What is an Object-Oriented Design Interview
Object-oriented design interviews have become increasingly popular in technical hiring. This shift reflects companies' growing emphasis on skills that align with real-world software development. OOD interviews are important at companies like Amazon, Bloomberg, and Uber, serving as a practical coding exercise. These interviews test your ability to build logical, maintainable systems and gauge how effectively you apply object-oriented design principles and patterns.
Unlike algorithm interviews, which demand a single, optimal solution, OOD interviews leave space for creativity. There's no one-size-fits-all answer, as various approaches can produce a coherent and working design. For example, some questions focus on real-world systems like a Parking Lot or a Vending Machine, while others take a more abstract turn, such as a Unix File Search or a Tic-Tac-Toe game. Each question presents unique challenges to test your skills, but they all build on the same basic knowledge and follow a similar interview structure.
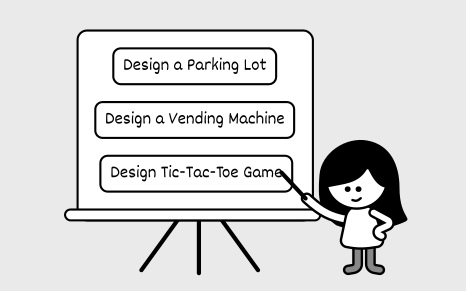
How Is This Book Structured?
This brief chapter explains what OOD interview questions are. Next, we'll present a framework for approaching OOD interviews and guide you through a complete end-to-end example. Then, we'll cover common design principles and patterns used in OOD. After that, the rest of the book focuses on typical case study questions, tackling them one at a time.
Why Do Companies Use OOD Interviews?
Companies use OOD interviews to hire skilled developers who can write effective code fast. They look for candidates who can define the problem scope, clarify requirements and edge cases, create practical, low-level designs, and build software that is easy to understand, maintain, and extend.
OOD interviews, along with System Design and Behavioral Questions, help companies decide a candidate's level. Doing well in OOD often sets intermediate and senior engineers apart by showing deeper design skills.
Here's what interviewers are typically looking for:
**Product Sense:** Translate real-world needs into software by applying domain knowledge and making user-centered decisions.
**Systems Thinking:** Break down a complex system into subsystems and components. Set clear roles for each and define how they work together.
**Decision Making:** See beyond immediate requirements, anticipate future needs, and design with flexibility in mind. Strike the right balance between making designs too complicated and keeping them too basic.
**Code Quality:** Write clean, logical, and maintainable code to implement your design. That's why modern OOD questions focus on coding, not just diagrams.
**OOP Knowledge:** Use object-oriented techniques, SOLID principles, and design patterns to make software simple and production-ready.
**Communication:** Ask clear questions, guide the discussion, explain your ideas well, and stand by your solutions confidently.
How Are OOD Interviews Different From Coding Interviews?
OOD interviews and algorithm coding interviews both involve writing code, but they focus on different goals. If you're familiar with algorithm interviews, you'll need to shift your mindset for OOD. Here's how they differ:
**Focus on quality, not speed**
Algorithm interviews want the fastest solution, focusing on time and space efficiency. OOD interviews value clean, maintainable software. You'll use objects and create well-structured code with abstractions and decomposing logic, even if it takes a bit longer, which is fine in OOD interviews. Write clear, organized code with intuitive names so your ideas stand out without extra explanation.
**Design with objects, not steps**
Algorithm interviews often push you to solve problems fast, so you might write all the logic in one function. OOD interviews, on the other hand, focus on objects, what they are, what they do, and how they interact with each other. Instead of listing steps, think about each object's role and relationships.
**Demonstrate OOP skills, not just answers**
In algorithm interviews, solving the problem matters most. OOD interviews also test your OOP skills. Use ideas like encapsulation, inheritance, and design patterns to build your solution. Demonstrating a strong grasp of SOLID principles shows that you can design clean, maintainable systems. They value your thinking process, not just the result.
**Plan extensible designs, not short-term fixes**
Algorithm interviews keep you racing against the clock, leaving little time to plan for future changes. In OOD interviews, the best solution often requires less coding, and the pacing gives you time to discuss how your solution scales to future requirements. A good design adapts to updates with minimal rework.
How To Prepare For An OOD Interview?
This book helps you prepare with the most up-to-date view on OOD interviews. It covers the basics, a complete walkthrough, and examples of common OOD problems with solutions. You can also try other resources to build your skills.
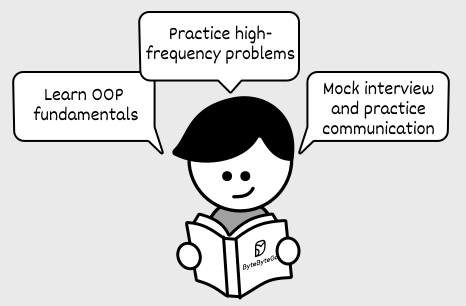
Here are a few ways to prepare:
**Learn OOP fundamentals:** Read articles, tutorials, or books on OOP. This strengthens your interview skills and your job performance later. Start with simple ideas like encapsulation, inheritance, polymorphism, and abstraction. Then, explore SOLID principles and design patterns using online guides.
**Practice high-frequency problems:** This book includes examples of typical OOD problems. Some, like Parking Lot, show how to model real-world systems. Others, like Elevator System, test complex logic, or like Linux File Search, check your abstraction skills. Code along with us, then try solving them on your own and review your work.
**Mock interview and practice communication:** OOD interviews value clear communication, not just coding. Our walkthrough chapter offers tips on key topics, but practice explaining your designs out loud. Work with a friend in a mock interview or record yourself when doing OOD and practice explaining your design decisions while you are coding.
Run The Code
All the code included in this book is executable. We encourage you to download the repository, run the code, and experiment with the solutions to deepen your understanding of OOD principles. Instructions for setting up and running the code are provided in the repository's README file.
GitHub repo link: [github.com/ByteByteGoHq/ood-interview](https://github.com/ByteByteGoHq/ood-interview)
A Framework for the OOD Interview
Having a clear framework for the OOD interview is more important than many realize. Without structure, the interview can feel disorganized and difficult for you and the interviewer to follow.
This chapter introduces a four-step framework to help you navigate open-ended OOD discussions with confidence. It guides you in transforming abstract requirements into concrete architecture or code, while showcasing your ability to make thoughtful trade-offs under real-world constraints.
Keep in mind that OOD interviews are highly versatile, and this framework is not foolproof. The structure and expectations can vary depending on the interviewer's preferences, so you'll need to be flexible and adapt accordingly.
Before we dive into the framework itself, let's first explore the common types of OOD interviews you might encounter.
Different Types of OOD Interviews
OOD interviews typically emphasize one of three areas, each with a preferred deliverable format. Early in the interview, gauge the interviewer's expectations by asking, "Are we focusing on high-level class diagram, code structure, or a full implementation?" This question helps you tailor your approach and ensures you deliver what's needed within the time constraints (usually 45–60 minutes). The three primary deliverable formats are:
**UML Diagrams:** UML diagrams were once the standard and are still commonly used to visually represent system designs. A UML class diagram helps illustrate the relationships between classes, including their attributes, methods, and interactions.
**Code Skeleton:** This approach has become increasingly popular in modern interviews, as it more closely resembles real-world software development. It allows interviewers to explore implementation details as needed. In this style, you define the structure of your design directly in code using appropriate class and method declarations, while leaving method bodies unimplemented.
**Working Code:** With the renewed emphasis on OOD interviews, interviewers sometimes request fully functional, bug-free implementations. They may also ask for test cases. This approach offers the highest fidelity to real industry development.
The expected deliverable often depends on the interviewer's preference and the time constraints. If you're asked to produce working code, don't be intimidated. Interviewers typically simplify the problem to ensure it's manageable within the allotted time.
> **Tip:** In an OOD interview, the journey is just as important as the final deliverable. Coding in silence doesn't make a strong impression. Instead, share thoughtful insights throughout the process to demonstrate your design thinking and communication skills.
A Guiding Framework for the OOD Interview
Here are the four steps we recommend:
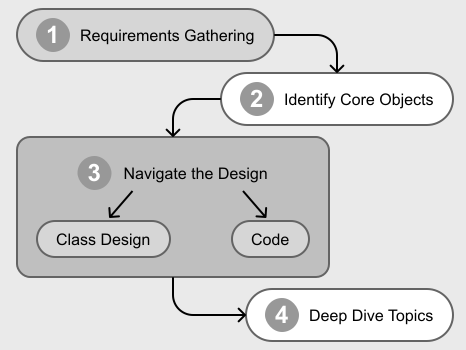
Step 1: Requirements Gathering (5-10 minutes)
Begin by thoroughly analyzing the problem statement and identifying key functional and non-functional requirements. Ask targeted questions to resolve ambiguities, establish realistic constraints, and confirm any assumptions. This ensures that you and the interviewer share a clear understanding of the scope and priorities.
Step 2: Identify Core Objects (3-7 minutes)
With requirements clarified, select a primary use case and walk through it step-by-step to identify core objects and their interactions. A practical approach is to map nouns in the requirements to objects (e.g., "parking lot," "vehicle," "ticket") and verbs to methods (e.g., "assign spot," "calculate fee"). This creates a naive but relevant initial design, serving as a foundation for refinement.
> **Note:** While use case diagrams can help visualize workflows and clarify interactions between objects, they are optional for most OOD interviews.
Step 3: Design Class Diagram and Code (20-25 minutes)
Now that the core objects and their roles are clear, it's time to develop the class diagram and demonstrate how it translates into code.
Start by designing the classes using either a top-down or bottom-up approach:
- **Top-down Approach:** First, identify high-level components or parent classes, then refine their attributes and methods. - **Bottom-up Approach:** Define concrete classes first (attributes, methods) and build relationships from there.
Define how the objects will interact and assign responsibilities in a way that follows key design principles such as low coupling and high cohesion. This is the stage where you solidify your object model and flesh out the details of its attributes and methods.
Once the design is in place, implement the core classes to demonstrate how the structure translates into code. In some cases, a complete implementation isn't necessary. Focus on the essential parts unless the interviewer requests otherwise.
> **Note:** The primary focus of an OOD interview is design and code quality. But you should not ignore time and space complexity and efficiency. Strong class and relationship modeling includes selecting appropriate data structures for performance. For example, choose between List and Set carefully based on access pattern and performance. Likewise, HashSet and TreeSet are also not interchangeable. Get familiar with more complex collections or nesting. During the actual interview, mention your thoughts and make the right choice, but do not go into exhaustive analysis or overly optimize by inventing your own.
Step 4: Deep Dive Topics (10-15 minutes, optional)
After validating your design with key use cases, refine it to handle edge cases and resolve any inconsistencies. This is typically the point in the interview where the deep dive begins. Interviewers may ask follow-up questions to assess your understanding, challenge your design decisions, or explore more advanced aspects of your solution.
A Step-by-Step Example
To better understand how an OOD interview unfolds, let's walk through a realistic example from start to finish. This section shows how an interview might naturally unfold, from a vague problem description to a structured and thoughtful solution.
Step 1: Requirements Gathering
Anne, a software engineer, is interviewing for a backend role. The interviewer, Beth, asks her to design a parking lot system, giving her 45 minutes to present the design.
Anne starts by digesting the problem, asking a few clarification questions to create a shared understanding of the scope. She quickly learns that the parking lot needs to support different vehicle types, reserved spaces, and accurate fee calculation.
**Sample Dialogue:**
**Anne:** What types of vehicles should the parking lot support? Are we considering cars and motorcycles?
**Beth:** Yes, and also buses. Each bus takes up three spots.
**Anne:** Should we design different types of parking spaces for the different types of vehicles?
**Beth:** Yes, you can decide how to design that.
Anne continues to ask thoughtful questions to clearly define the scope and constraints. She avoids common mistakes such as:
- Asking overly obvious or excessively detailed questions. - Repeating previously answered questions, which could signal inattentiveness. - Introducing irrelevant or overly complex topics that distract from the main problem.
**Tips for Effective Requirements Gathering**
The first few minutes of an OOD interview are critical. Here are a few tips for effective requirements gathering.
**Focus on the Most Essential Requirements**
Start by focusing on the most essential requirements and confirming that both you and the interviewer are aligned on the problem's scope. Once Anne has a clear understanding of the task, she restates and lists down the core functionality to validate her interpretation:
**Anne:** The system will support parking and unparking vehicles, track space availability, and calculate fees based on vehicle type and parking duration. It should also support three types of vehicles.
**Use Examples to Clarify Scope**
Rather than relying solely on stating the requirements, Anne uses concrete examples to ground the discussion and expose edge cases. She presents one simple scenario and one more complex one to fully explore the system's expected behavior.
**Simple Case:**
**Anne:** Let's consider a basic scenario: a car enters the lot, finds an available space, parks, and leaves after two hours. The system should allocate a space, track the duration, and calculate the fee.
**Complex Case:**
**Anne:** Now, imagine a bus with a reservation entering the lot. Some spaces are too small or reserved for other types. The system needs to find the most suitable available space while optimizing future availability.
By walking through these contrasting examples, Anne clarifies ambiguities and ensures both the interviewer and she are on the same page.
With a solid grasp of the core problem and its constraints, she's now ready to move on to identifying the building blocks (classes, methods, and attributes), that will form the backbone of her design.
Step 2: Identify Core Objects
To kick off the design, Anne walks through a key use case: parking a car. As she steps through the process, she identifies relevant objects by paying attention to nouns and verbs in the requirements. This leads her to a simple but effective initial design.
**Anne:** When a car enters, the system will find an available space of the appropriate size, assign it, generate a ticket, and mark the space as occupied.
By focusing on two or three representative use cases, Anne allows the requirements to naturally guide the design. She avoids trying to model everything up front, prioritizing clarity and relevance over completeness.
As she works through the use case, she keeps the design focused and minimal. For example:
**Beth:** How would you handle edge cases like a full lot?
**Anne:** Good question. If no spaces are available, the system should return an appropriate message. I'll refine this logic once I have the complete design.
When more complex topics arise, Anne acknowledges them without getting sidetracked:
**Anne:** Let's finish the core use case first. If time permits, I'll extend the design to support configurable pricing, perhaps using a strategy pattern.
Anne's goal during this phase is to identify the core objects and define their responsibilities clearly.

Step 3: Class Design and Code
Once the core objects are identified, Anne begins defining classes, sketching relationships, and implementing a basic structure in code.
**Defining the Classes**
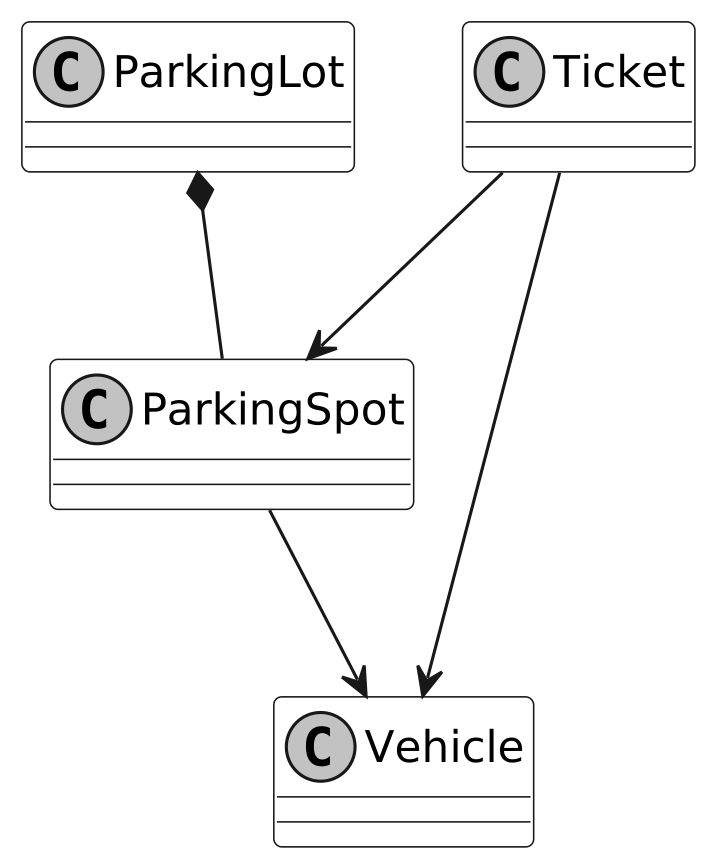
She starts with foundational components that form the system's backbone. In the parking lot example, she focuses on: ParkingLot, ParkingSpot, Vehicle, and Ticket.
**Anne:** The key entities are ParkingLot, ParkingSpot, Vehicle, and Ticket. Each space has attributes like size and availability, and each vehicle has a type. A Ticket will track the entry time and calculate the fee.
She then sketches a UML diagram to show relationships:
- ParkingLot contains multiple ParkingSpots. - Each ParkingSpot can hold one Vehicle. - A Ticket links a Vehicle to a ParkingSpot and tracks the time.
Anne ensures that each class is well-defined and adheres to OOP principles like encapsulation, single responsibility, and inheritance:
**Anne:** The ParkingLot manages the overall structure, including tracking spaces and handling vehicle flow. Each ParkingSpot handles its own availability status and the vehicle parked in it.
**Anne:** We can define a base Vehicle class with subclasses like Car, Motorcycle, and Bus since their parking requirements and fee calculations differ.
She avoids overcomplicating the model and focuses only on objects that carry meaningful behavior.
**Code Implementation**
With the design in place, Anne writes class definitions and adds relevant attributes and method signatures. For example:
- ParkingLot: manages a collection of spots and handles assignments. - ParkingSpot: tracks size, availability, and assigned vehicle. - Ticket: stores entry time and calculates the fee.
As she codes, Anne explains her rationale to the interviewer, ensuring her thought process remains transparent. She also validates the design as she progresses:
**Anne:** This setup covers the main use cases we discussed. I'll check if it also holds up under edge conditions.
By staying focused and grounding her choices in solid OOD principles, Anne builds a practical and extensible design.
Step 4: Deep Dive Topics
At this point, Anne's design is nearly complete, whether in the form of a detailed UML diagram or a coherent code skeleton. The final step is refinement, taking a step back to examine the design from a high level, address edge cases, and consider improvements.
**Addressing Gaps**
**Anne:** For edge cases, I'd add logic to handle full lots and group spaces for buses. I'd also include validation for invalid tickets during checkout.
She updates her diagram or code as needed to support grouped space handling or special logic for larger vehicles.
**Summarizing the Design**
**Anne:** This design supports key use cases, scales to different vehicle types, and includes logic for core edge cases. If time allows, I'd explore enhancements like dynamic pricing based on time of day.
This recap reinforces her understanding and gives the interviewer a complete picture of her thinking.
**Making Thoughtful Trade-offs**
Refinements often involve trade-offs in areas like inheritance vs. composition, data modeling, or design patterns. The goal isn't just to choose the "right" answer, but to clearly explain why the decision makes sense.
She also knows when to say "this is good enough" and move on. If her design already addresses the primary use cases, she avoids getting bogged down in hypotheticals or over-optimization.
What If the Interview Doesn't Go as Planned?
No matter how well you prepare, real interviews rarely follow a perfectly linear path. You might face curveballs such as shifting requirements, unexpected deep dives, or even a disengaged interviewer. The key is to stay adaptable, communicate clearly, and remain focused on delivering a thoughtful design.
This section explores common challenges during OOD interviews and how to handle them with confidence and grace.
**1. Shifting Requirements and Expanding Scope**
In some interviews, the scope of the problem may expand as you go. You might be halfway through a design when the interviewer introduces new requirements or constraints. Don't panic. This is often intentional.
✅ Acknowledge the new requirement and briefly assess its impact. Explain how your current design can accommodate the change, or what trade-offs might be required. Be flexible but strategic — adapt your solution without overhauling it unnecessarily. If the interviewer keeps expanding on a specific area, it's likely that flexibility and scalability are part of what they're testing.
**2. Being Pulled into a Deep Dive Too Early**
Sometimes, the interviewer may want to dive into details before you've mapped out the broader structure. If you go too deep too soon, you risk losing sight of the big picture and running out of time.
✅ Set expectations early: "I'll start with a high-level overview, then we can dive deeper where needed." Periodically check in on time and structure. If you're stuck in one area, say: "Here's the direction I'd take for now. Completing the rest of the system will give me the context to refine this."
**3. Struggling to Communicate Your Thought Process**
Clear communication is as important as solid design. If your thoughts feel jumbled or hard to explain, it can weaken the impact of your solution.
✅ Begin with a high-level summary of your system before diving into class-level details. Use visuals. A class diagram or code skeleton can anchor the conversation. Focus on *why* you made design decisions rather than just describing *what* they are.
**4. Dealing with a Disengaged Interviewer**
Not every interviewer will give active feedback. If they appear disinterested, confused, or silent, don't let it throw you off.
✅ Politely ask for feedback: "Would it be helpful if I clarified anything or focused on a specific part of the design?" If that doesn't work, let your work speak for itself. Focus on delivering clean diagrams or runnable code.
**5. When Your Design Decisions Are Challenged**
It's common for interviewers to challenge your choices. This isn't a bad sign — it's a chance to demonstrate your reasoning and adaptability.
✅ Stay calm and explain your thought process. Use concrete examples or real-world analogies to support your point. If relevant, reference trade-offs using terms like time complexity, extensibility, or maintainability. Offer alternatives: "I considered both inheritance and composition. I chose inheritance here because…"
**6. Encountering Unfamiliar Terminology**
If the interviewer uses a term or concept you're not familiar with, it's better to clarify than to guess.
✅ Ask politely: "Could you clarify what you mean by that term?" Or show partial understanding and align: "My understanding of this concept is X. Please let me know how it differs in your context."
**7. Struggling with the Right Level of Abstraction**
Not sure how much detail to go into? This is a common tension in OOD interviews. Going too broad can make your solution feel vague; going too deep too early wastes time.
✅ Start with a general structure and layer in details as needed. Ask the interviewer what level of depth they'd like: "Would you prefer a high-level architecture here or a more detailed class breakdown?"
**8. Addressing Concurrency in OOD Interviews**
Concurrency is an advanced topic that interviewers may bring up, often by asking how your system handles multiple users or processes accessing the same resources at the same time.
A classic example is a ticket booking system, where the key concern is preventing double-bookings when multiple users attempt to select the same seat. This scenario is a great opportunity to demonstrate techniques like locking, optimistic locking, or using language-specific synchronization mechanisms and concurrent data structures.
Keep your explanation concise and your implementation simple. In most interviews, a high-level description of your concurrency strategy, along with a brief code snippet to illustrate how you prevent race conditions, is more than enough.
In some cases, your system itself may need to run concurrently. If you're coding in Java, understanding classes like Thread, Runnable, Callable, and ExecutorService is valuable, as it helps you avoid reinventing concurrency from low-level primitives.
Final Thoughts
The object-oriented design interview is about more than just technical skills. It's about thinking clearly under pressure, communicating effectively, and applying OOP principles to build maintainable, scalable solutions.
By breaking the process into manageable steps and learning how to navigate unexpected challenges, you'll be well-prepared to handle even the most unpredictable interviews. With practice and the right mindset, you can turn curveballs into opportunities and leave a lasting impression.
OOP Fundamentals
This chapter introduces OOP, a popular programming paradigm that organizes code and data into objects. These objects interact to perform tasks and model real-world entities, providing a structured approach to building flexible, maintainable software.
Why Learn OOP?
Understanding OOP fundamentals, including core principles such as encapsulation and advanced design guidelines like SOLID, is key to excelling in OOD interviews. OOP knowledge equips you with a clear mental model and foundational skills. It enables you to make design decisions aligned with widely accepted principles, articulate your reasoning to interviewers, and leverage established patterns to solve common problems efficiently.
OOP interviews often mirror real-world business applications and technical components. Understanding OOP concepts and SOLID guidelines not only prepares you for interviews but also makes you a stronger developer once hired. While functional programming and other paradigms are gaining traction, OOP remains the backbone of general software development. To deepen your expertise, supplement this chapter's essentials with additional resources on OOP principles.
Cornerstones of Object-Oriented Programming
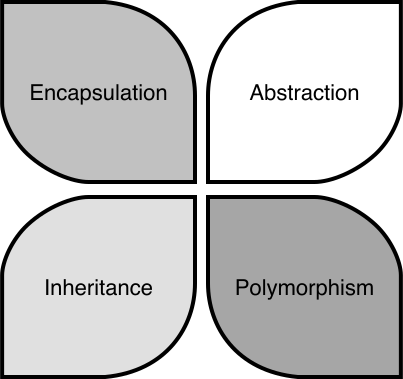
Object-oriented programming is built on four fundamental principles: Encapsulation, Abstraction, Inheritance, and Polymorphism.
These principles guide how we organize code and design software. The other techniques and design patterns stem from these principles, and they are important for evaluating solutions. Let's dive into each principle with practical examples.
Encapsulation
Encapsulation is the concept of bundling data as attributes and logic as methods, and then putting related attributes and methods within a single unit called an object. The object's internal state is hidden from the outside world, and access to the data or state is controlled through well-defined interfaces available as public methods. A description of a type of object is a class, while a specific object is called an instance.
To see how encapsulation works in practice, let's explore the Person class, which bundles data like name and age with methods to manage them while controlling access to that data.
### How to work toward encapsulation?
To achieve encapsulation, follow these steps:
1. **Define your classes:** Identify objects in your requirements, think about the data they hold, and the functionality they support. For the Person class, the data includes name and age, and the functionality includes accessing and modifying these attributes. 2. **Enforce encapsulation:** Declare the class's data members (attributes) as private to restrict direct access from outside the class. Provide public methods (getters and setters) to access and modify those attributes. 3. **Use access modifiers:** The private access modifier restricts direct access to the attributes outside the class. Only methods in the class have access to these private members. Public methods are the interface through which external code interacts with the object's attributes, hiding internal implementation details and maintaining the object's integrity.
### Implementing encapsulation in Java
Let's demonstrate encapsulation in Java with a simple class representing a "Person":
```java public class Person { // Private data members (attributes) private String name; private int age;
// Public constructor public Person(String name, int age) { this.name = name; this.age = age; }
// Public getter methods (accessors) public String getName() { return name; }
public int getAge() { return age; }
// Public setter methods (mutators) public void setName(String name) { this.name = name; }
public void setAge(int age) { if (age >= 0) { this.age = age; } } } ```
- The Person class has private attributes `name` and `age`, which cannot be accessed directly from outside the class. - Public getter methods, `getName()` and `getAge()`, allow external code to read (access) the private attributes. - The setter methods, `setName()` and `setAge()`, are also public, allowing external code to modify (mutate) the private attributes.
This implementation ensures that the Person object's internal state is protected, and external code interacts with it only through controlled methods.
### When to use encapsulation?
Encapsulation is particularly useful in the following scenarios:
- **Protecting data integrity:** When you need to ensure an object's data remains consistent and valid. For example, in the Person class, encapsulation hides name and age as private attributes, allowing the setAge() method to enforce rules like non-negative values, preventing invalid modifications, and ensuring the object's state is reliable. - **Controlling access and improving security:** Encapsulation restricts direct access to sensitive data. While attributes like name and age in a Person class are not highly sensitive, encapsulation becomes essential for classes handling critical information such as passwords. Although encapsulation alone does not guarantee full security, it acts as a foundational layer by limiting unwanted access. - **Modularity and reusability:** When designing classes that can be reused across different applications. The Person class's clear interface makes it modular and reusable in contexts like school management or social networking systems.
### Common pitfalls
While encapsulation is powerful, avoid these common mistakes:
- **Over-encapsulation:** Creating excessive getter and setter methods for every attribute can make code verbose and harder to maintain. - **Under-encapsulation:** Failing to hide internal details can lead to tight coupling and reduced modularity. For instance, if name and age in the Person class were public, other parts of the code could modify them directly, leading to potential inconsistencies.
Abstraction
Abstraction can simplify complex systems by hiding unnecessary details. It separates the "what" an object does from the "how" it does it, enabling users to interact with objects through simplified interfaces. For example, the volume button on a television remote control provides a simple way to adjust sound without exposing the TV's internal circuitry. In programming, abstraction is achieved using mechanisms like abstract classes and interfaces.
To see how abstraction works in practice, let's explore a Shape class and a Drawable interface, which define simplified behaviors for shapes like circles.
### How to work toward abstraction?
To achieve abstraction, use abstract classes and interfaces: Define abstract classes or interfaces with abstract methods, which are declared without implementation and must be implemented by subclasses. These allow users to call methods without needing to know their internal details.
### Implementing Abstraction in Java
Let's demonstrate abstraction in Java with an abstract class representing a Shape and an interface representing a Drawable object:
```java // Abstract class abstract class Shape { protected String color;
public Shape(String color) { this.color = color; }
// Abstract method public abstract double area();
// Concrete method public void displayColor() { System.out.println("This shape is " + color + "."); } }
// Interface interface Drawable { void draw(); }
// Concrete class implementing Shape and Drawable class Circle extends Shape implements Drawable { private double radius;
public Circle(String color, double radius) { super(color); this.radius = radius; }
// Implementing abstract method from Shape @Override public double area() { return Math.PI * radius * radius; }
// Implementing method from Drawable interface @Override public void draw() { System.out.println("Drawing a circle."); } } ```
The implementation demonstrates abstraction through:
- The Shape abstract class defines an abstract `area()` method that subclasses must implement and a concrete `displayColor()` method, which provides a default behavior. - The Drawable interface, which declares a `draw()` method that implementing classes must define. - The Circle class extends Shape and implements Drawable, providing specific implementations for `area()` (calculating the circle's area) and `draw()` (describing the drawing action).
This structure allows users to interact with shapes using high-level methods like `area()` and `draw()` without needing to know the underlying drawing logic.
### When to use abstraction?
Abstraction is particularly useful in the following scenarios:
- **Simplifying complex systems:** Abstraction helps provide a clean and consistent interface for complex functionality. For example, in the Shape class, abstraction allows users to call `area()` without understanding the mathematical calculations, making the system easier to use. - **Promoting code flexibility:** When you anticipate that subclasses will provide specific implementations of generalized behavior, abstraction becomes essential. The Shape class's abstract `area()` method ensures that shapes like circles or rectangles implement their area calculations, allowing flexibility in design. - **Supporting extensibility:** Abstraction makes it easier to extend systems without modifying existing code. For instance, adding a new shape like Triangle to the Shape hierarchy only requires implementing `area()`, without changing existing code that uses shapes.
### Abstraction vs. Encapsulation
Abstraction and encapsulation are distinct but complementary OOP principles, often confused because both involve hiding details. Here's how they differ:
| Characteristics | Abstraction | Encapsulation | |---|---|---| | Focus | Hiding complexity by exposing only what an object does through simplified interfaces, without revealing how it does it. | Bundling data and methods into a single unit (a class) and protecting data by restricting direct access. | | Purpose | Simplifies user interaction and promotes flexibility by defining high-level behaviors. | Ensures data integrity and maintainability by controlling access to an object's data. | | Implementation | Uses abstract classes and interfaces, e.g., the Shape abstract class with `area()` or the Drawable interface with `draw()`. | Uses access modifiers (e.g., private, public) and methods, e.g., private radius in Circle with public getters and setters. |
By understanding these differences, you can apply abstraction to simplify interfaces and encapsulation to protect data, creating robust and user-friendly systems.
Inheritance
Inheritance allows a class (subclass or derived class) to inherit properties and behaviors from another class (superclass or base class). It promotes code reuse and creates a hierarchical relationship between classes. Think of inheritance like a family tree, where children inherit traits from their parents, and grandchildren inherit traits from both their parents and grandparents. The subclass can extend and specialize the functionality of its superclass, reducing code duplication.
### Common patterns of class hierarchy
Building on the concept of inheritance, we now explore common patterns for structuring class hierarchies in Java.
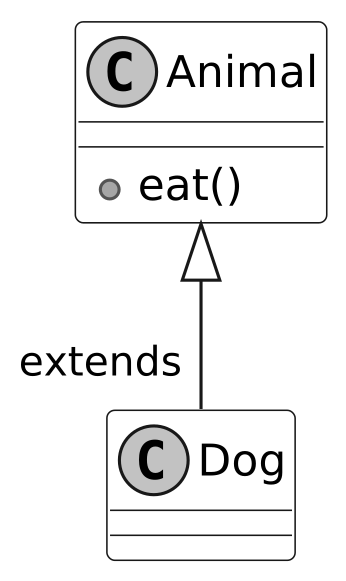
**Single inheritance** — A subclass extends only one superclass. This is the standard type of inheritance supported in Java.
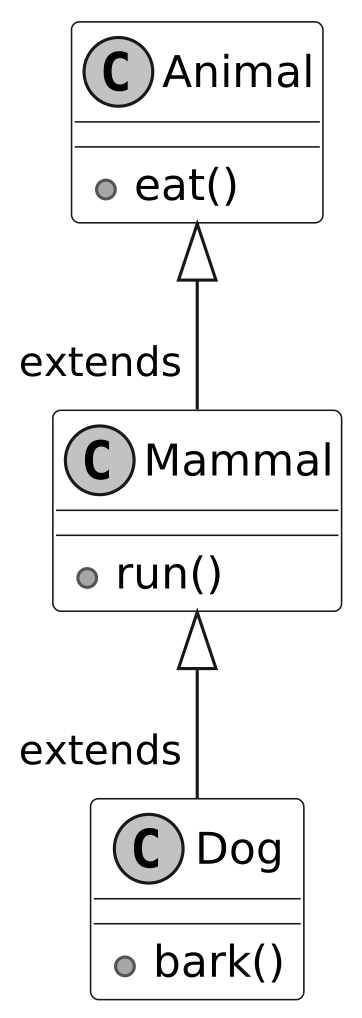
**Multilevel Inheritance** — A subclass that inherits from another subclass, creating a chain of inheritance. Consider a scenario with three classes: Animal, Mammal, and Dog, where Animal is the superclass of Mammal, and Mammal is the superclass of Dog.
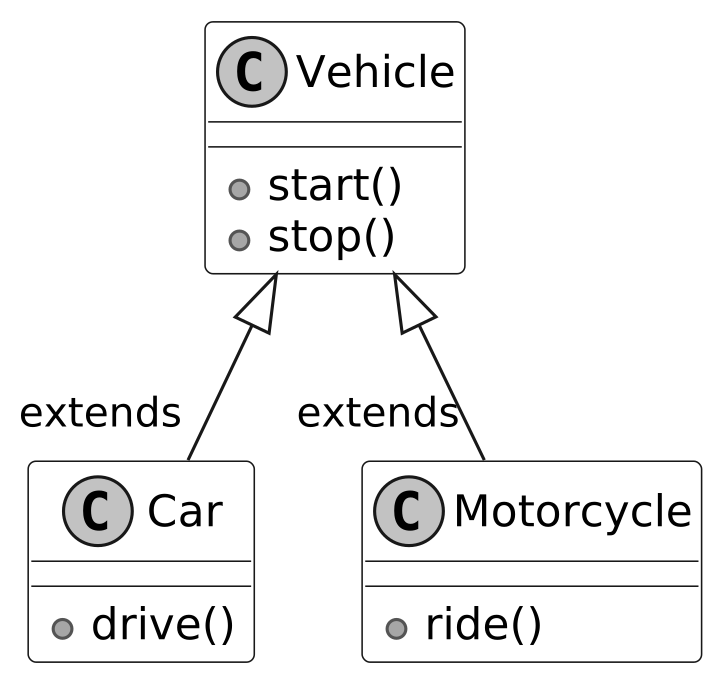
**Hierarchical Inheritance** — Multiple subclasses inherit from the same superclass, forming a hierarchical structure. For example, Car and Motorcycle both inherit from the Vehicle class.
### When to use inheritance?
Inheritance is particularly useful in the following scenarios:
- Whenever we encounter an 'is-a' relationship between objects. - When multiple classes share common attributes or methods, a superclass can define them once, allowing all subclasses to inherit them and avoid duplication. - When classes form a natural hierarchy, such as Animal being a parent to Dog and Cat.
### Drawbacks of inheritance
While Inheritance promotes code reuse, its overuse can complicate designs:
- **Tight coupling:** Subclasses depend heavily on their superclass. Changes to the superclass can break subclasses, making the code harder to maintain. - **Inappropriate behavior inheritance:** Inheritance can force subclasses to inherit behaviors that don't apply. For example, adding a `fly()` method to the Animal superclass assumes all subclasses (e.g., Penguin) can fly. - **Limited flexibility:** Inheritance locks in relationships at design time. If you later need a RobotDog that barks but doesn't eat, it can't inherit from Animal without inheriting irrelevant methods.
To address these issues, consider alternatives like composition (combining objects) or interfaces, which offer flexibility and loose coupling.
### Inheritance vs. Composition
Inheritance creates an "is-a" relationship. Composition creates a "has-a" relationship, where a class contains other objects to provide its behavior.
Consider the Dog and RobotDog scenario. Using inheritance, RobotDog extends Animal to inherit `bark()`, but it also gets `eat()`, which doesn't apply. Using composition, you define a BarkBehavior interface with a `bark()` method. Dog and RobotDog each have a BarkBehavior object, implemented differently (e.g., DogBark for "Woof!" and RobotBark for "Beep!"). This lets RobotDog bark without inheriting `eat()`.
```java interface BarkBehavior { void bark(); }
class DogBark implements BarkBehavior { public void bark() { System.out.println("Woof!"); } }
class RobotBark implements BarkBehavior { public void bark() { System.out.println("Beep!"); } }
class Dog { private BarkBehavior barkBehavior;
public Dog(BarkBehavior barkBehavior) { this.barkBehavior = barkBehavior; }
public void bark() { barkBehavior.bark(); } }
class RobotDog { private BarkBehavior barkBehavior;
public RobotDog(BarkBehavior barkBehavior) { this.barkBehavior = barkBehavior; }
public void bark() { barkBehavior.bark(); } }
public class Main { public static void main(String[] args) { Dog dog = new Dog(new DogBark()); RobotDog robotDog = new RobotDog(new RobotBark()); dog.bark(); // Output: Woof! robotDog.bark(); // Output: Beep! } } ```
> **Design Choice:** Use inheritance for clear "is-a" relationships with stable, shared behaviors. Choose composition for "has-a" relationships or when you need flexible, swappable behaviors, as it's easier to modify and maintain. In OOD interviews, favor composition when flexibility or loose coupling is key, as it's preferred in modern design.
Polymorphism
Polymorphism is the concept of implementing objects that can take on multiple forms or behave differently depending on their context, all within a common interface. It provides the flexibility to add new behaviors without modifying existing code.
Consider a media player as a real-world example. Different types of media, such as audio, video, and streaming content, would be played on the same rendering widget and controlled by the same "play" button. But they require different internal processing and rendering logic. The user only interacts with a uniform interface, while polymorphic behavior manages the varying objects.
### Types of Polymorphism
Polymorphism is typically categorized into two main types: compile-time (static) and runtime (dynamic) polymorphism.
**Compile-Time polymorphism via method overloading** — Method overloading allows a class to have multiple methods with the same name but different parameters. The compiler determines the appropriate method to call based on the number and type of arguments passed during compile time.
```java class MathOperations { public int add(int a, int b) { return a + b; }
public double add(double a, double b) { return a + b; }
public String add(String str1, String str2) { return str1 + str2; } }
public class Main { public static void main(String[] args) { MathOperations math = new MathOperations();
int sum1 = math.add(5, 10); double sum2 = math.add(3.5, 7.2); String result = math.add("Hello, ", "World!");
System.out.println("Sum of integers: " + sum1); System.out.println("Sum of doubles: " + sum2); System.out.println("Concatenated string: " + result); } } ```
The MathOperations class defines multiple `add` methods with different parameter types or counts. The compiler selects the appropriate `add` method based on the arguments passed, enhancing code readability.
**Runtime polymorphism via method overriding** — Method overriding occurs when a subclass provides a specific implementation for a method already defined in its superclass. The method to be executed is determined at runtime based on the actual type of the object. This is often referred to as dynamic dispatch.
```java class Animal { public void sound() { System.out.println("Animal makes a sound."); } }
class Dog extends Animal { @Override public void sound() { System.out.println("Dog barks: Woof!"); } }
class Cat extends Animal { @Override public void sound() { System.out.println("Cat meows: Meow!"); } }
public class Main { public static void main(String[] args) { Animal animal1 = new Dog(); Animal animal2 = new Cat();
animal1.sound(); // Dog's sound() method is called animal2.sound(); // Cat's sound() method is called } } ```
- The Animal class defines a generic `sound` method. - The Dog and Cat subclasses override `sound` to provide specific implementations. - At runtime, the JVM determines the actual type of the object (Dog or Cat) and calls the appropriate `sound` method, even though the reference type is Animal.
### When to use polymorphism?
Polymorphism is particularly valuable in the following scenarios:
- **Shared Interface:** When multiple classes need to perform the same action in different ways, such as a `play` method for various media types. Interfaces or superclasses ensure a consistent contract across implementations. - **Extensibility:** When designing systems that need to accommodate new classes without modifying existing code. Adding a new media type only requires implementing the existing play interface. - **Customization:** When subclasses need to tailor the behavior of inherited methods. For instance, a Dog barking differently from a Cat uses method overriding to provide specific implementations while adhering to the Animal interface.
SOLID Principle of Good Design
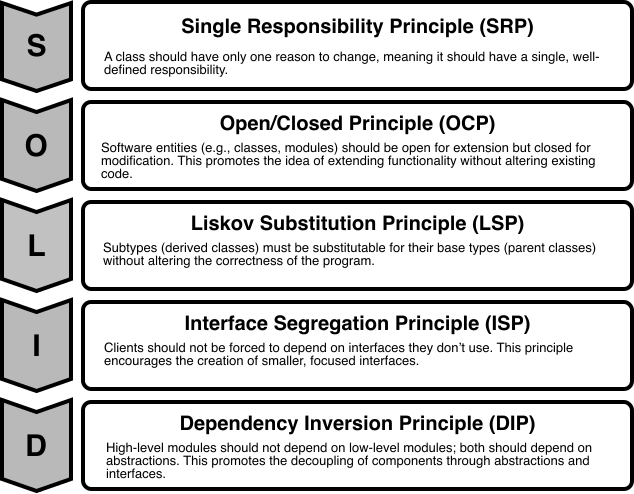
Aside from the core OOP principles (encapsulation, abstraction, inheritance, and polymorphism), you should also be familiar with the SOLID principles. SOLID offers guidelines to create software that is easy to understand, modify, and extend. These principles are particularly valuable in OOD interviews, where articulating design decisions and their rationale can help you stand out.
The SOLID acronym stands for:
- **S** — Single Responsibility Principle (SRP) - **O** — Open/Closed Principle (OCP) - **L** — Liskov Substitution Principle (LSP) - **I** — Interface Segregation Principle (ISP) - **D** — Dependency Inversion Principle (DIP)
Single Responsibility Principle (SRP)
The Single Responsibility Principle (SRP) states that a class should have only one reason to change — it should have a single, well-defined responsibility or task within a software system.
**Violation of SRP**
Here's an example of a class that violates SRP by taking on multiple responsibilities:
```java class Employee { private String name; private double salary;
public Employee(String name, double salary) { this.name = name; this.salary = salary; }
public double calculateSalary() { return salary * 12; // Annual salary }
public void generatePayrollReport() { System.out.println("Payroll Report for " + name + ": $" + salary * 12); } } ```
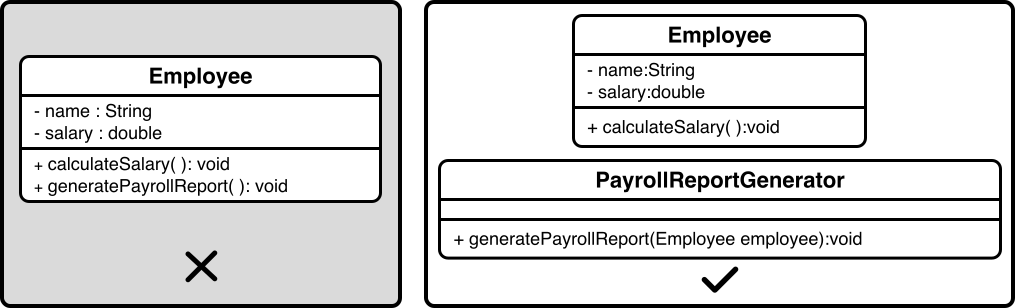
The Employee class violates SRP because it has two responsibilities: calculating an employee's salary and generating a payroll report. This means the class could change for two unrelated reasons.
**Fixing the violation**
To address the violation, refactor the code to separate concerns:
- The `Employee` class manages employee data (name, salary) and calculates the annual salary. - The `PayrollReportGenerator` class takes an employee's data and produces payroll reports.
This separation ensures changes to salary calculations won't affect reporting, and updates to report formats won't impact employee data.
**Best practices**
- Aim to define a clear role for each class, focusing on one specific task. - If a class handles multiple tasks, refactor it into smaller, focused classes with single responsibilities. - Design classes so that changes to one task don't impact others.
Open/Closed Principle (OCP)
The Open/Closed Principle (OCP) states that software entities should be open for extension but closed for modification. This means you can add new functionality without altering existing code.
**Violation of OCP**
Here's an example of a class that violates OCP by requiring changes to support new shapes:
```java class Rectangle { private double width; private double height;
public Rectangle(double width, double height) { this.width = width; this.height = height; }
public double calculateArea() { return width * height; } }
class AreaCalculator { public double calculateArea(Rectangle rectangle) { return rectangle.calculateArea(); } } ```
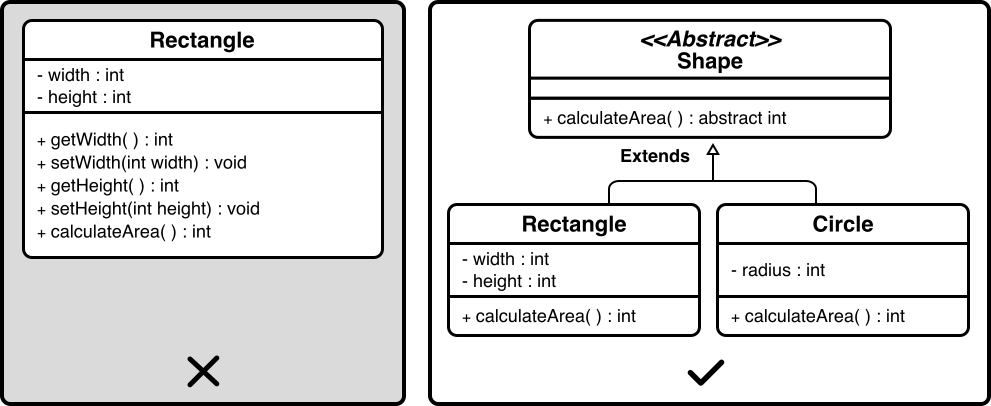
The `AreaCalculator` class works only with Rectangle objects. Adding support for new shapes, like circles or triangles, would require modifying its code.
**Fixing the violation**
Refactor by introducing an abstract Shape class that defines a common behavior:
- Specific shapes, like Rectangle and Circle, inherit from Shape and provide their area calculations. - This design allows new shapes (e.g., Triangle) to be added by creating new classes that inherit from Shape, without modifying `AreaCalculator` or existing shape classes.
**Best practices**
- Introduce abstract classes or interfaces to create flexible blueprints that classes can extend with new functionality. - Allow subclasses to override methods to provide specific behaviors. - Use polymorphism to treat objects of different classes uniformly through a common interface.
Liskov Substitution Principle (LSP)
The Liskov Substitution Principle (LSP) states that objects of a derived class should be able to replace objects of the base class without affecting the correctness of the program.
**Violation of LSP**
Here's an example of a design that violates LSP by assuming all birds can fly:
```java class Bird { public void fly() { System.out.println("Flying in the sky."); } }
class Ostrich extends Bird { @Override public void fly() { throw new UnsupportedOperationException("Ostriches cannot fly."); } }
// Program calls bird.fly() to test bird behavior ```
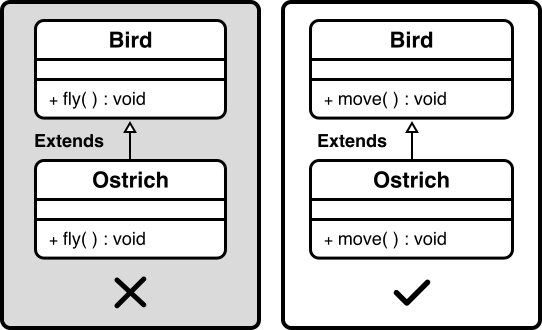
The Ostrich class inherits from Bird but throws an exception for `fly()`, as ostriches cannot fly. This breaks the expectation that any Bird can fly, violating the substitutability principle.
**Fixing the violation**
Refactor the hierarchy to ensure substitutability:
- Redefine the Bird class with a more general behavior, such as `move()`, that all birds can perform. - The Bird class defines a `move` method, which each bird implements according to its abilities — Sparrow flies, Ostrich runs on land.
**Best practices**
- Ensure derived classes maintain the behavioral compatibility of their base classes. - When overriding methods, respect the base class's method contracts (preconditions, postconditions, invariants). - Use polymorphism to allow derived class objects to replace base class objects.
Interface Segregation Principle (ISP)
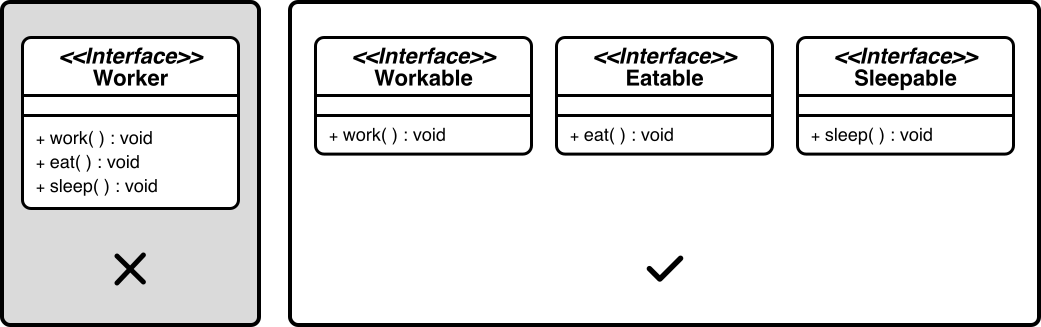
The Interface Segregation Principle (ISP) emphasizes that clients should not be forced to depend on interfaces they don't use. An interface should have a specific and focused set of methods relevant to the implementing classes.
**Violation of ISP**
Here's an example that violates ISP by including methods that not all implementing classes need:
```java interface Worker { void work(); void eat(); void sleep(); }
class Robot implements Worker { public void work() { System.out.println("Performing tasks like welding."); }
public void eat() { throw new UnsupportedOperationException("Robots don't eat."); }
public void sleep() { throw new UnsupportedOperationException("Robots don't sleep."); } }
class Human implements Worker { public void work() { System.out.println("Performing tasks like coding."); }
public void eat() { System.out.println("Eating a meal."); }
public void sleep() { System.out.println("Sleeping for rest."); } } ```
The Worker interface forces Robot to implement `eat` and `sleep`, which are irrelevant, leading to unsupported operations.
**Fixing the violation**
Refactor by splitting into focused interfaces:
- `Workable` — includes only the `work` method, applicable to all workers. - `Eatable` — includes `eat`, relevant to humans but not robots. - `Sleepable` — includes `sleep`, specific to humans.
This design ensures classes implement only the methods they need.
**Best practices**
- Design interfaces with a specific purpose, including only methods directly related to that purpose. - Create multiple smaller interfaces that classes can choose to implement. - Think from the perspective of the classes implementing the interface.
Dependency Inversion Principle (DIP)
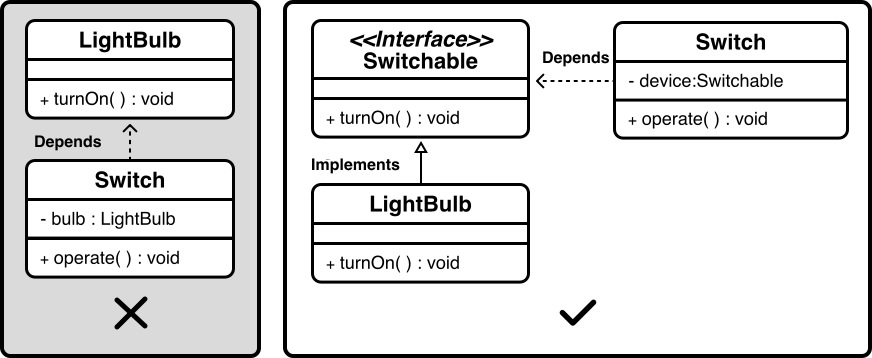
The Dependency Inversion Principle (DIP) states that high-level modules should not depend on low-level modules; both should depend on abstractions. This encourages the use of abstract interfaces to decouple higher-level components from lower-level details.
**Violation of DIP**
Here's an example that violates DIP by having a high-level class depend directly on a low-level class:
```java class LightBulb { public void turnOn() { System.out.println("LightBulb is on."); }
public void turnOff() { System.out.println("LightBulb is off."); } }
class Switch { private LightBulb bulb;
public Switch(LightBulb bulb) { this.bulb = bulb; }
public void operate() { bulb.turnOn(); } } ```
The Switch class depends directly on the low-level LightBulb class. This tight coupling means changing LightBulb or replacing it with another device (like a Fan) requires altering the Switch class.
**Fixing the violation**
Refactor to use abstractions:
- Introduce a `Switchable` interface that defines standard methods (`turnOn`, `turnOff`). - The Switch class is modified to depend only on the `Switchable` interface. - The `LightBulb` class implements `Switchable`.
Now, Switch can work with any device that implements Switchable (Fan, Heater) without changes.
**Best practices**
- Introduce interfaces or abstract classes to represent dependencies, allowing high-level modules to depend on these abstractions. - Use dependency injection to inject concrete implementations into high-level modules through their abstractions. - This promotes loose coupling and makes the system more flexible and easier to extend.
Wrap Up
This chapter has helped you understand how to use Encapsulation, Abstraction, Inheritance, Polymorphism, and the SOLID principles. These concepts form the backbone of robust software design, enabling you to create flexible, maintainable, and scalable systems. Applying these tools will help you articulate clear design decisions, justify your approach, and demonstrate adherence to industry-standard practices.
To further refine your skills and deepen your expertise, explore the following resources:
- *Clean Code: A Handbook of Agile Software Craftsmanship* by Robert C. Martin - *Design Patterns: Elements of Reusable Object-Oriented Software* by Erich Gamma, Richard Helm, Ralph Johnson, and John Vlissides - *Tidy First?: A Personal Exercise in Empirical Software Design* by Kent Beck
Design a Parking Lot
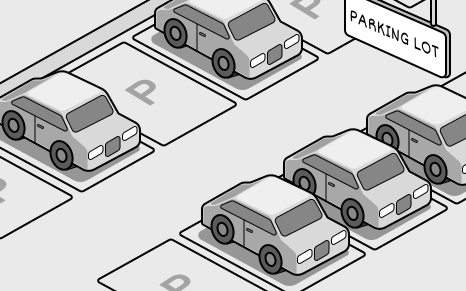
In this chapter, we explore the object-oriented design of a Parking Lot system, one of the most popular questions in technical interviews. This parking lot application aims to provide a comprehensive solution for efficiently managing a parking lot. It automates various processes, including vehicle entry, exit, and spot allocation, while also providing accurate information about parking lot occupancy and generating parking tickets.
To build this system, we first need to clarify its requirements.
Requirements Gathering
The first step in designing the parking lot system is to clarify the requirements and define the scope. Here's an example of a typical prompt an interviewer might present:
> **Interviewer:** "Imagine you're arriving at a busy parking lot, eager to park your car. At the entrance, you're issued a ticket. You then drive in, find a spot suited to your vehicle's size, and park. Later, when you prepare to leave, you present your ticket at the exit, the system calculates your fee, and the spot is freed up for the next vehicle. Behind the scenes, the parking lot is assigning spots based on vehicle size, recording entry and exit times, and updating availability for new arrivals. Now, let's design a parking lot system that handles all this."
---
> **Candidate:** What types of vehicles are supported by the parking lot?
> **Interviewer:** Three types of vehicles should be supported: motorcycles, cars, and trucks.
> **Candidate:** What parking spot types are available in the parking lot?
> **Interviewer:** The parking lot supports three types of parking spots: compact, regular spots, and oversized.
> **Candidate:** How does the system determine which spot a vehicle should park in?
> **Interviewer:** The system assigns spots based on the size of the vehicle, ensuring an appropriate fit.
> **Candidate:** Are parking tickets issued to vehicles upon entry and charged at the exit?
> **Interviewer:** Yes, a ticket is issued with vehicle details and entry time when a vehicle enters. On exit, the system calculates the fee based on duration and vehicle size, then marks the spot as vacant.
> **Candidate:** How are parking fees calculated?
> **Interviewer:** Fees are based on parking duration and vehicle size, with rates varying depending on the time of day.
**Requirements**
Here are the key functional requirements we've identified:
- The parking lot has multiple parking spots, including compact, regular, and oversized spots. - The parking lot supports parking for motorcycles, cars, and trucks. - Customers can park their vehicles in spots assigned based on vehicle size. - Customers receive a parking ticket with vehicle details and entry time at the entry point and pay a fee based on duration, vehicle size, and time of day at the exit point.
Non-functional requirements:
- The system must scale to support large parking lots with many spots and vehicles. - The system must reliably track spot assignments and ticket details to ensure accurate operations.
Identify Core Objects
Before diving into the design, it's important to enumerate the core objects.
- **Vehicle:** Represents a vehicle that needs a spot. Encapsulates details like the license plate and size (small for motorcycles, medium for cars, large for trucks). - **ParkingSpot:** Models an individual parking spot in the parking lot, ensuring only appropriately sized vehicles can park based on its capacity. - **Ticket:** Represents a parking ticket issued when a Vehicle enters. Stores the ticket ID, associated Vehicle, assigned ParkingSpot, and entry time. - **ParkingManager:** Oversees spot allocation, managing the assignment, lookup, and release of ParkingSpot instances. - **ParkingLot:** Acts as a facade, providing a central interface to manage vehicle entry, spot assignment, ticketing, and fee calculation.
> **Design Choice:** We chose these five objects to separate concerns. Vehicle and ParkingSpot define the core physical entities, Ticket tracks sessions, ParkingManager handles allocation, and ParkingLot coordinates as a facade.
Design Class Diagram
Now that we've identified the core objects and their responsibilities, the next step is to design the classes and methods that bring the parking lot system to life.
### Vehicle
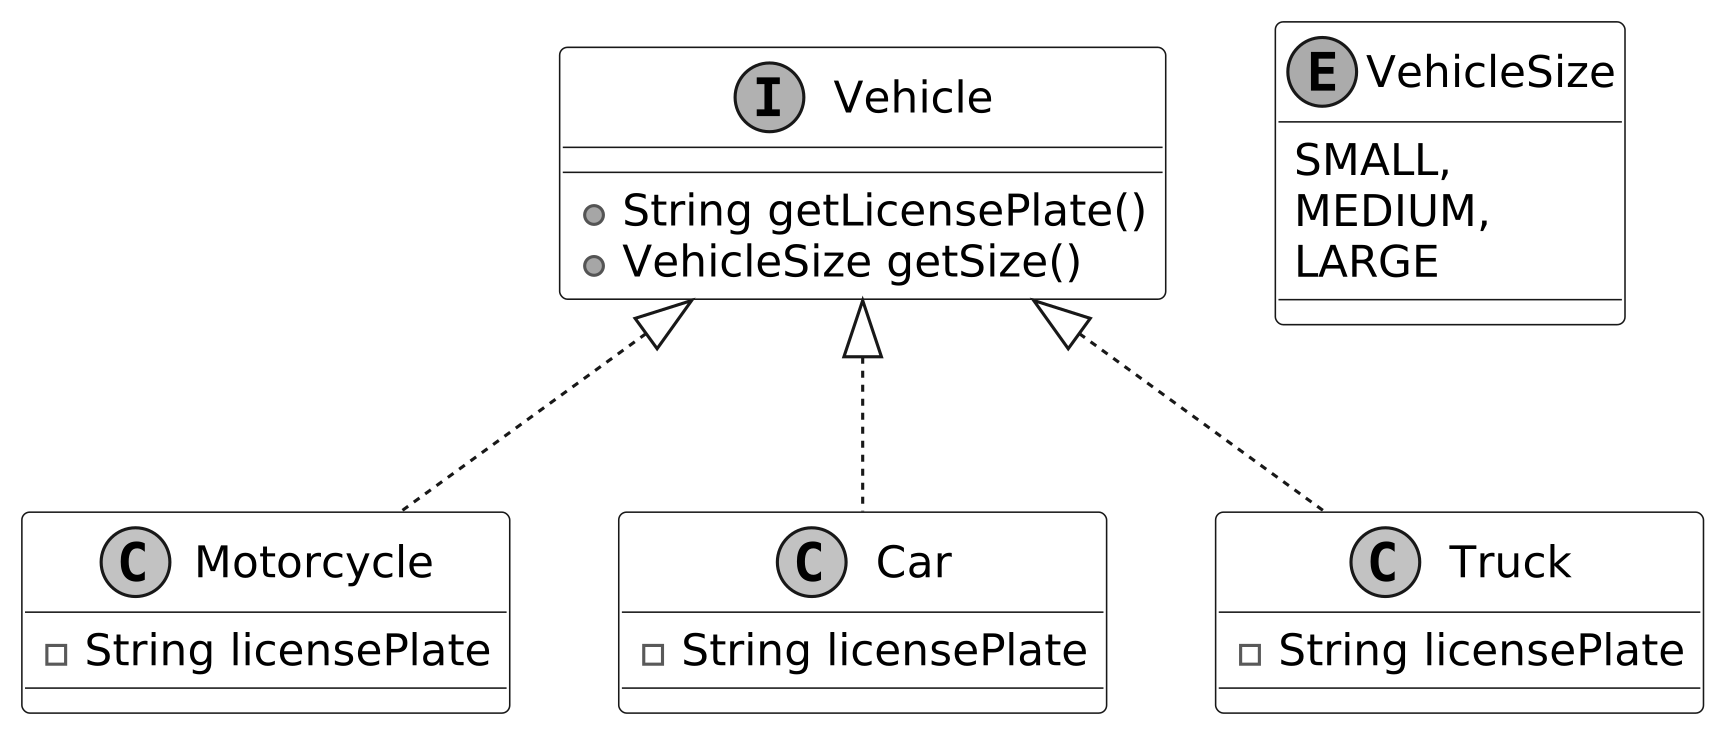
We have modeled the Vehicle as an interface to set a standard for all vehicle types. It defines two key methods:
- `getLicensePlate()`: Returns the vehicle's license plate number. - `getSize()`: Returns a VehicleSize enum (SMALL, MEDIUM, LARGE), indicating the space it occupies.
Concrete classes — Motorcycle, Car, and Truck — implement the Vehicle interface, each defining its size.
> **Design Choice:** Using `getSize()` instead of `getType()` abstracts away specific vehicle names. A truck and a van might both be LARGE, so they're treated the same for parking purposes. Adding a new vehicle type only requires marking its size — the system stays lean and adaptable.
ParkingSpot Design
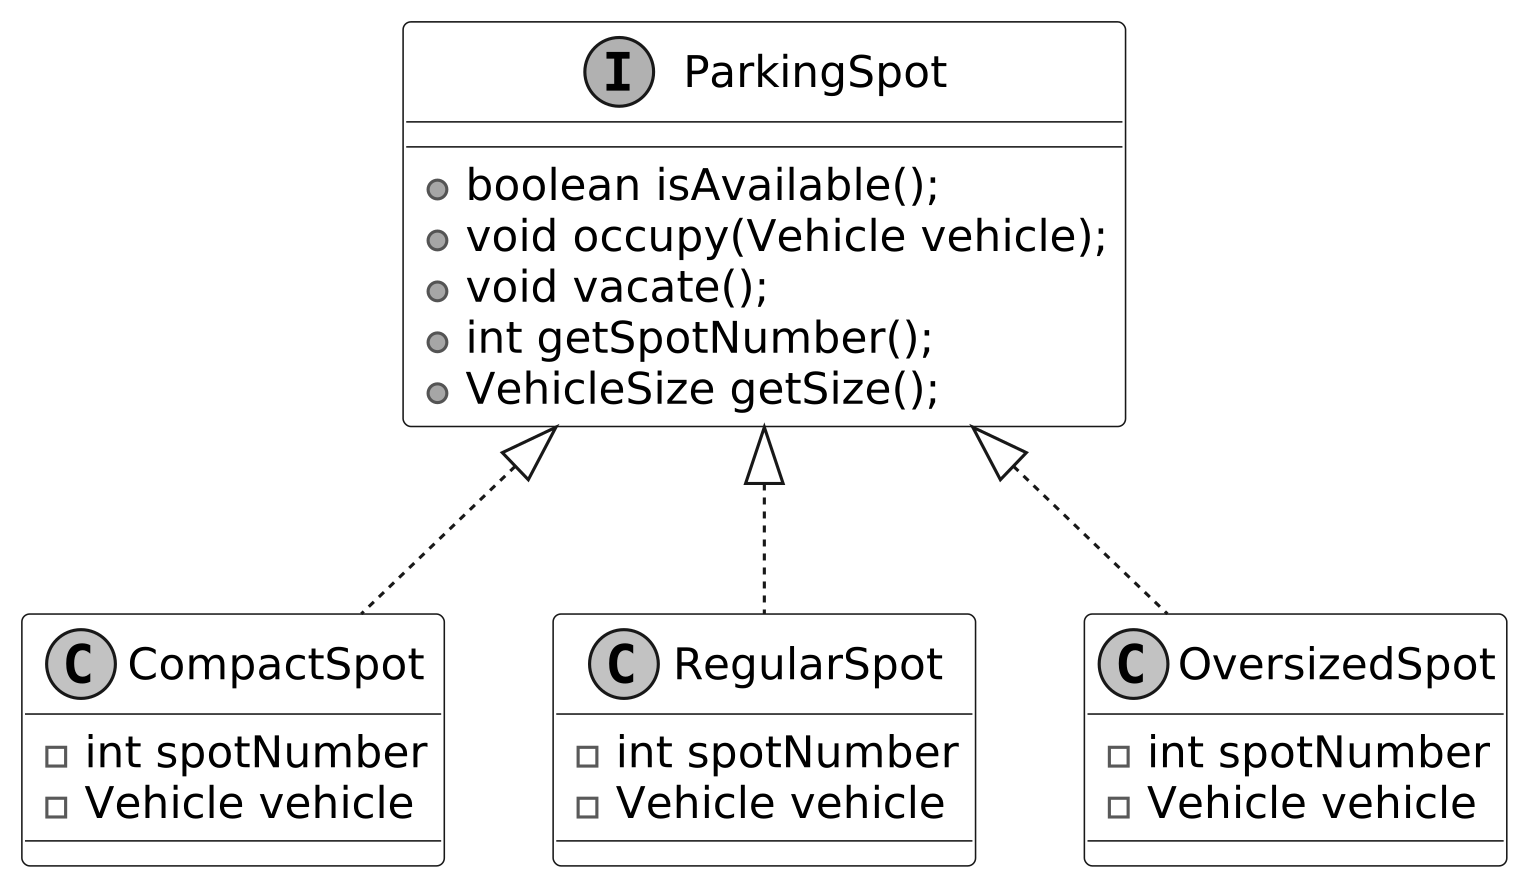
The ParkingSpot interface represents a parking spot. Concrete classes (CompactSpot, RegularSpot, OversizedSpot) implement it for small, medium, and large vehicles respectively.
> **Design Choice:** ParkingSpot is intentionally kept simple, managing only its state (availability and size). Complex operations like locating available spots and monitoring parked vehicles are delegated to ParkingManager. This makes it easy to add new spot types without introducing unnecessary complexity.
ParkingManager Design
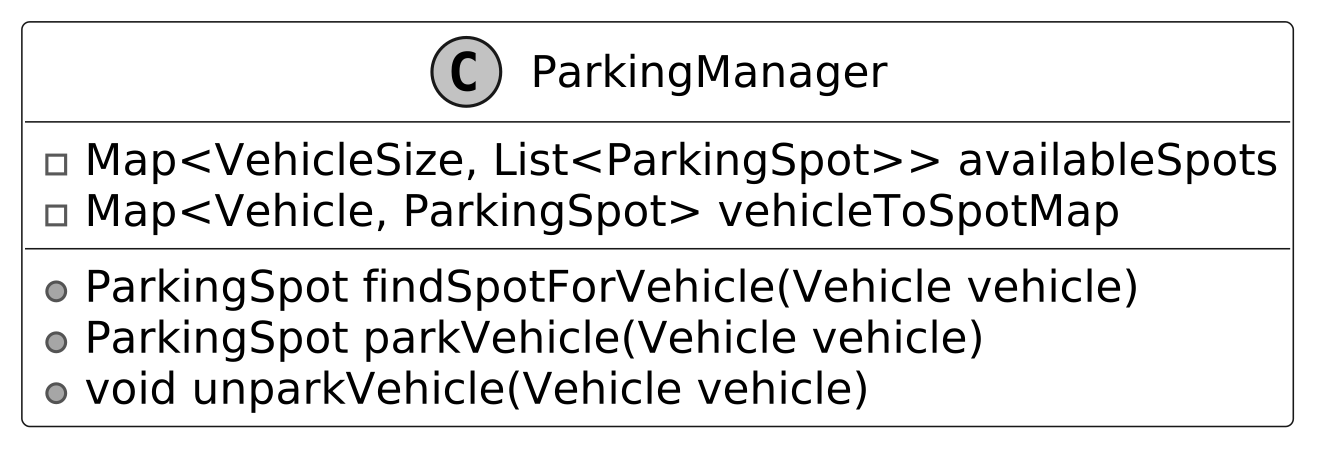
The ParkingManager is responsible for managing the allocation and tracking of parking spots. Its primary functions:
- `parkVehicle(Vehicle vehicle)`: Assigns a spot that matches the vehicle's size when it arrives. - `unparkVehicle(Vehicle vehicle)`: Frees up the spot when the vehicle leaves.
> **Design Choice:** ParkingManager centralizes spot allocation and tracking, allowing ParkingLot to remain a lightweight facade. This separation of concerns enhances modularity and scalability.
Ticket Design
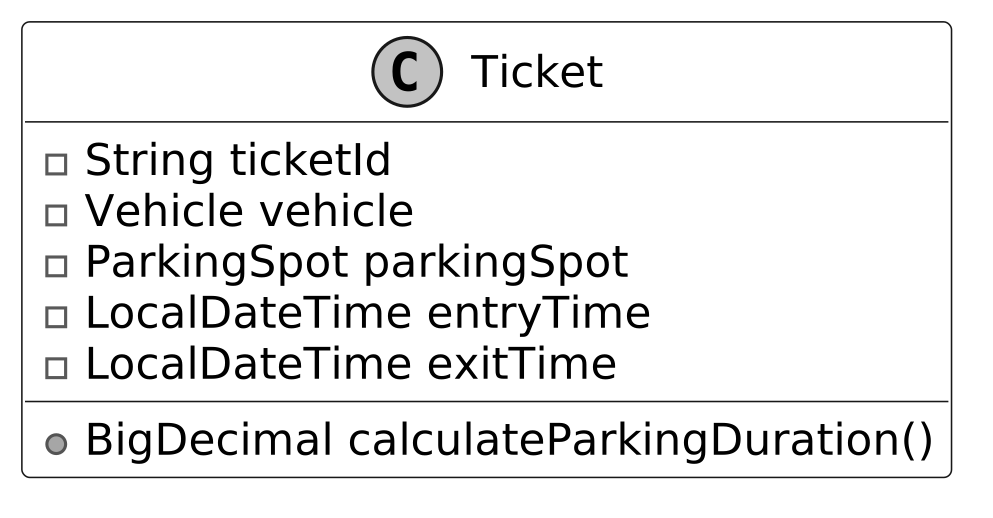
The Ticket class represents a parking ticket generated when a vehicle enters. It tracks entry/exit times to calculate duration and links the vehicle to its assigned spot.
> **Design Choice:** Ticket is designed as a concise, immutable record of a parking event. Its primary role is to serve as a data container — complex logic like fee calculation is delegated to FareCalculator.
FareStrategy and FareCalculator Design
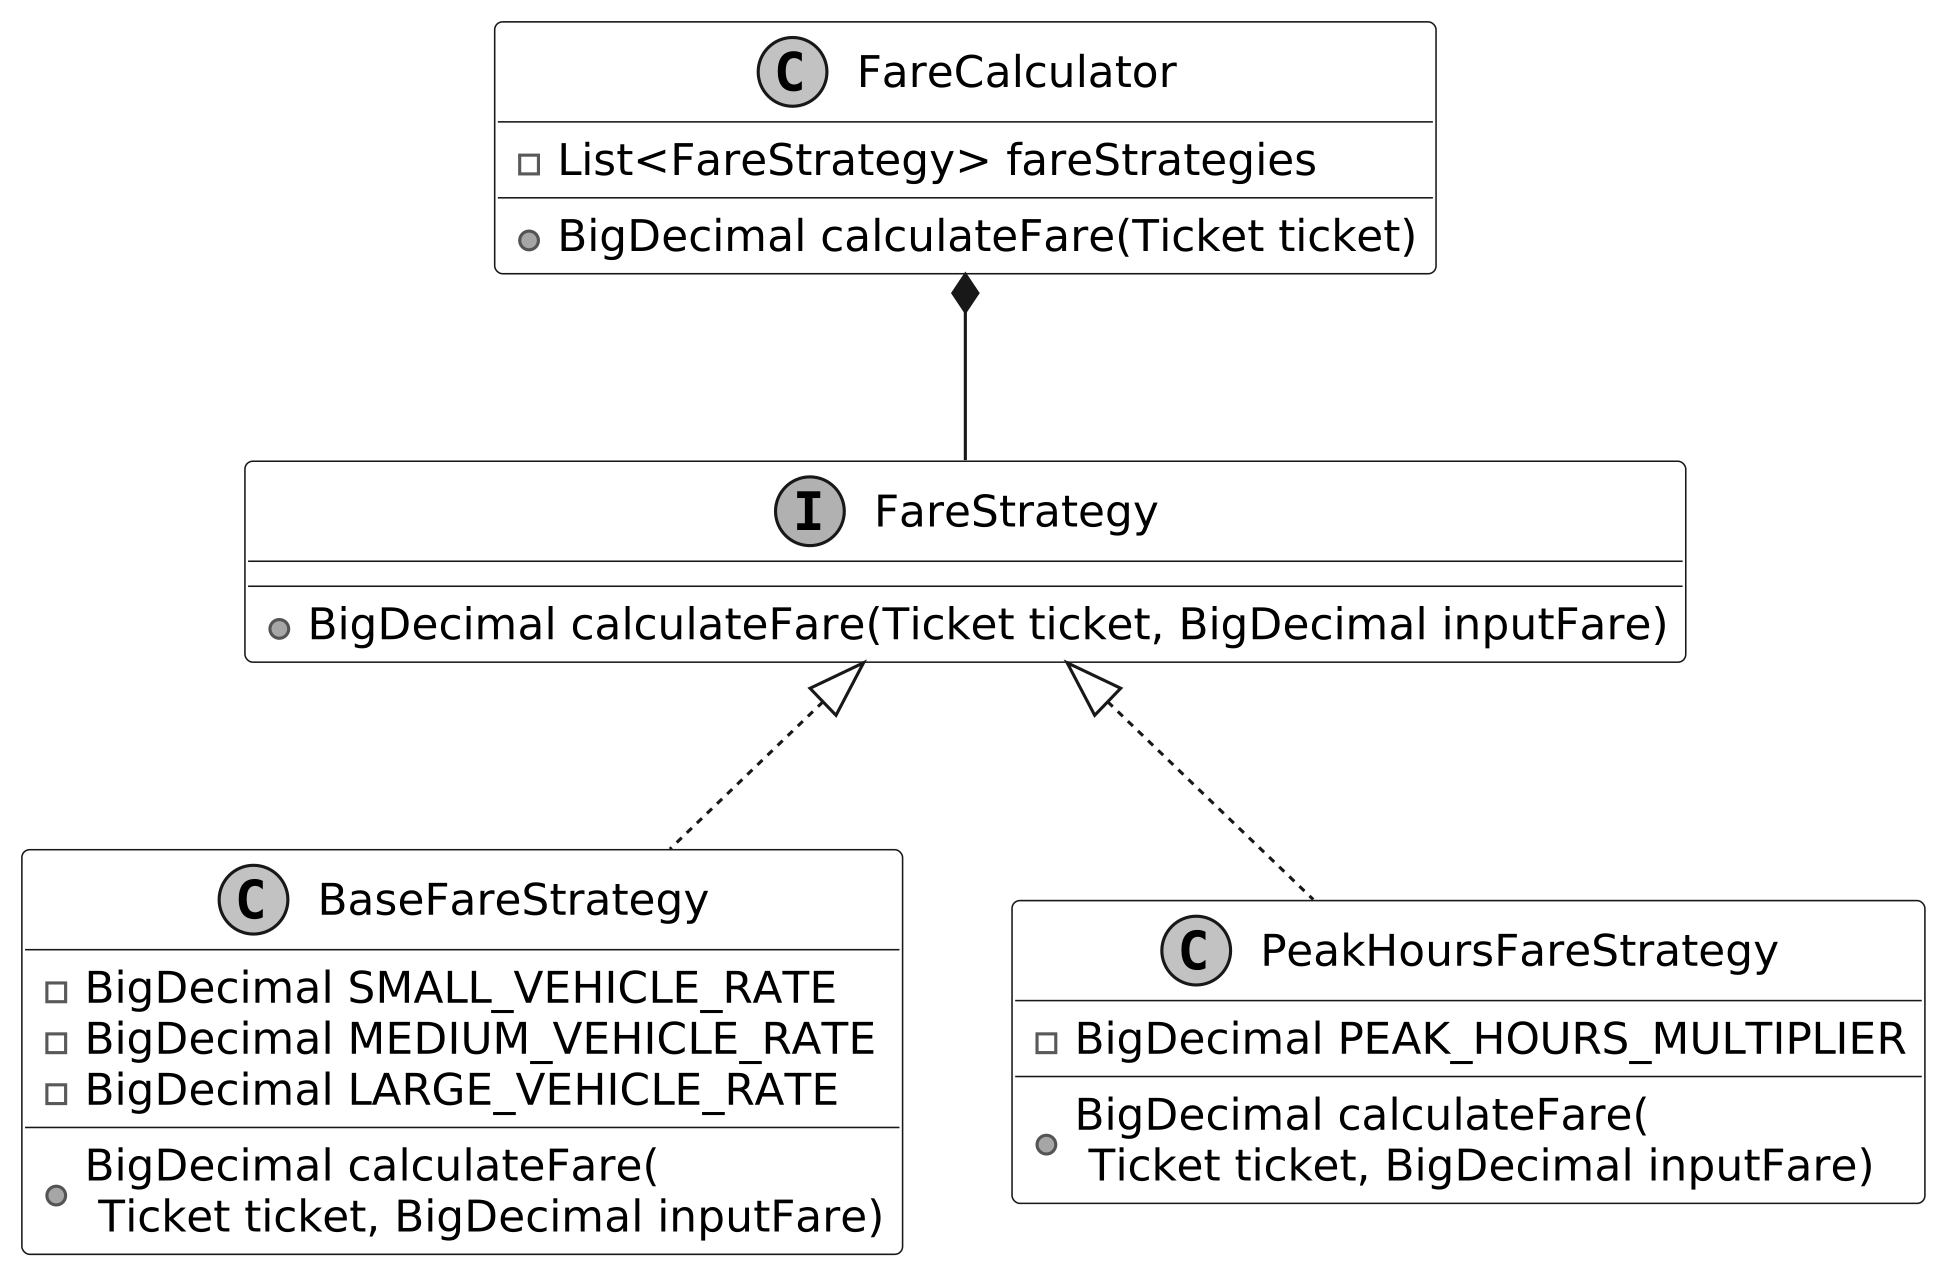
The FareStrategy interface establishes a standard method for modifying the parking fee. Concrete classes handle specific pricing rules:
- **BaseFareStrategy:** Establishes the base fee using ticket duration and vehicle size. - **PeakHoursFareStrategy:** Modifies the fee based on time of day (50% higher during peak hours).
The FareCalculator coordinates these strategies to calculate the final fee. The pricing logic relies on the **Strategy Pattern**, which enables dynamic selection and swapping of pricing rules.
> **Note:** To learn more about the Strategy Pattern, refer to the Further Reading section at the end of this chapter.
> **Design Choice:** The FareStrategy interface enables modular, interchangeable pricing rules. Using a `List<FareStrategy>` in FareCalculator preserves strategy order — BaseFareStrategy must run before PeakHoursFareStrategy for correct calculation.
ParkingLot Design
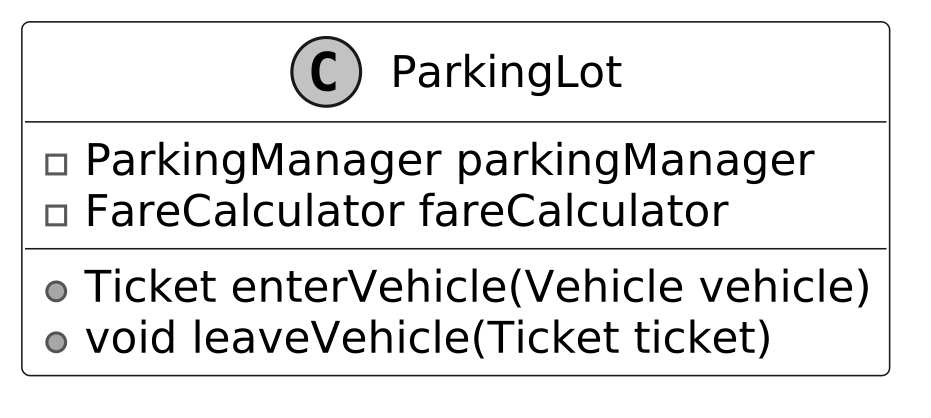
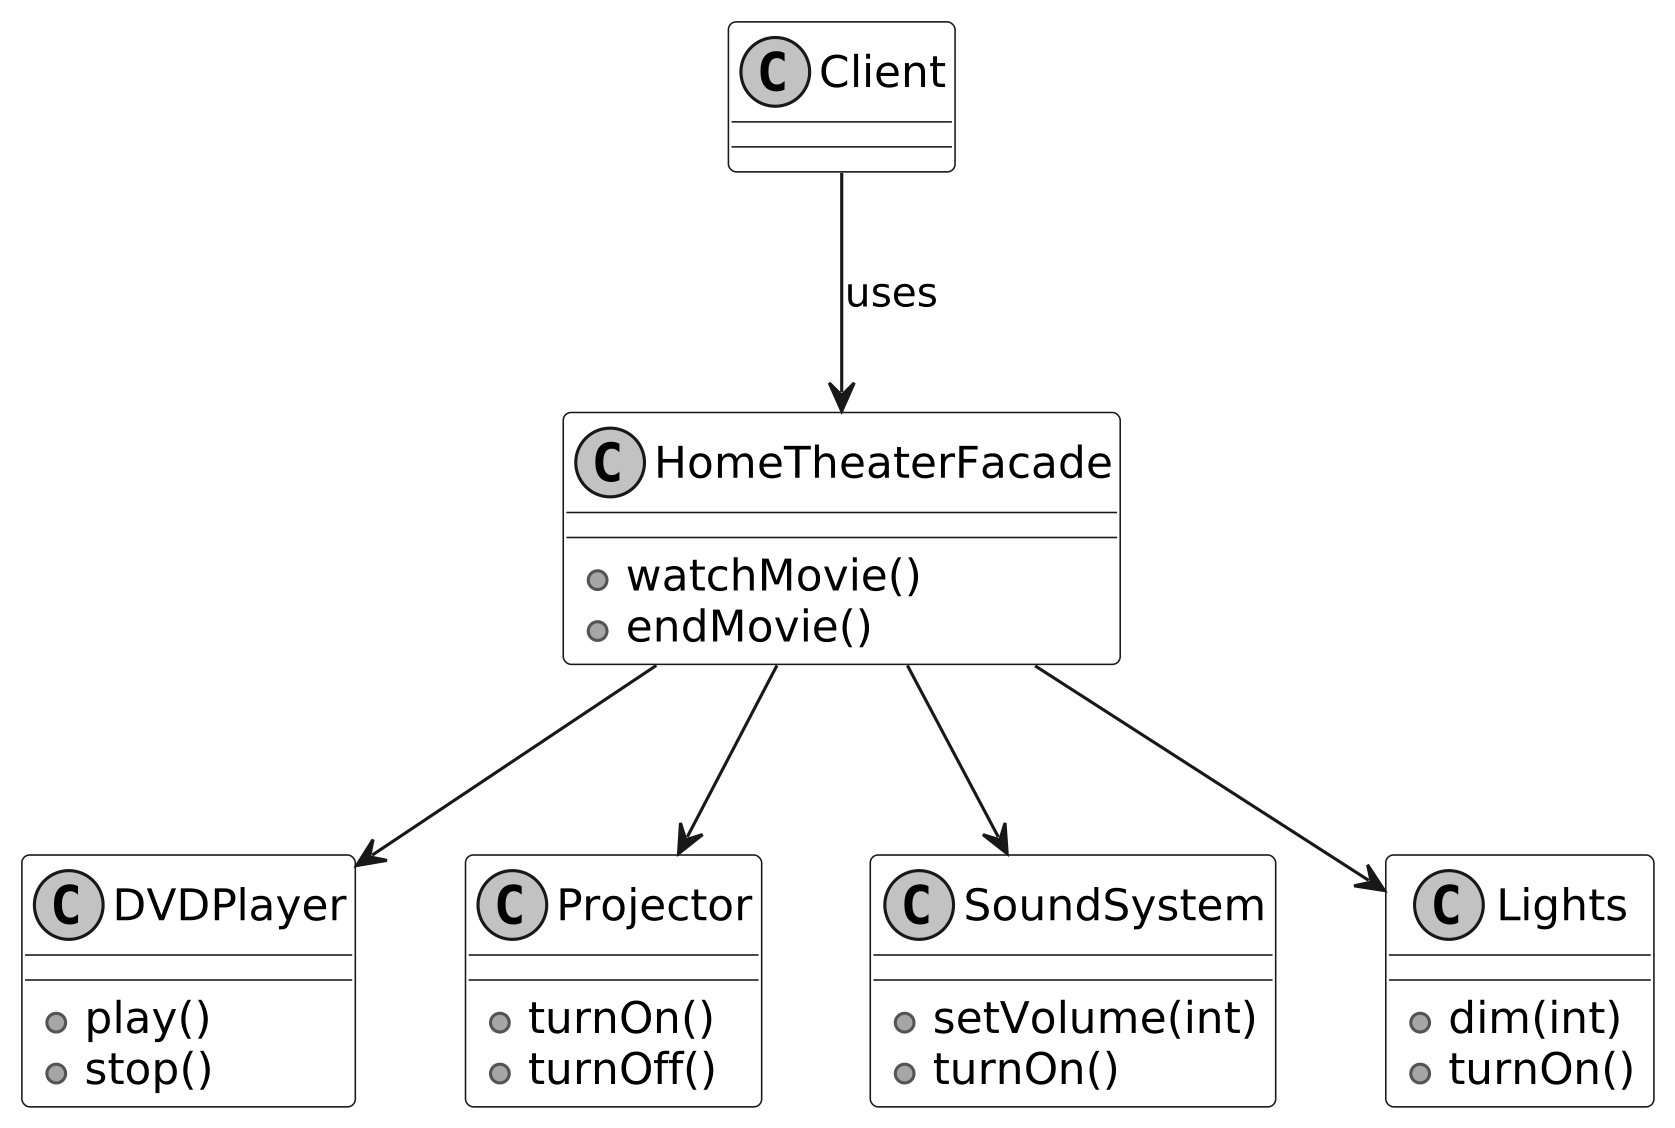
The ParkingLot class acts as a **facade**, providing a simple interface for managing the parking lot's key operations. It manages vehicle entry (generating tickets, assigning spots) and exit (calculating fares), delegating to ParkingManager and FareCalculator.
> **Note:** To learn more about the Facade Pattern, refer to the Further Reading section at the end of this chapter.
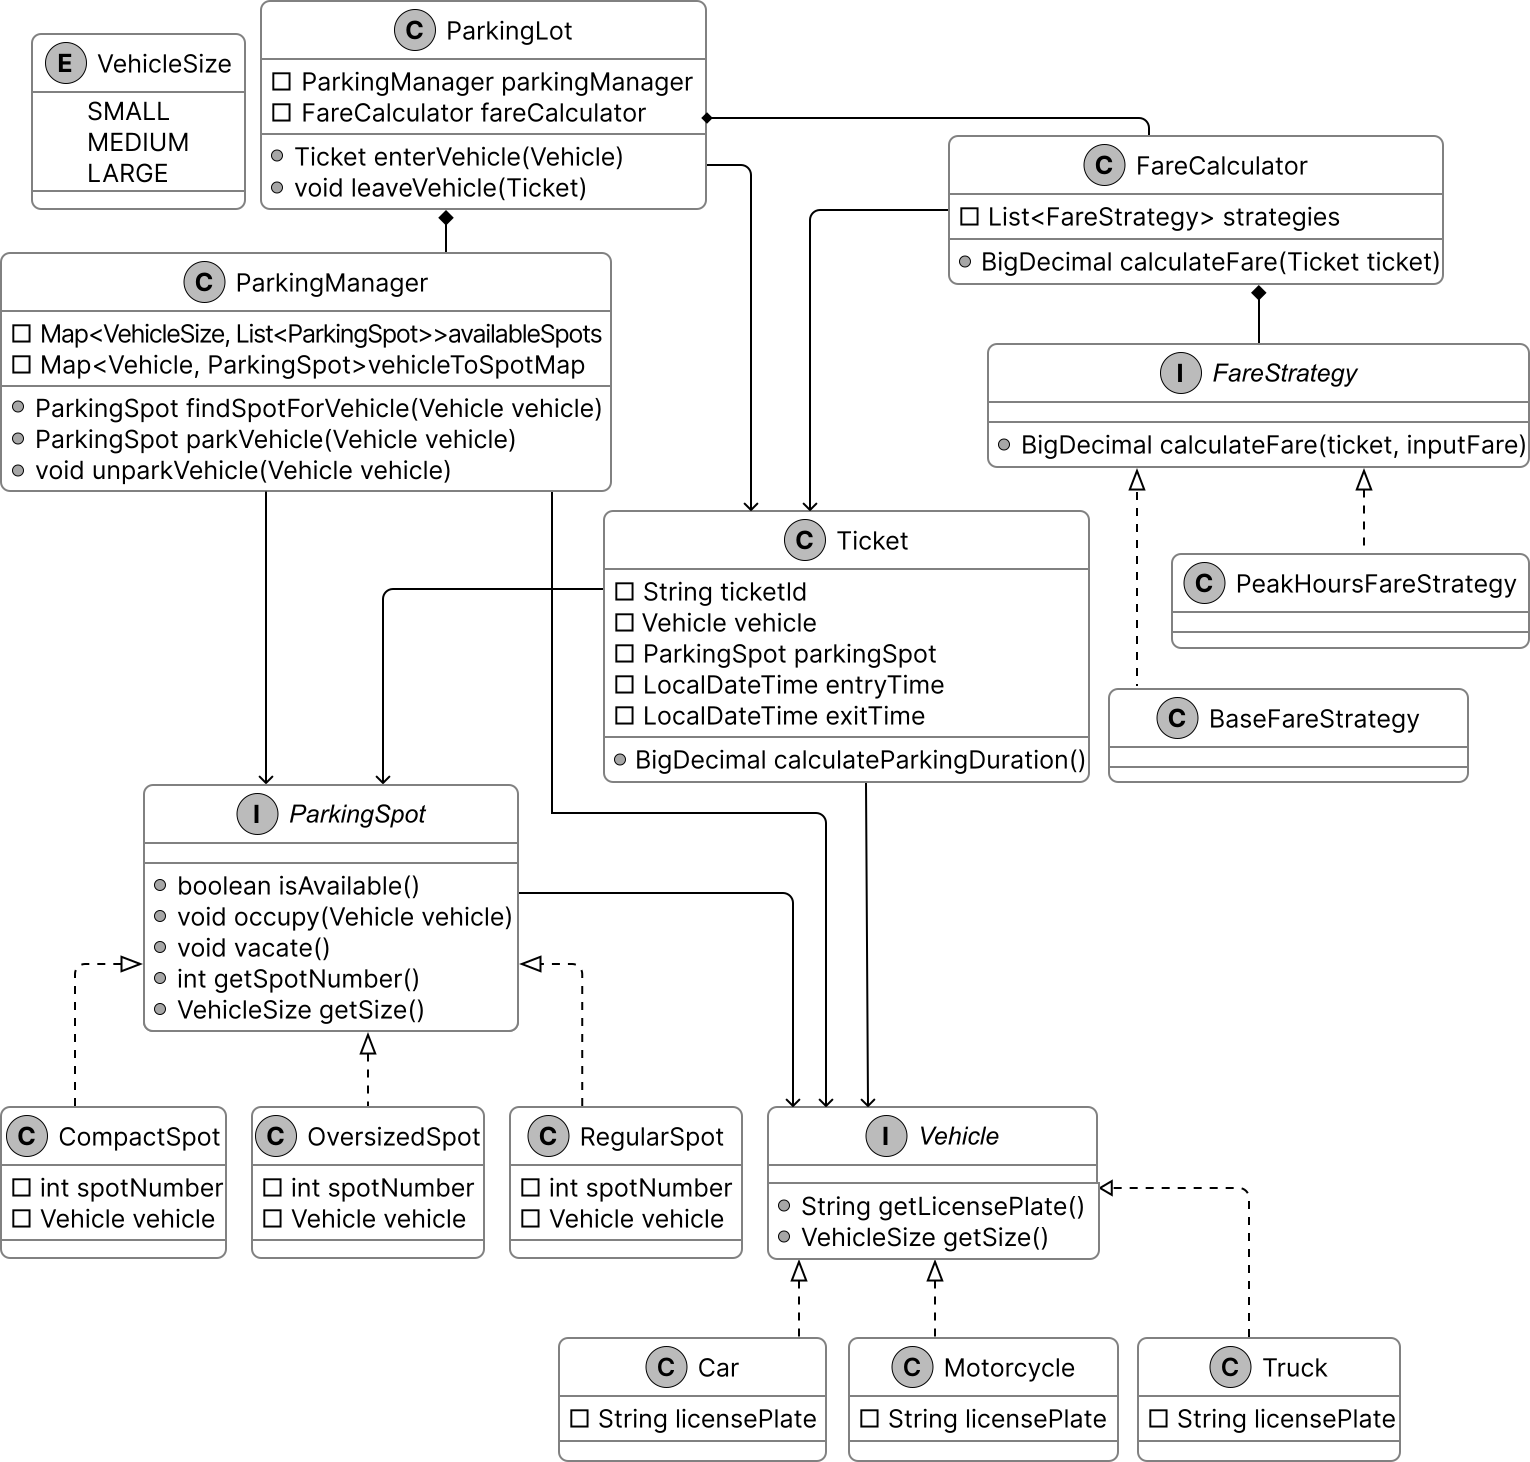
Complete Class Diagram
Take a moment to review the complete class structure and the relationships between them. This diagram demonstrates how a seemingly complex system can be constructed using simple, well-designed components working together cohesively.
Code - Parking Lot
In this section, we implement the core functionalities of the parking lot system.
### Vehicle
We define the Vehicle interface, the VehicleSize enum, and the Car concrete class:
```java public interface Vehicle { String getLicensePlate(); VehicleSize getSize(); }
public class Car implements Vehicle { private String licensePlate;
public Car(String licensePlate) { this.licensePlate = licensePlate; }
@Override public String getLicensePlate() { return this.licensePlate; }
@Override public VehicleSize getSize() { return VehicleSize.MEDIUM; } }
public enum VehicleSize { SMALL, MEDIUM, LARGE } ```
The interface ensures every vehicle provides a license plate for tracking and a size for managing parking spaces. Motorcycle and Truck classes follow the same structure as Car.
> **Implementation Choice:** The `VehicleSize` enum (SMALL, MEDIUM, LARGE) standardizes vehicle and parking spot sizes, ensuring type-safe, error-free size comparisons. Alternatives like Strings (prone to typos) or integers (ambiguous) were rejected for fragility and lack of type safety.
### ParkingSpot
```java public interface ParkingSpot { boolean isAvailable(); void occupy(Vehicle vehicle); void vacate(); int getSpotNumber(); VehicleSize getSize(); }
public class CompactSpot implements ParkingSpot { private int spotNumber; private Vehicle vehicle; // The vehicle currently occupying this spot
public CompactSpot(int spotNumber) { this.spotNumber = spotNumber; this.vehicle = null; // No vehicle occupying initially }
@Override public int getSpotNumber() { return spotNumber; }
@Override public boolean isAvailable() { return vehicle == null; }
@Override public void occupy(Vehicle vehicle) { if (isAvailable()) { this.vehicle = vehicle; } else { // Spot is already occupied. } }
@Override public void vacate() { this.vehicle = null; // Make the spot available }
@Override public VehicleSize getSize() { return VehicleSize.SMALL; // Compact spots fit small vehicles } } ```
RegularSpot returns `VehicleSize.MEDIUM` and OversizedSpot returns `VehicleSize.LARGE`, following the same structure as CompactSpot.
### ParkingManager
```java public class ParkingManager { private final Map<VehicleSize, List<ParkingSpot>> availableSpots; private final Map<Vehicle, ParkingSpot> vehicleToSpotMap;
// Create Parking Manager based on a given map of available spots public ParkingManager(Map<VehicleSize, List<ParkingSpot>> availableSpots) { this.availableSpots = availableSpots; this.vehicleToSpotMap = new HashMap<>(); }
public ParkingSpot findSpotForVehicle(Vehicle vehicle) { VehicleSize vehicleSize = vehicle.getSize();
// Start looking for the smallest spot that can fit the vehicle for (VehicleSize size : VehicleSize.values()) { if (size.ordinal() >= vehicleSize.ordinal()) { List<ParkingSpot> spots = availableSpots.get(size); for (ParkingSpot spot : spots) { if (spot.isAvailable()) { return spot; // Return the first available spot } } } } return null; // No suitable spot found }
public ParkingSpot parkVehicle(Vehicle vehicle) { ParkingSpot spot = findSpotForVehicle(vehicle); if (spot != null) { spot.occupy(vehicle); vehicleToSpotMap.put(vehicle, spot); availableSpots.get(spot.getSize()).remove(spot); return spot; // Parking successful } return null; // No spot found for this vehicle }
public void unparkVehicle(Vehicle vehicle) { ParkingSpot spot = vehicleToSpotMap.remove(vehicle); if (spot != null) { spot.vacate(); availableSpots.get(spot.getSize()).add(spot); } } } ```
- `findSpotForVehicle()`: Searches for the smallest available spot that fits the vehicle's size. - `parkVehicle()`: Assigns the spot, records the vehicle-spot pair, removes spot from available pool. - `unparkVehicle()`: Frees the spot, adds it back to the available pool.
> **Implementation Choice:** Two HashMaps provide O(1) access: `availableSpots` organizes spots by VehicleSize for best-fit allocation; `vehicleToSpotMap` records which spot each vehicle occupies.
### Ticket
```java public class Ticket { private final String ticketId; // Unique ticket identifier private final Vehicle vehicle; // The vehicle associated with the ticket private final ParkingSpot parkingSpot; // The parking spot where the vehicle is parked private final LocalDateTime entryTime; // The time the vehicle entered the parking lot private LocalDateTime exitTime; // The time the vehicle exited the parking lot
public Ticket( String ticketId, Vehicle vehicle, ParkingSpot parkingSpot, LocalDateTime entryTime) { this.ticketId = ticketId; this.vehicle = vehicle; this.parkingSpot = parkingSpot; this.entryTime = entryTime; this.exitTime = null; // Initially null — vehicle is still parked }
public BigDecimal calculateParkingDuration() { return new BigDecimal( Duration.between( entryTime, Objects.requireNonNullElseGet(exitTime, LocalDateTime::now)) .toMinutes()); } // getter and setter methods omitted for brevity } ```
### FareStrategy and FareCalculator
```java public interface FareStrategy { BigDecimal calculateFare(Ticket ticket, BigDecimal inputFare); }
public class BaseFareStrategy implements FareStrategy { private static final BigDecimal SMALL_VEHICLE_RATE = new BigDecimal("1.0"); private static final BigDecimal MEDIUM_VEHICLE_RATE = new BigDecimal("2.0"); private static final BigDecimal LARGE_VEHICLE_RATE = new BigDecimal("3.0");
@Override public BigDecimal calculateFare(Ticket ticket, BigDecimal inputFare) { BigDecimal fare = inputFare; BigDecimal rate; switch (ticket.getVehicle().getSize()) { case MEDIUM: rate = MEDIUM_VEHICLE_RATE; break; case LARGE: rate = LARGE_VEHICLE_RATE; break; default: rate = SMALL_VEHICLE_RATE; } fare = fare.add(rate.multiply(ticket.calculateParkingDuration())); return fare; } }
public class PeakHoursFareStrategy implements FareStrategy { private static final BigDecimal PEAK_HOURS_MULTIPLIER = new BigDecimal("1.5"); // 50% higher
@Override public BigDecimal calculateFare(Ticket ticket, BigDecimal inputFare) { BigDecimal fare = inputFare; if (isPeakHours(ticket.getEntryTime())) { fare = fare.multiply(PEAK_HOURS_MULTIPLIER); } return fare; }
private boolean isPeakHours(LocalDateTime time) { int hour = time.getHour(); return (hour >= 7 && hour <= 10) || (hour >= 16 && hour <= 19); } }
public class FareCalculator { private final List<FareStrategy> fareStrategies;
public FareCalculator(List<FareStrategy> fareStrategies) { this.fareStrategies = fareStrategies; }
public BigDecimal calculateFare(Ticket ticket) { BigDecimal fare = BigDecimal.ZERO; for (FareStrategy strategy : fareStrategies) { fare = strategy.calculateFare(ticket, fare); } return fare; } } ```
> **Implementation Choice:** `FareCalculator` uses a `List<FareStrategy>` (not Set or array) to preserve order — strategies like BaseFareStrategy must apply before PeakHoursFareStrategy for correct fare calculation.
### ParkingLot
```java public class ParkingLot { private final ParkingManager parkingManager; private final FareCalculator fareCalculator;
public ParkingLot(ParkingManager parkingManager, FareCalculator fareCalculator) { this.parkingManager = parkingManager; this.fareCalculator = fareCalculator; }
public Ticket enterVehicle(Vehicle vehicle) { ParkingSpot spot = parkingManager.parkVehicle(vehicle); if (spot != null) { Ticket ticket = new Ticket(generateTicketId(), vehicle, spot, LocalDateTime.now()); return ticket; } else { return null; // No spot available } }
public void leaveVehicle(Ticket ticket) { if (ticket != null && ticket.getExitTime() == null) { ticket.setExitTime(LocalDateTime.now()); parkingManager.unparkVehicle(ticket.getVehicle()); BigDecimal fare = fareCalculator.calculateFare(ticket); } else { // Invalid ticket or vehicle already exited. } } } ```
Deep Dive Topics
### Adding a New Parking Spot Type
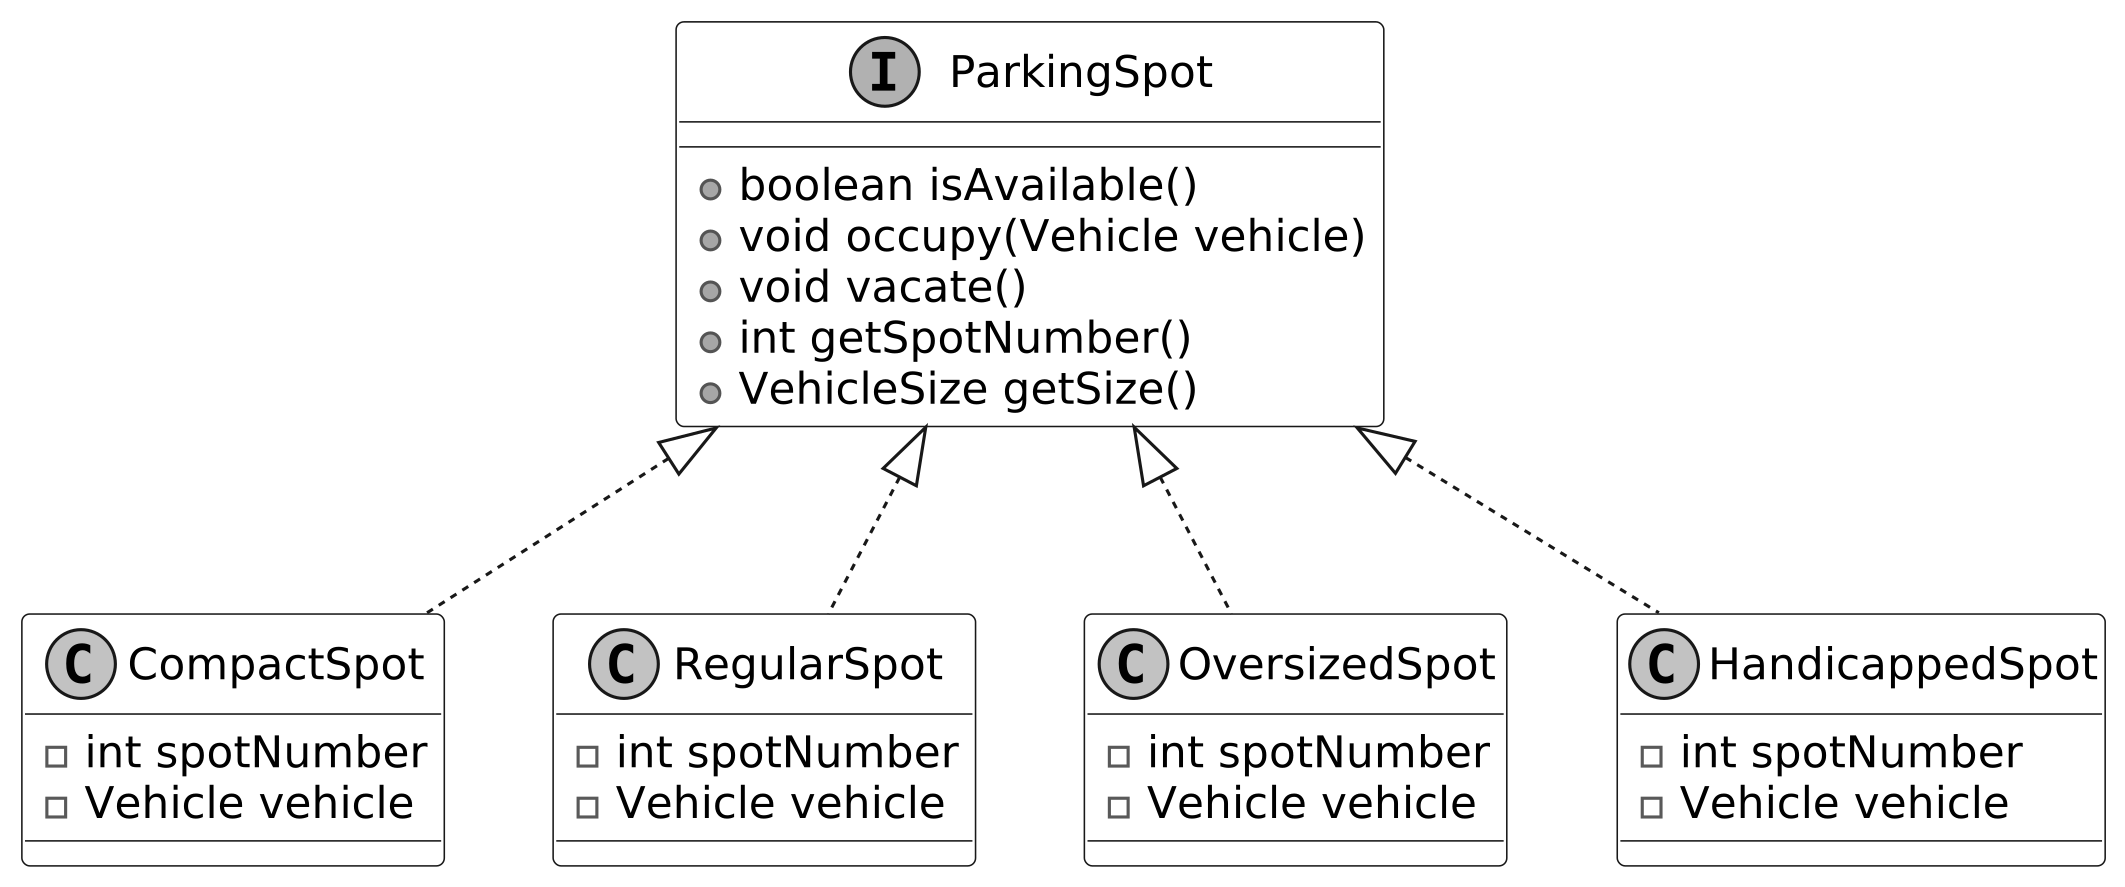
To add a handicapped parking spot, we introduce a `HandicappedSpot` class implementing the existing ParkingSpot interface. This adheres to the Open-Closed Principle — no modification to existing classes required.
```java public class HandicappedSpot implements ParkingSpot { private int spotNumber; private Vehicle vehicle;
public HandicappedSpot(int spotNumber) { this.spotNumber = spotNumber; this.vehicle = null; }
@Override public int getSpotNumber() { return spotNumber; }
@Override public boolean isAvailable() { return vehicle == null; }
@Override public void occupy(Vehicle vehicle) { if (isAvailable()) { this.vehicle = vehicle; } }
@Override public void vacate() { this.vehicle = null; }
@Override public VehicleSize getSize() { return VehicleSize.MEDIUM; } } ```
### Faster Parking Spot Management
The current mapping is one-way (Vehicle → ParkingSpot). To find which vehicle is in a specific spot, we'd need to search all entries — O(n). We can add a reverse HashMap `spotToVehicleMap` for O(1) lookups in both directions:
```java public class ParkingManager { private final Map<VehicleSize, List<ParkingSpot>> availableSpots; private final Map<Vehicle, ParkingSpot> vehicleToSpotMap; private final Map<ParkingSpot, Vehicle> spotToVehicleMap;
public ParkingManager(Map<VehicleSize, List<ParkingSpot>> availableSpots) { this.availableSpots = availableSpots; this.vehicleToSpotMap = new HashMap<>(); this.spotToVehicleMap = new HashMap<>(); }
public ParkingSpot findSpotForVehicle(Vehicle vehicle) { // No change in the method }
public ParkingSpot parkVehicle(Vehicle vehicle) { ParkingSpot spot = findSpotForVehicle(vehicle); if (spot != null) { spot.occupy(vehicle); vehicleToSpotMap.put(vehicle, spot); // Record bidirectional mapping spotToVehicleMap.put(spot, vehicle); availableSpots.get(spot.getSize()).remove(spot); return spot; } return null; }
public void unparkVehicle(Vehicle vehicle) { ParkingSpot spot = vehicleToSpotMap.remove(vehicle); if (spot != null) { spotToVehicleMap.remove(spot); spot.vacate(); availableSpots.get(spot.getSize()).add(spot); } }
public ParkingSpot findVehicleBySpot(Vehicle vehicle) { return vehicleToSpotMap.get(vehicle); }
public Vehicle findSpotByVehicle(ParkingSpot spot) { return spotToVehicleMap.get(spot); } } ```
**Benefits:** The bidirectional mapping enables O(1) lookups in both directions — especially efficient in large parking lots where linear searches would be expensive.
Wrap Up
In this chapter, we gathered requirements for the Parking Lot system, identified core objects, designed the class structure, and implemented key components.
A key takeaway is the value of modularity and clear separation of concerns. Each component handles a distinct responsibility, keeping the system maintainable and open to future enhancements.
Our design choices — using ParkingLot as a facade, employing FareStrategy for flexible pricing — emphasize simplicity and adaptability. An alternative approach embedding spot allocation and fare logic directly in ParkingLot might reduce class count but would complicate scalability by overloading a single class with multiple responsibilities.
Further Reading: Strategy and Facade Design Patterns
### Strategy Design Pattern
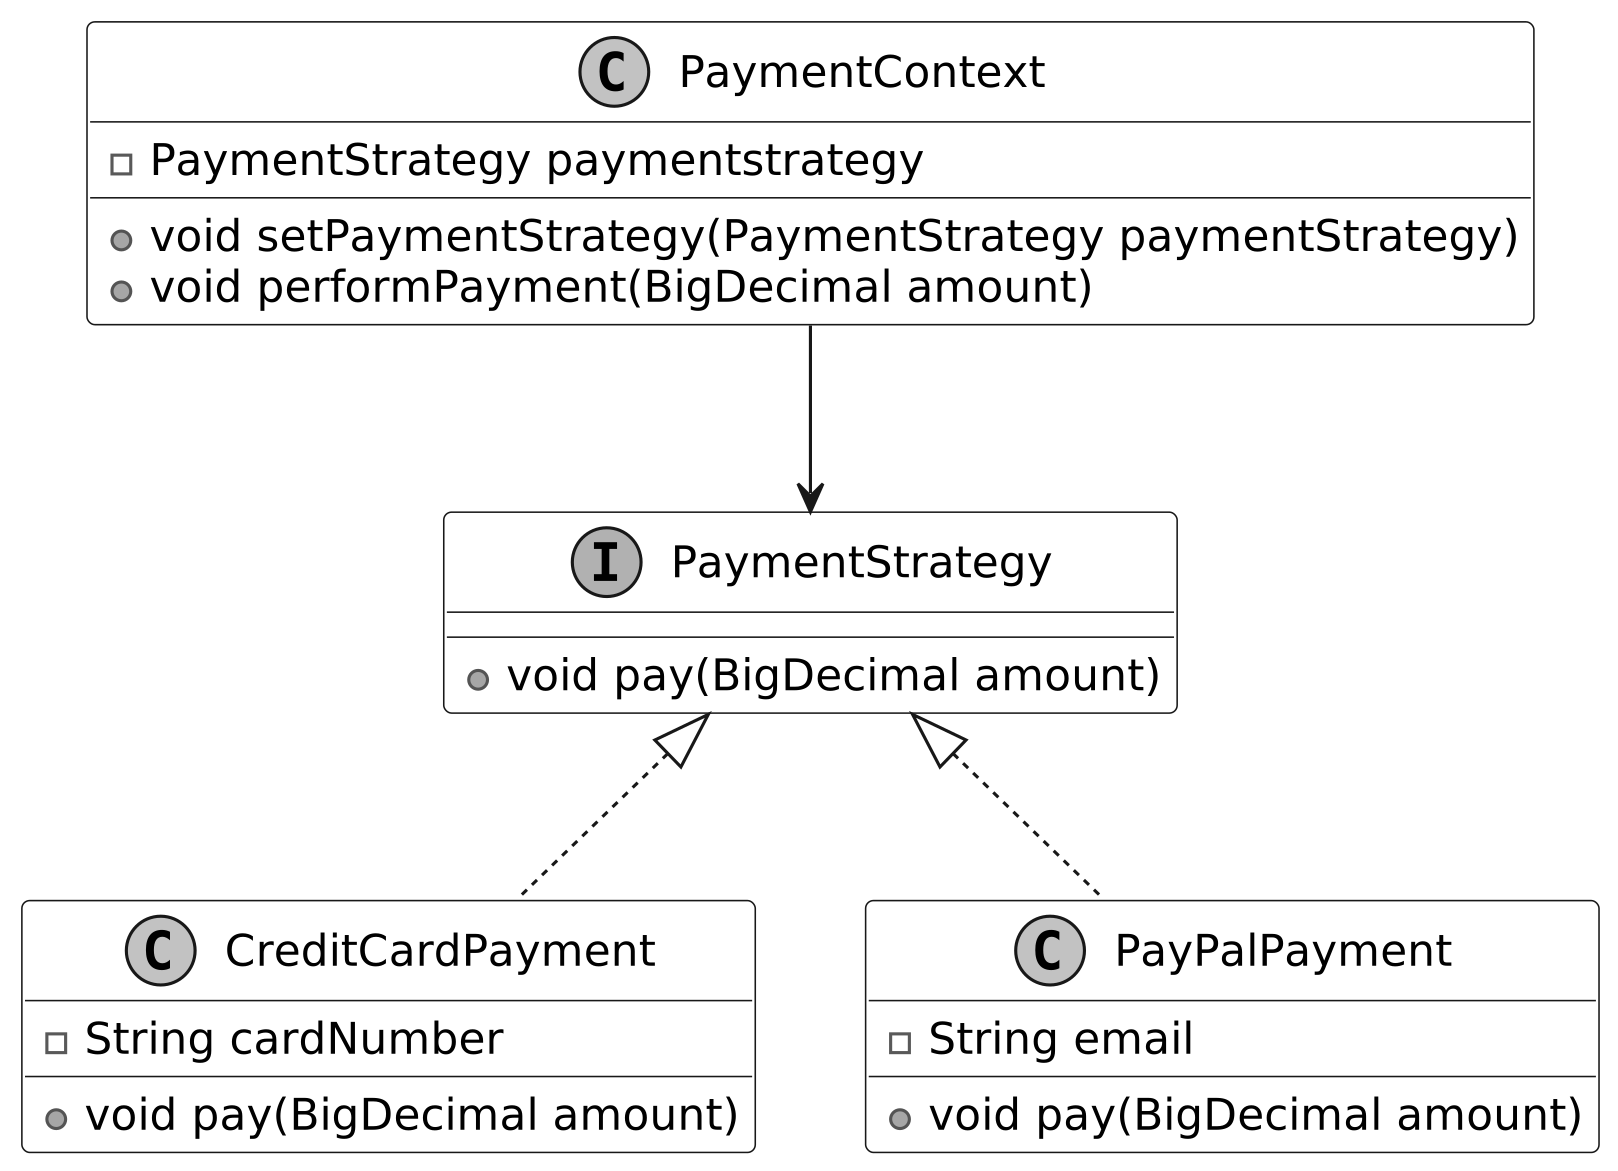
The Strategy pattern defines a family of algorithms, encapsulates each in a separate class, and allows their objects to be interchangeable.
**When to use:** - When an application needs to select different algorithms at runtime based on specific conditions. - When a class is cluttered with conditionals choosing between algorithm variations. - To keep business logic separate from implementation details of specific tasks.
**Example use case:** An e-commerce payment system with credit card, PayPal, and bank transfer options — each payment method is a strategy, interchangeable without modifying the checkout core logic.
### Facade Design Pattern
The Facade pattern provides a simple interface to a complex subsystem, simplifying how clients interact with it by hiding underlying complexity.
**When to use:** - When a subsystem is complex and you want a simpler client interface. - When you want to layer a system into subsystems with a unified entry point for common operations.
**Example use case:** A home theater system — a `HomeTheaterFacade.watchMovie()` method internally manages the projector, sound system, and lights, so the user interacts with one simple call instead of configuring each device.
Design a Movie Ticket Booking System
In this chapter, we'll walk through the design of a Movie Ticket Booking System. It's used to assess your ability to model real-world systems and apply object-oriented principles to create a well-structured solution. The goal is to carefully define the classes that represent key entities in a movie booking system, such as rooms, screenings, and movies. We'll aim to build a clear and functional structure that captures the essential interactions between these components, making the system intuitive and scalable.
Requirements Gathering
Here is an example of a typical prompt an interviewer might give:
> **Interviewer:** "Imagine you're trying to book tickets for a blockbuster movie on a busy weekend. You log into the booking system, browse through the available showtimes, select your preferred seats, and proceed to book them. Within moments, your tickets are confirmed, and you receive a digital ticket. Behind the scenes, the system is efficiently managing seat availability, tracking screenings, and calculating ticket costs. Now, let's design a movie ticket booking system that handles all of this seamlessly."
---
> **Candidate:** Does the system support finding and booking tickets across different cinemas and rooms?
> **Interviewer:** Yes, users can search for available tickets across multiple cinemas, each containing multiple rooms.
> **Candidate:** Does the system allow scheduling multiple screenings of the same movie across different rooms and times?
> **Interviewer:** Yes, each movie can have different screenings scheduled across various rooms and times in the same cinema or different cinemas.
> **Candidate:** Does the system support different pricing tiers for seats within the same screening?
> **Interviewer:** Yes, each seat can have its pricing strategy, such as normal, premium, or VIP, affecting the ticket price.
> **Candidate:** Can a user book multiple tickets in a single order, and how does the system calculate the total cost?
> **Interviewer:** Yes, users can combine multiple tickets into one order for a specific screening. The system calculates the total cost by summing the prices of all selected seats based on their rate classes.
> **Candidate:** Does the system need to handle payment processing as part of the booking process?
> **Interviewer:** For this design, we can ignore payment processing and focus on browsing, scheduling, seat selection, and booking tickets.
> **Candidate:** What happens when a user books a ticket for a specific seat?
> **Interviewer:** The system should create a ticket with the screening, seat, and price based on the seat's pricing strategy, then add it to the screening's ticket list, marking the seat as booked.
**Requirements**
Functional requirements:
- Each cinema is located at a specific location and contains multiple rooms. - Movies can have multiple screenings scheduled across different rooms, cinemas, and time slots. - Each room has a grid of seats available for booking. - Seats within a room can have varying pricing strategies (normal, premium, VIP) that affect ticket prices. - Users can find and book available tickets. - A ticket represents a specific seat to watch a movie in a room at a particular time. - A user can book multiple tickets within the same order. - The total cost for an order is computed by summing the prices of all selected seats.
Non-functional requirements:
- Fast searches for screenings for a smooth user experience. - Basic error handling should prevent booking conflicts such as double-booking the same seat.
Identify Core Objects
To build a modular and maintainable system, we'll define objects that represent distinct entities with clear responsibilities:
- **Movie:** Represents a specific movie shown in cinemas, capturing its essential details like title and duration. - **Cinema:** Models a physical location where movies are screened, containing multiple rooms. - **Room:** Defines a screening space within a cinema, tied to a unique layout of seats. - **Layout:** Organizes the seating arrangement in a room as a grid, managing seat positions. - **Seat:** Represents an individual seat in a room linked to a pricing strategy. - **Screening:** Combines a movie, a room, and a time slot to define when and where a movie is shown. - **Ticket:** Captures a customer's choice of a specific seat for a screening, including its price. - **Order:** Groups multiple tickets purchased together into a single transaction, tracking the total cost.
> **Design Choice:** We separate Movie from Screening to distinguish fixed movie data from dynamic screening schedules. Separating Room from Layout allows rooms to share or customize seating arrangements. We could merge Room and Layout, but this limits flexibility if rooms need varied layouts.
> **Interview Tip:** When presenting objects in an interview, explain why you chose them and how they meet the requirements. Mention alternatives to show you've considered different options and their trade-offs.
Design Class Diagram
### Movie
The Movie class captures essential details about a specific movie — title, genre, and duration — data that remains constant across all screenings. It stands apart from a Screening, which ties a movie to a room and time slot.
> **Design Choice:** Movie is designed as a standalone entity, independent of cinema-specific or scheduling contexts. This allows the same Movie to be reused across multiple cinemas and screenings without data duplication.
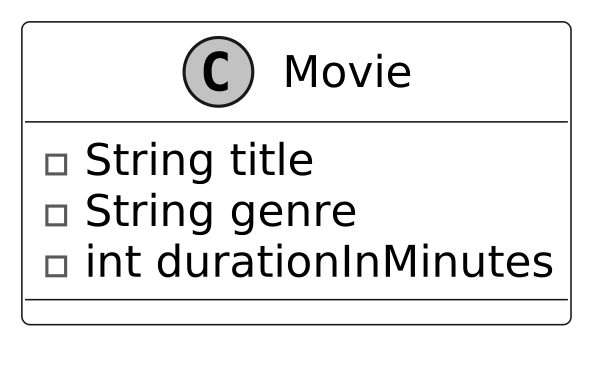
Seat and PricingStrategy Design
The Seat class holds key details about an individual seat, including its unique number. It uses the **Strategy Pattern** through the PricingStrategy interface with concrete classes NormalRate, PremiumRate, and VIPRate.
The strategy pattern benefits the system by: - Promoting extensibility — easy to add new rate classes. - Reducing code redundancy — a single Seat class handles all pricing variations.
> **Alternate Approach:** Embedding pricing logic directly in Seat reduces flexibility if pricing rules change. The strategy pattern, while more complex, supports future extensions.
> **Note:** To learn more about the Strategy pattern, refer to the Parking Lot chapter.
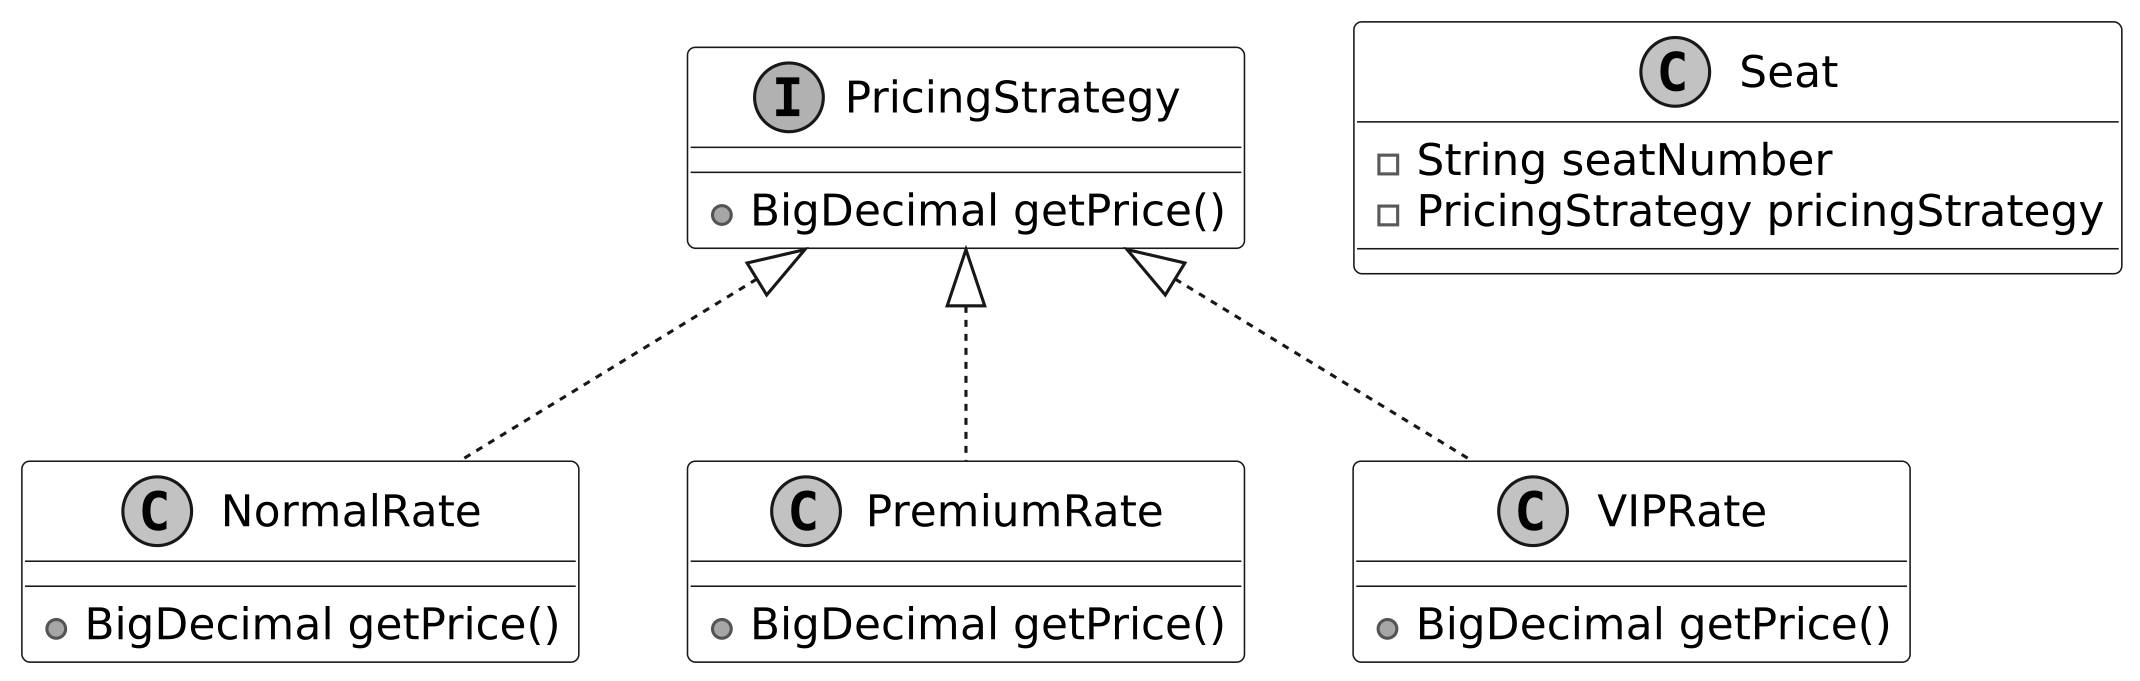
Layout Design
The Layout class organizes seats into a grid structure defined by rows and columns. It uses: - A nested map `Map<Integer, Map<Integer, Seat>>` for efficient seat lookup by position (row → column → seat). - A separate index `Map<String, Seat>` for O(1) lookup by seat number.
> **Alternate Approach:** A 2D array could work for fixed-size rooms but lacks flexibility for irregular layouts or dynamic seat additions. The nested map supports dynamic row creation with `computeIfAbsent`.
> **Interview Tip:** When coding, explain why you chose a data structure (e.g., map vs. array) and how it supports your design goals.
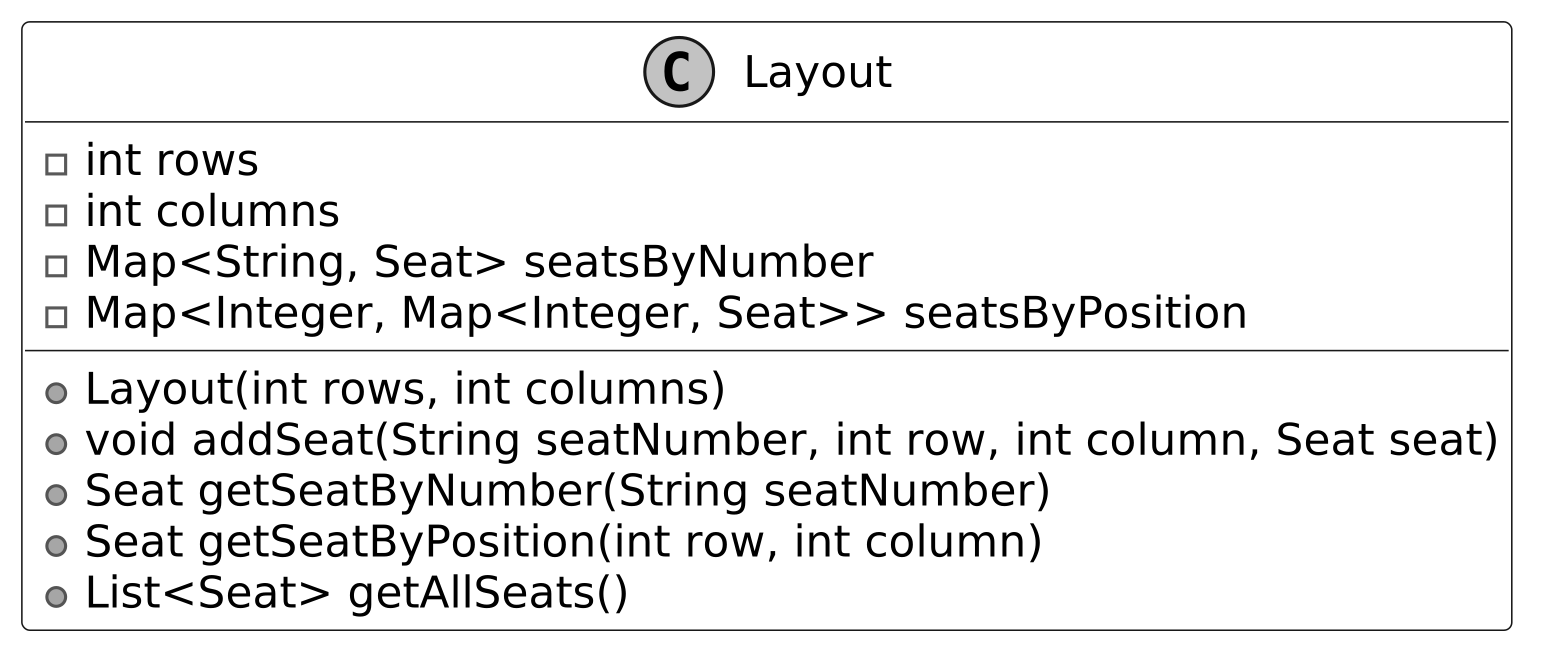
Cinema and Room Design
A Cinema contains multiple Room instances (composition). Each Room includes a Layout to define its seat arrangement. Together they form a clear hierarchy for managing theater spaces.
> **Design Choice:** The compositional relationship between Cinema and Room allows each Room to operate independently with its layout and schedule, while Cinema provides a unified context.
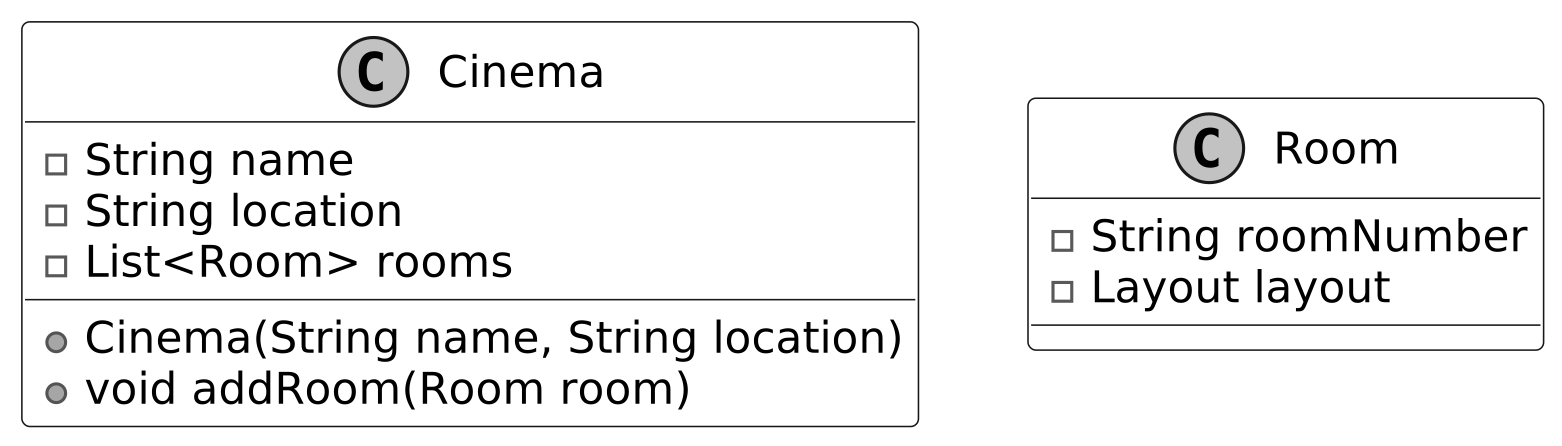
Screening Design
The Screening class defines a specific showing of a movie in a particular room at a scheduled time. It combines a Movie, a Room, and time details into a single entity.
> **Design Choice:** Screening centralizes scheduling details, making it easier to manage showtimes across cinemas and ensuring a clear separation of concerns.
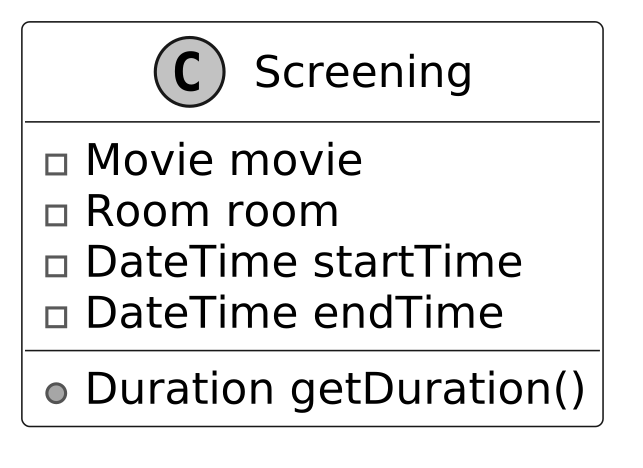
Ticket and Order Design
The **Ticket** class represents a purchased seat for a specific Screening. It includes a price attribute capturing the seat's cost at the time of purchase — ensuring the ticket price remains fixed, independent of future changes to the seat's pricing strategy.
The **Order** class groups multiple tickets into a single transaction, recording the order timestamp and providing the total cost.
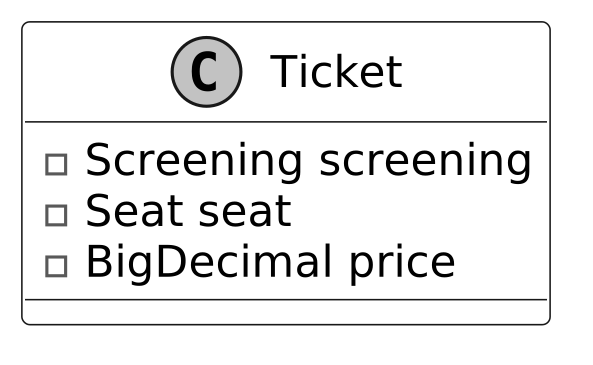
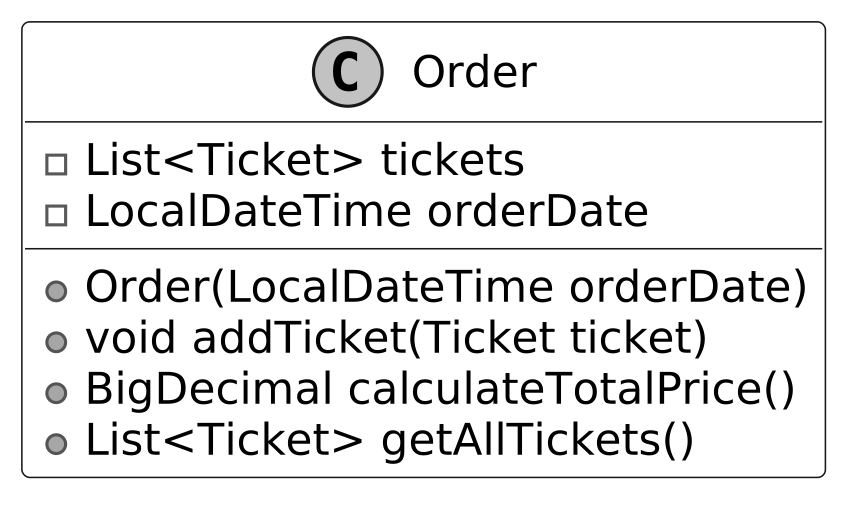
ScreeningManager and MovieBookingSystem Design
**ScreeningManager** is a centralized manager for screenings and tickets. It maintains mappings between Movies and their Screenings, and between Screenings and their Tickets.
> **Design Choice:** An alternative would be to embed these operations in the Cinema class, but that would couple static cinema attributes with scheduling/booking logic, reducing modularity.
**MovieBookingSystem** acts as a **facade**, integrating movies, cinema locations, and ScreeningManager into a cohesive system. It centralizes key operations — adding movies, finding screenings, checking seat availability, and booking tickets.
> **Alternate Approach:** Allowing client code to directly interact with ScreeningManager or Cinema increases coupling and fragility. The facade pattern enhances maintainability.
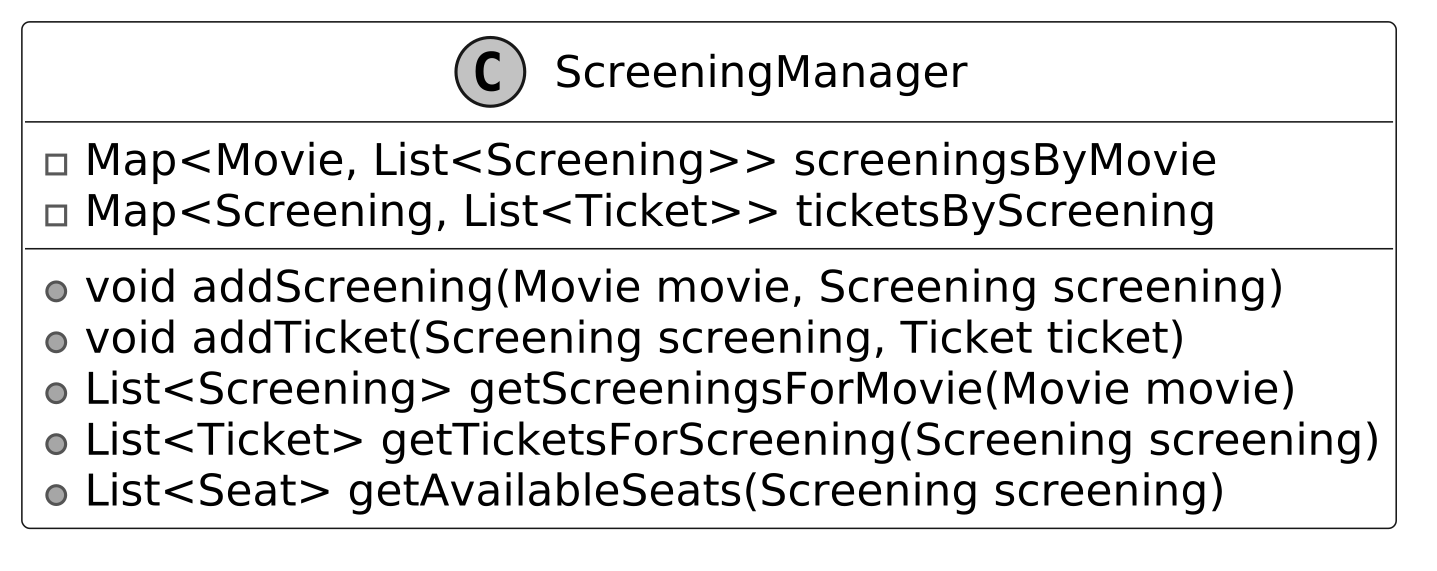
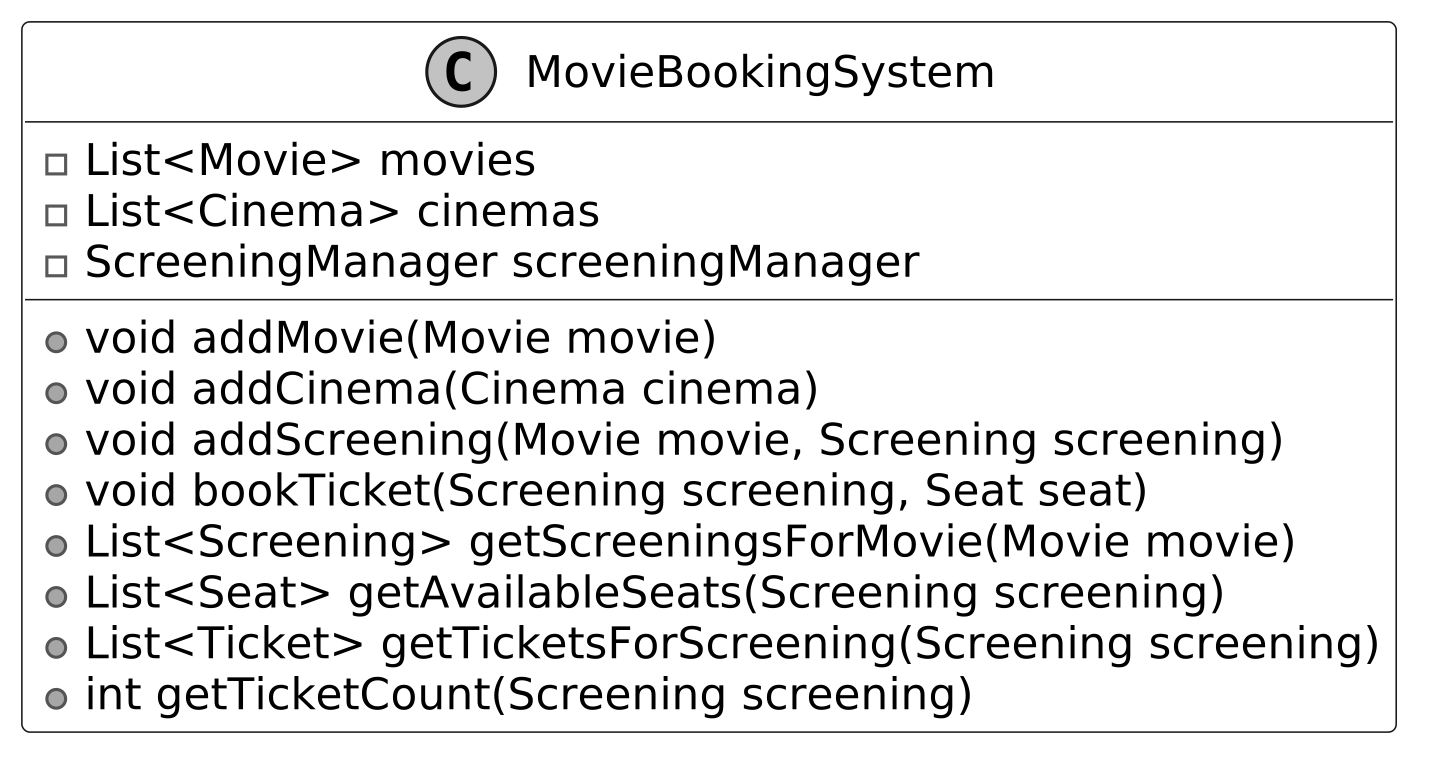
Complete Class Diagram
Below is the complete class diagram of the movie ticket booking system.
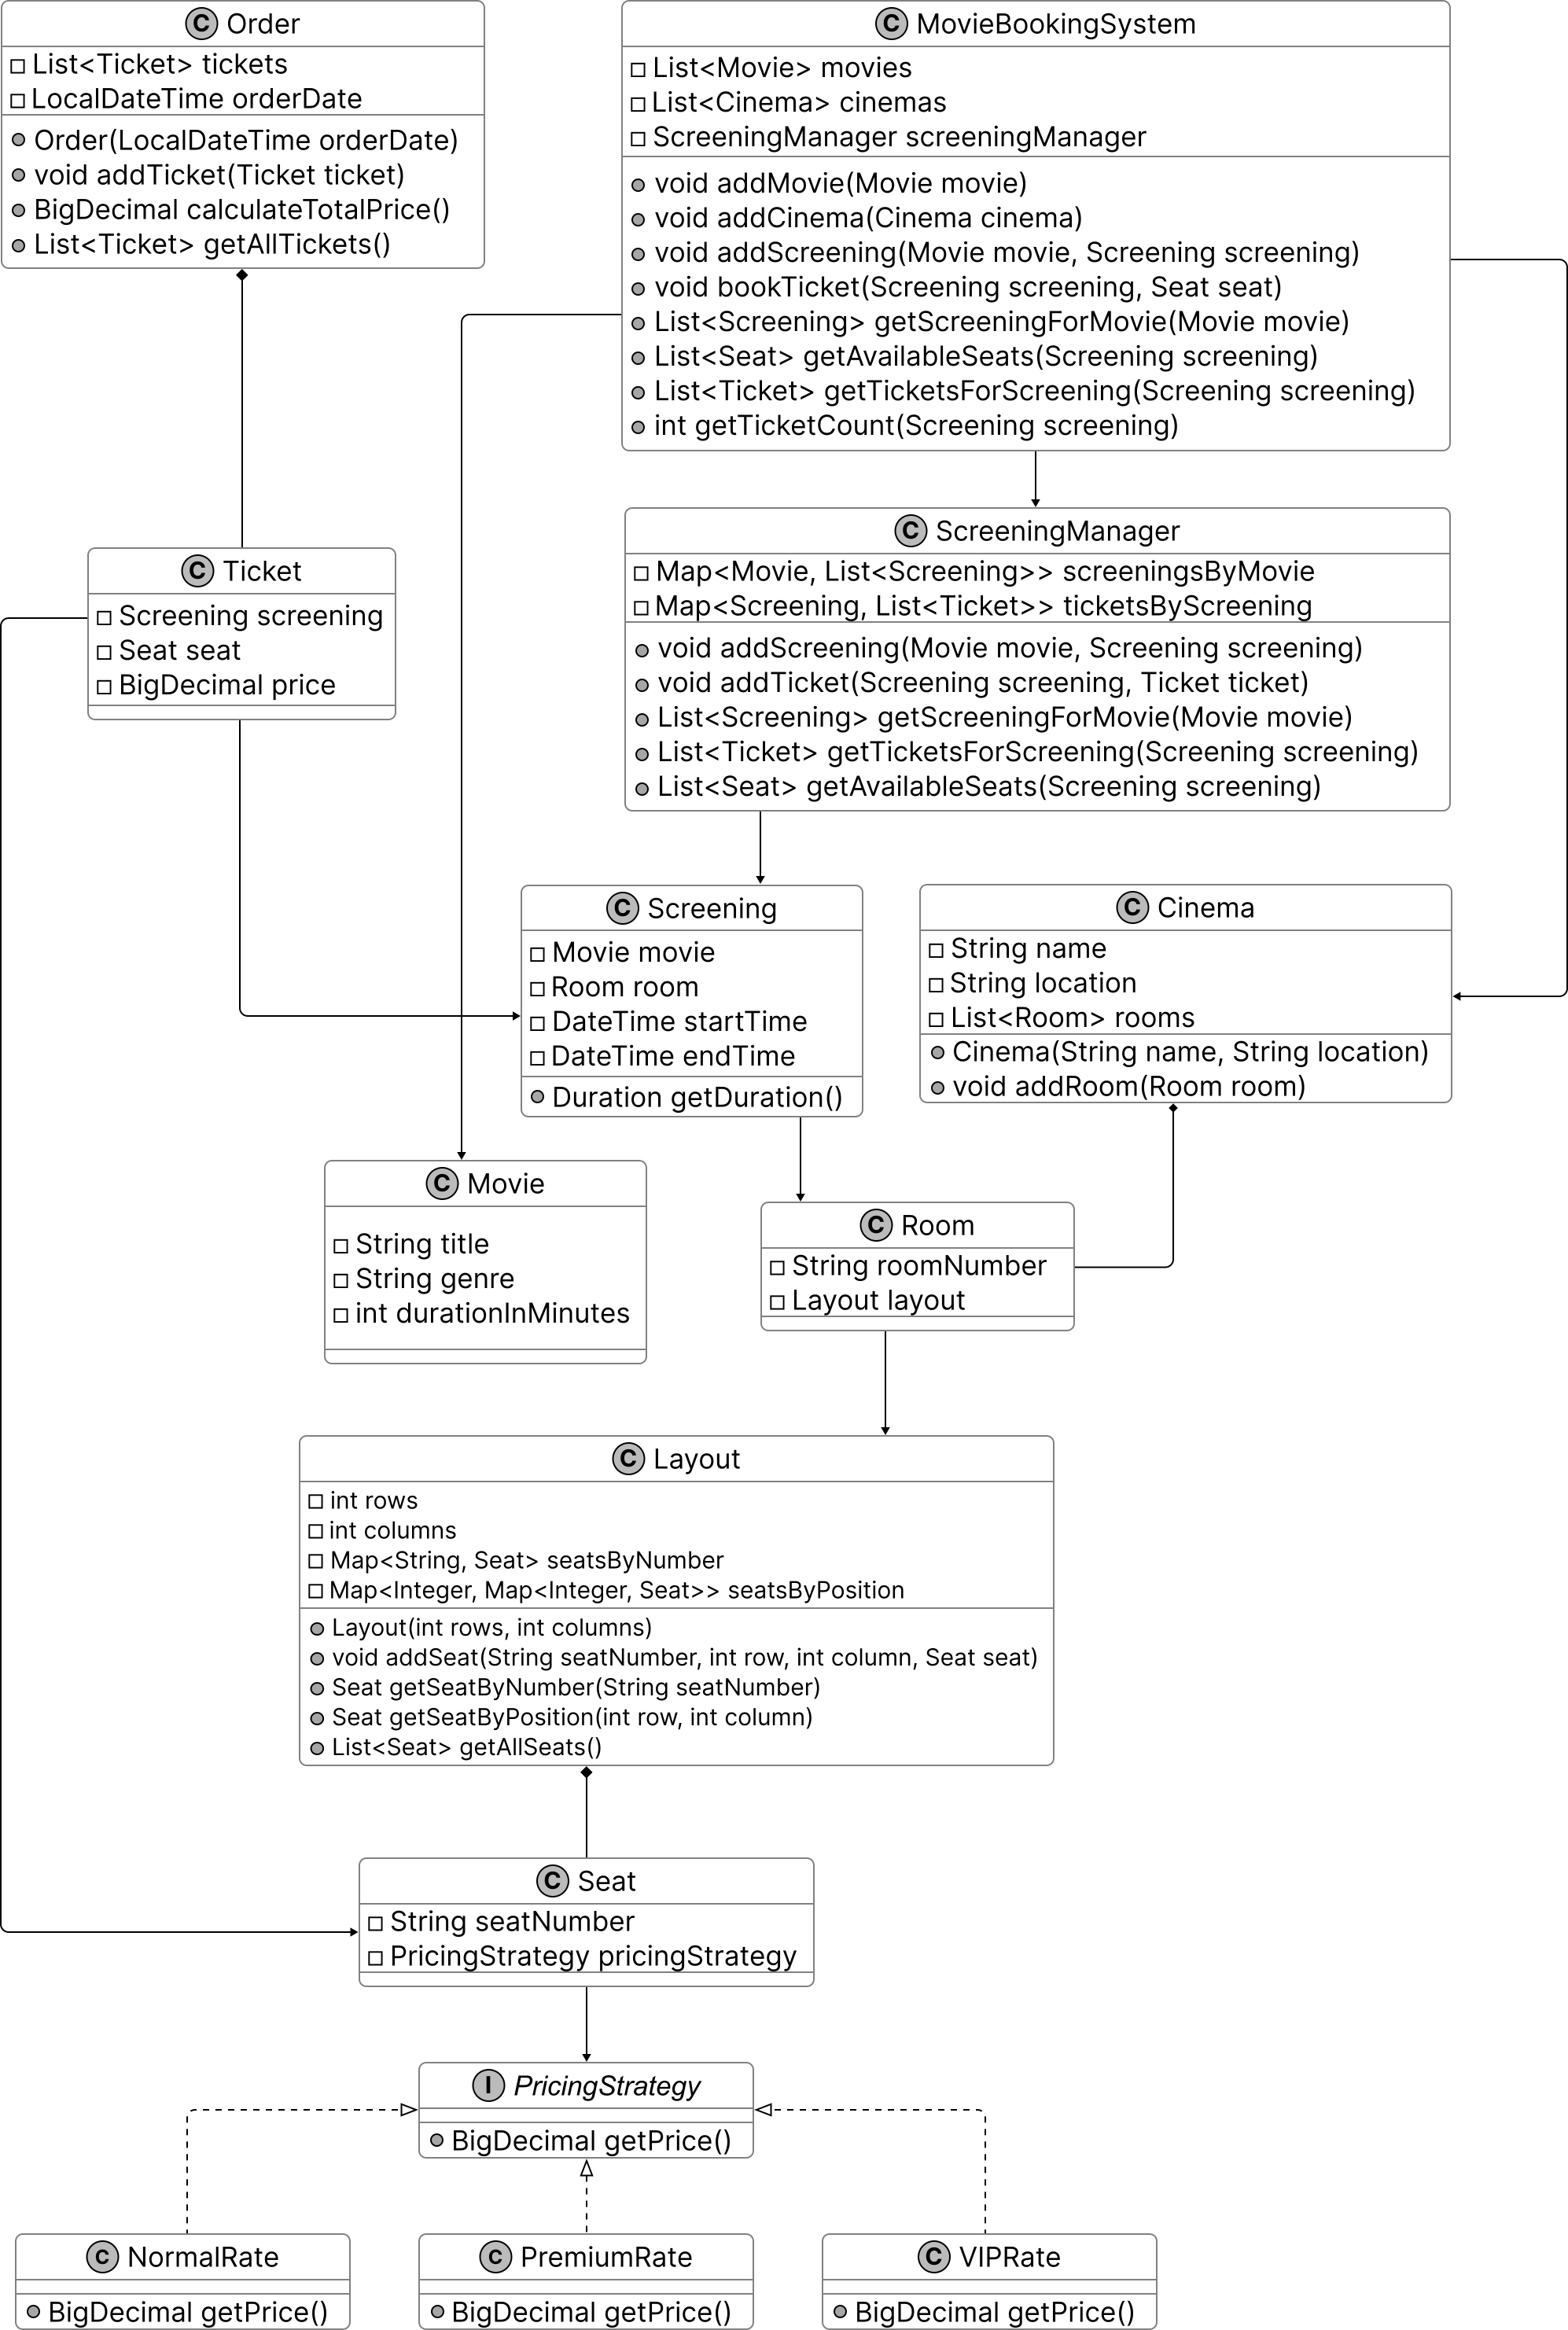
Code - Movie Ticket Booking System
### Movie
```java public class Movie { private final String title; private final String genre; private final int durationInMinutes;
public Movie(String title, String genre, int durationInMinutes) { this.title = title; this.genre = genre; this.durationInMinutes = durationInMinutes; }
public Duration getDuration() { return Duration.ofMinutes(durationInMinutes); } // getter methods omitted for brevity } ```
The `getDuration()` method converts `durationInMinutes` into a Duration object, offering a standardized way to represent the movie's length. The class is immutable — no setter methods — ensuring movie details cannot be altered once created.
### Cinema
```java public class Cinema { private final String name; private final String location; private final List<Room> rooms;
public Cinema(String name, String location) { this.name = name; this.location = location; this.rooms = new ArrayList<>(); }
public void addRoom(Room room) { rooms.add(room); } // getter and setter methods omitted for brevity } ```
### Room
```java public class Room { private final String roomNumber; private final Layout layout;
public Room(String roomNumber, Layout layout) { this.roomNumber = roomNumber; this.layout = layout; } // getter and setter methods omitted for brevity } ```
### Layout
```java // Represents the seating layout of a cinema room. public class Layout { private final int rows; private final int columns; // Maps seat numbers (e.g., "0-0") to Seat objects for direct access private final Map<String, Seat> seatsByNumber; // Nested map for position-based access (row → column → seat) private final Map<Integer, Map<Integer, Seat>> seatsByPosition;
public Layout(int rows, int columns) { this.rows = rows; this.columns = columns; this.seatsByNumber = new HashMap<>(); this.seatsByPosition = new HashMap<>(); initializeLayout(); }
private void initializeLayout() { for (int i = 0; i < rows; i++) { for (int j = 0; j < columns; j++) { String seatNumber = i + "-" + j; addSeat(seatNumber, i, j, new Seat(seatNumber, null)); } } }
public void addSeat(String seatNumber, int row, int column, Seat seat) { seatsByNumber.put(seatNumber, seat); seatsByPosition.computeIfAbsent(row, k -> new HashMap<>()).put(column, seat); }
public Seat getSeatByNumber(String seatNumber) { return seatsByNumber.get(seatNumber); }
public Seat getSeatByPosition(int row, int column) { Map<Integer, Seat> rowSeats = seatsByPosition.get(row); return (rowSeats != null) ? rowSeats.get(column) : null; }
public List<Seat> getAllSeats() { return List.copyOf(seatsByNumber.values()); } } ```
- `addSeat()` uses `computeIfAbsent` to dynamically create rows in the nested map. - `getSeatByNumber()` provides O(1) lookup by seat identifier. - `getSeatByPosition()` accesses seats by row and column coordinates. - `getAllSeats()` returns an unmodifiable list for safe access.
> **Implementation Choice:** Nested `Map<Integer, Map<Integer, Seat>>` for the grid provides O(1) access and supports dynamic row creation. A 2D array is simpler for fixed layouts but lacks flexibility for irregular grids.
### Seat
```java public class Seat { private final String seatNumber; private PricingStrategy pricingStrategy;
public Seat(String seatNumber, PricingStrategy pricingStrategy) { this.seatNumber = seatNumber; this.pricingStrategy = pricingStrategy; } // getter and setter methods omitted for brevity } ```
### PricingStrategy
```java public interface PricingStrategy { BigDecimal getPrice(); }
public class NormalRate implements PricingStrategy { private final BigDecimal price;
public NormalRate(BigDecimal price) { this.price = price; }
@Override public BigDecimal getPrice() { return price; } }
public class PremiumRate implements PricingStrategy { private final BigDecimal price;
public PremiumRate(BigDecimal price) { this.price = price; }
@Override public BigDecimal getPrice() { return price; } }
public class VIPRate implements PricingStrategy { private final BigDecimal price;
public VIPRate(BigDecimal price) { this.price = price; }
@Override public BigDecimal getPrice() { return price; } } ```
New pricing strategies can be added without modifying existing code, adhering to the Open-Closed Principle.
### Screening
```java // Represents a scheduled screening of a movie in a specific cinema room. public class Screening { private final Movie movie; private final Room room; private final LocalDateTime startTime; private final LocalDateTime endTime;
public Screening(Movie movie, Room room, LocalDateTime startTime, LocalDateTime endTime) { this.movie = movie; this.room = room; this.startTime = startTime; this.endTime = endTime; }
public Duration getDuration() { return Duration.between(startTime, endTime); } // getter and setter methods omitted for brevity } ```
### Ticket
```java public class Ticket { private final Screening screening; private final Seat seat; private final BigDecimal price;
public Ticket(Screening screening, Seat seat, BigDecimal price) { this.screening = screening; this.seat = seat; this.price = price; } // getter and setter methods omitted for brevity } ```
### Order
```java public class Order { private final List<Ticket> tickets; private final LocalDateTime orderDate;
public Order(LocalDateTime orderDate) { this.tickets = new ArrayList<>(); this.orderDate = orderDate; }
public void addTicket(Ticket ticket) { tickets.add(ticket); }
public BigDecimal calculateTotalPrice() { return tickets.stream() .map(Ticket::getPrice) .reduce(BigDecimal.ZERO, BigDecimal::add); } // getter and setter methods omitted for brevity } ```
### ScreeningManager
```java // Manages the relationships between movies, screenings, and tickets public class ScreeningManager { private final Map<Movie, List<Screening>> screeningsByMovie; private final Map<Screening, List<Ticket>> ticketsByScreening;
public ScreeningManager() { this.screeningsByMovie = new HashMap<>(); this.ticketsByScreening = new HashMap<>(); }
public void addScreening(Movie movie, Screening screening) { screeningsByMovie.computeIfAbsent(movie, k -> new ArrayList<>()).add(screening); }
public List<Screening> getScreeningsForMovie(Movie movie) { return screeningsByMovie.getOrDefault(movie, new ArrayList<>()); }
public void addTicket(Screening screening, Ticket ticket) { ticketsByScreening.computeIfAbsent(screening, k -> new ArrayList<>()).add(ticket); }
public List<Ticket> getTicketsForScreening(Screening screening) { return ticketsByScreening.getOrDefault(screening, new ArrayList<>()); }
public List<Seat> getAvailableSeats(Screening screening) { List<Seat> allSeats = screening.getRoom().getLayout().getAllSeats(); List<Ticket> bookedTickets = getTicketsForScreening(screening);
List<Seat> availableSeats = new ArrayList<>(allSeats); for (Ticket ticket : bookedTickets) { availableSeats.remove(ticket.getSeat()); } return availableSeats; } } ```
`getAvailableSeats()` retrieves all seats from the room's Layout and removes seats already associated with tickets for the screening.
> **Implementation Choice:** `Map<Movie, List<Screening>>` and `Map<Screening, List<Ticket>>` provide O(1) lookup. A flat List with manual filtering would be O(n).
### MovieBookingSystem
```java // Manages the complete movie booking system operations public class MovieBookingSystem { private final List<Movie> movies; private final List<Cinema> cinemas; private final ScreeningManager screeningManager;
public MovieBookingSystem() { this.movies = new ArrayList<>(); this.cinemas = new ArrayList<>(); this.screeningManager = new ScreeningManager(); }
public void addMovie(Movie movie) { movies.add(movie); }
public void addCinema(Cinema cinema) { cinemas.add(cinema); }
public void addScreening(Movie movie, Screening screening) { screeningManager.addScreening(movie, screening); }
public void bookTicket(Screening screening, Seat seat) { BigDecimal price = seat.getPricingStrategy().getPrice(); Ticket ticket = new Ticket(screening, seat, price); screeningManager.addTicket(screening, ticket); }
public List<Screening> getScreeningsForMovie(Movie movie) { return screeningManager.getScreeningsForMovie(movie); }
public List<Seat> getAvailableSeats(Screening screening) { return screeningManager.getAvailableSeats(screening); }
public int getTicketCount(Screening screening) { return screeningManager.getTicketsForScreening(screening).size(); }
public List<Ticket> getTicketsForScreening(Screening screening) { return screeningManager.getTicketsForScreening(screening); } // getter and setter methods omitted for brevity } ```
Deep Dive Topics
### Handling Concurrent Bookings
In OOD interviews, concurrency is often discussed for systems like movie ticket booking where multiple users interact simultaneously. Always ask the interviewer if concurrency needs to be handled.
**Problem: Race Condition** — Two users attempt to book the same seat at the same time, potentially causing a double-booking.
**Solution: Pessimistic vs Optimistic Locking**
**Pessimistic Locking** acquires an exclusive lock on a seat at the start of the booking process, preventing concurrent access until released. A timeout mechanism (e.g., 30 seconds) automatically releases the lock if the transaction remains incomplete. Best for high-contention scenarios.
```java public class SeatLockManager { private final Map<String, SeatLock> lockedSeats = new ConcurrentHashMap<>(); private final Duration lockDuration;
public SeatLockManager(Duration lockDuration) { this.lockDuration = lockDuration; }
public synchronized boolean lockSeat(Screening screening, Seat seat, String userId) { String lockKey = generateLockKey(screening, seat); cleanupLockIfExpired(lockKey); if (isLocked(screening, seat)) { return false; } SeatLock lock = new SeatLock(userId, LocalDateTime.now().plus(lockDuration)); lockedSeats.put(lockKey, lock); return true; }
public synchronized boolean isLocked(Screening screening, Seat seat) { String lockKey = generateLockKey(screening, seat); cleanupLockIfExpired(lockKey); return lockedSeats.containsKey(lockKey); }
private void cleanupLockIfExpired(String lockKey) { SeatLock lock = lockedSeats.get(lockKey); if (lock != null && lock.isExpired()) { lockedSeats.remove(lockKey); } }
private String generateLockKey(Screening screening, Seat seat) { return screening.getId() + "-" + seat.getSeatNumber(); }
private static class SeatLock { private final String userId; private final LocalDateTime expirationTime;
public SeatLock(String userId, LocalDateTime expirationTime) { this.userId = userId; this.expirationTime = expirationTime; }
public boolean isExpired() { return LocalDateTime.now().isAfter(expirationTime); }
public String getUserId() { return userId; } } } ```
**Optimistic Locking** avoids locking seats during booking, instead verifying seat availability at the final stage. If another user booked the seat in the interim, the transaction fails and the user retries. Best for low-contention scenarios.
```java // Simplified optimistic locking in ScreeningManager public synchronized Ticket bookSeatOptimistically(Screening screening, Seat seat) { // Check if seat is available (optimistic — no persistent lock held) if (isSeatBooked(screening, seat)) { throw new IllegalStateException("Seat is already booked"); }
BigDecimal price = seat.getPricingStrategy().getPrice(); Ticket ticket = new Ticket(screening, seat, price);
// Atomically add to booking system — effectively "reserves" the seat ticketsByScreening.computeIfAbsent(screening, k -> new ArrayList<>()).add(ticket);
return ticket; }
private boolean isSeatBooked(Screening screening, Seat seat) { List<Ticket> tickets = getTicketsForScreening(screening); return tickets.stream().anyMatch(ticket -> ticket.getSeat().equals(seat)); } ```
> **Interview Tip:** Pessimistic locking is often preferred for popular screenings with high contention, while optimistic locking suits simpler cases with fewer conflicts. Ask the interviewer which approach aligns with their expectations.
Wrap Up
In this chapter, we gathered requirements for the Movie Ticket Booking System, identified core objects, designed the class structure, and implemented key components.
A key takeaway is the significance of modularity and adherence to the Single Responsibility Principle. Each component — Movie, ScreeningManager, Seat, and Order — handles a distinct responsibility, ensuring the system remains maintainable and adaptable.
Our design choices — separating Movie and Screening, using a strategy pattern for pricing — prioritize flexibility and scalability. An alternative like merging Screening and Ticket might simplify the model but could complicate individual seat management.
Design a Unix File Search System
In this chapter, we will explore the design of a Unix File Search system. The goal is to design classes that represent abstractions of the key entities in a file search system, such as directories, files, and filter criteria. We'll aim to create a clear and functional structure that captures the essential interactions between these components, ensuring the search system is intuitive and scalable.
Requirements Gathering
Here is an example of a typical prompt an interviewer might give:
> **Interviewer:** "Imagine you're a developer trying to find specific files on a Unix system, like files owned by a user, or text files matching a pattern, buried deep in a directory structure. You run a search command, specify your criteria, and the system returns matching files quickly. Behind the scenes, it's recursively traversing directories, evaluating file attributes, and applying your filters efficiently. Let's design a Unix File Search system that handles this process."
---
> **Candidate:** What attributes does the find command use to search for files?
> **Interviewer:** It could be based on criteria like size, file type, filename, and owner.
> **Candidate:** Does it need to handle directories?
> **Interviewer:** Yes, directories are considered as files too, with a distinct file type.
> **Candidate:** What types of comparisons does the command support?
> **Interviewer:** That depends on the type of attribute. For strings, we support 'equals' and 'regex match'. For numbers, we support 'greater than', 'equals', and 'less than'.
> **Candidate:** Can we combine multiple criteria, even on the same attribute?
> **Interviewer:** Yes, with multiple criteria, using 'and', 'or', and 'not' conditions.
> **Candidate:** I assume we're designing a system to search a directory and its sub-directories, returning files that match the given conditions.
> **Interviewer:** Yes, that's a fair assumption.
**Constructing concrete examples**
With the requirements in hand, let's see them in action:
- **Simple Search:** Find files recursively within `/` where `size > 10`. - **Complex Search:** Find files recursively within `/` where `((size > 10 and size < 1000 and owner = "alice") or (size > 1000 and !(filename matches /prefix.*/)))`.
**Requirements**
Functional requirements:
- The search system can search for files based on attributes such as size, type, filename, and owner. - The search system supports comparison types: 'equals' and 'regex match' for strings; 'greater than', 'equals', and 'less than' for numbers. - The system can combine multiple search criteria using logical operators (and, or, not). - The file search system can perform recursive searches within directories. - The search system can apply search criteria to directories as well as files.
Non-functional requirements:
- **Scalability:** Efficiently handle large directory trees using resource-efficient traversal strategies. - **Extensibility:** Support adding new attributes and comparison operators without altering core logic. - **Separation of concerns:** Keep traversal logic separate from filtering logic for a modular design.
Identify Core Objects
Here are the core objects we'll need:
- **FileSearch:** The central entity managing the search process. Recursively traverses the filesystem from a starting File and returns matches based on a FileSearchCriteria object. - **File:** Models a file or directory, storing attributes like size, type, filename, and owner. Supports hierarchical structure with entries for subdirectories. - **FileSearchCriteria:** Encapsulates a search condition and determines whether a File matches it by delegating to a Predicate. Decouples search execution from condition evaluation. - **Predicate:** An interface defining the contract for evaluating whether a File matches a condition. Supports both simple checks (`size > 10`) and composite conditions (AND, OR, NOT). - **SimplePredicate:** Implements Predicate to compare one file attribute against a value with an operator. - **CompositePredicate:** Extends Predicate for combining conditions with AndPredicate, OrPredicate, and NotPredicate. - **ComparisonOperator:** An interface defining how attribute values are compared, with implementations: EqualsOperator, RegexMatchOperator, GreaterThanOperator, and LessThanOperator.
> **Design Choice:** We could merge FileSearchCriteria and Predicate into a single class, but this reduces modularity as the search logic would be tightly coupled to condition evaluation.
> **Design Choice:** The File object represents files and directories as a single entity, aligning with the Unix principle that treats everything as a file for uniform handling.
Design Class Diagram
### File
Rather than relying on Java's `java.io.File`, we define a custom File class as the core entity. It's paired with a `FileAttribute` enum for attributes used in search conditions.
> **Design Choice:** `FileAttribute` is defined as an enum to provide a fixed, type-safe set of attributes (size, owner, etc.), preventing runtime errors from invalid attribute names. Adding a new attribute like modification time requires only extending the enum.
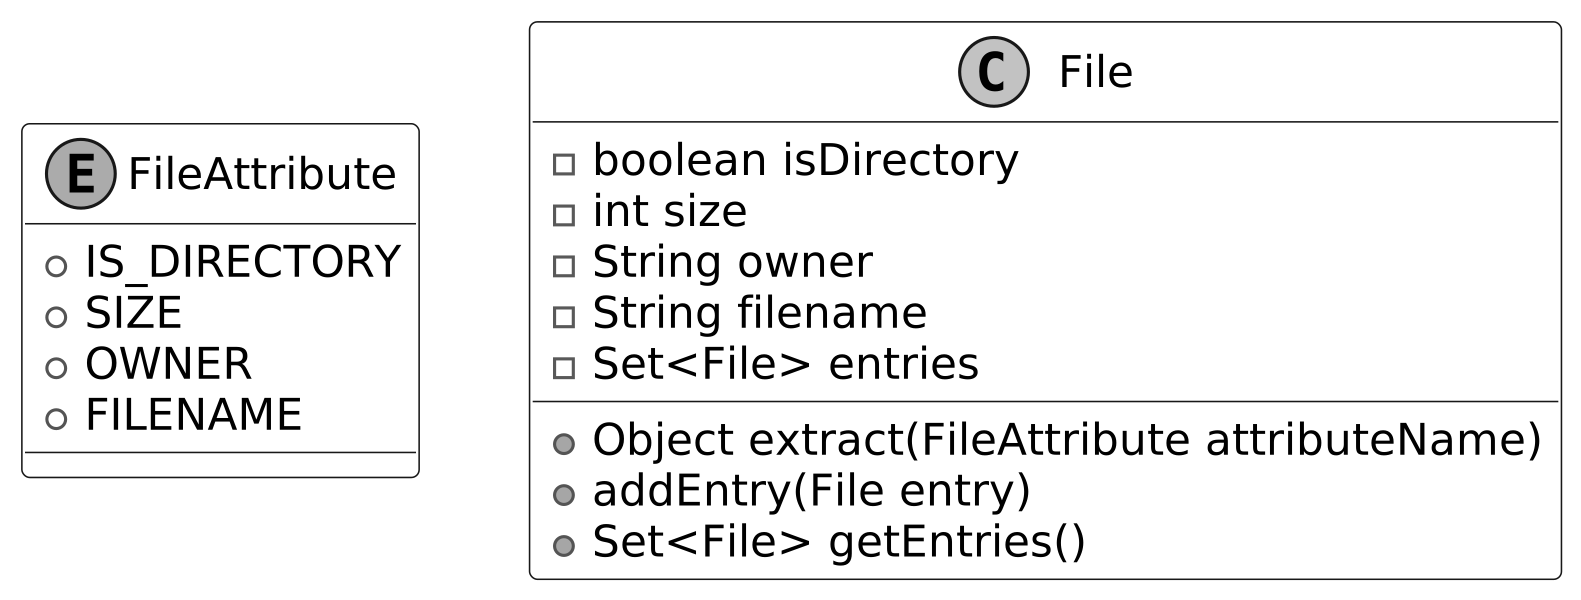
FileSearch Design
The FileSearch class traverses the file system from a given File, using a FileSearchCriteria object to select matching files. By separating traversal from filtering logic, the design remains modular and easy to extend.
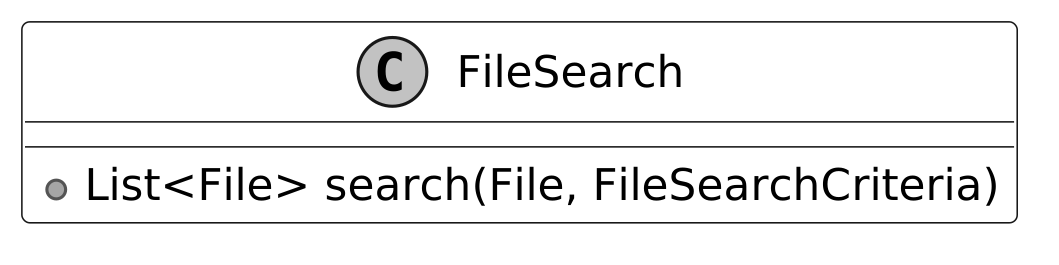
FileSearchCriteria Design
FileSearchCriteria acts as a bridge between FileSearch and the Predicate. It tells FileSearch what qualifies as a match by delegating to a Predicate.
> **Design Choice:** FileSearchCriteria delegates to Predicate to check if a file meets search conditions without handling all logic itself. This keeps responsibilities clean — FileSearch handles traversal, FileSearchCriteria holds the criteria, Predicate evaluates the conditions.
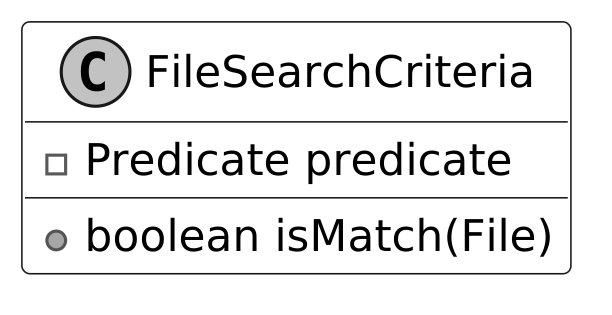
Predicate and SimplePredicate Design
The Predicate interface defines a single `isMatch(File)` method. For straightforward conditions, SimplePredicate evaluates a single file attribute against a value using a ComparisonOperator — e.g., "is size > 10?" or "is owner 'bob'?"
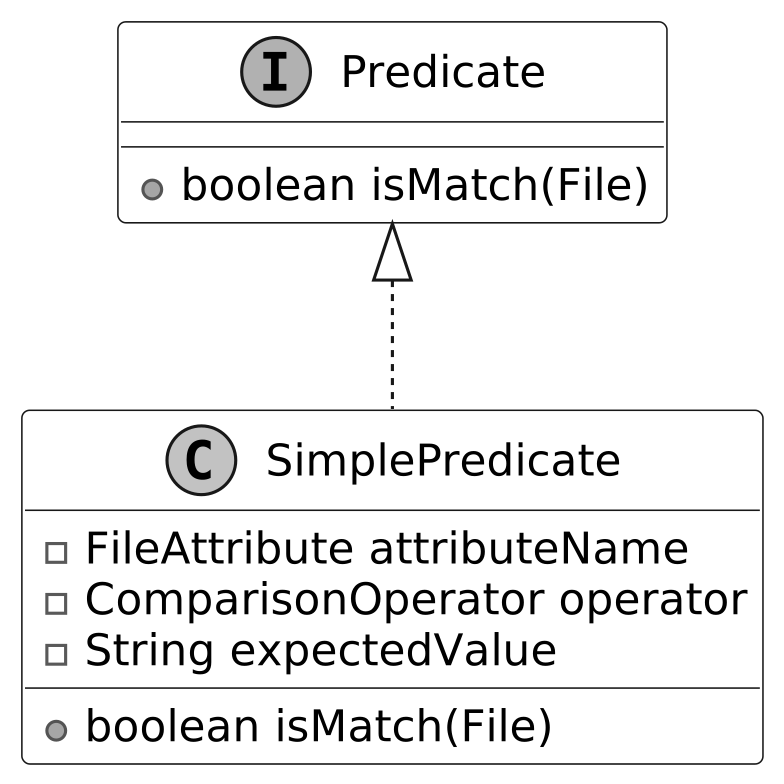
ComparisonOperator Design
The ComparisonOperator interface defines a contract for comparing a file's attribute value to an expected value. We use generics (`<T>`) to enforce type safety. Concrete implementations:
- `EqualsOperator` — confirms if two values are the same. - `GreaterThanOperator` — verifies if one value is larger. - `LessThanOperator` — ensures one value is smaller. - `RegexMatchOperator` — evaluates whether a string matches a regex pattern.
> **Alternative:** Using strings like `"equals"` or `">"` shifts validation to runtime and risks exceptions. Using enums provides compile-time safety but requires modifying the enum to add a new operator, whereas the interface-based approach allows adding a new class without touching existing code.
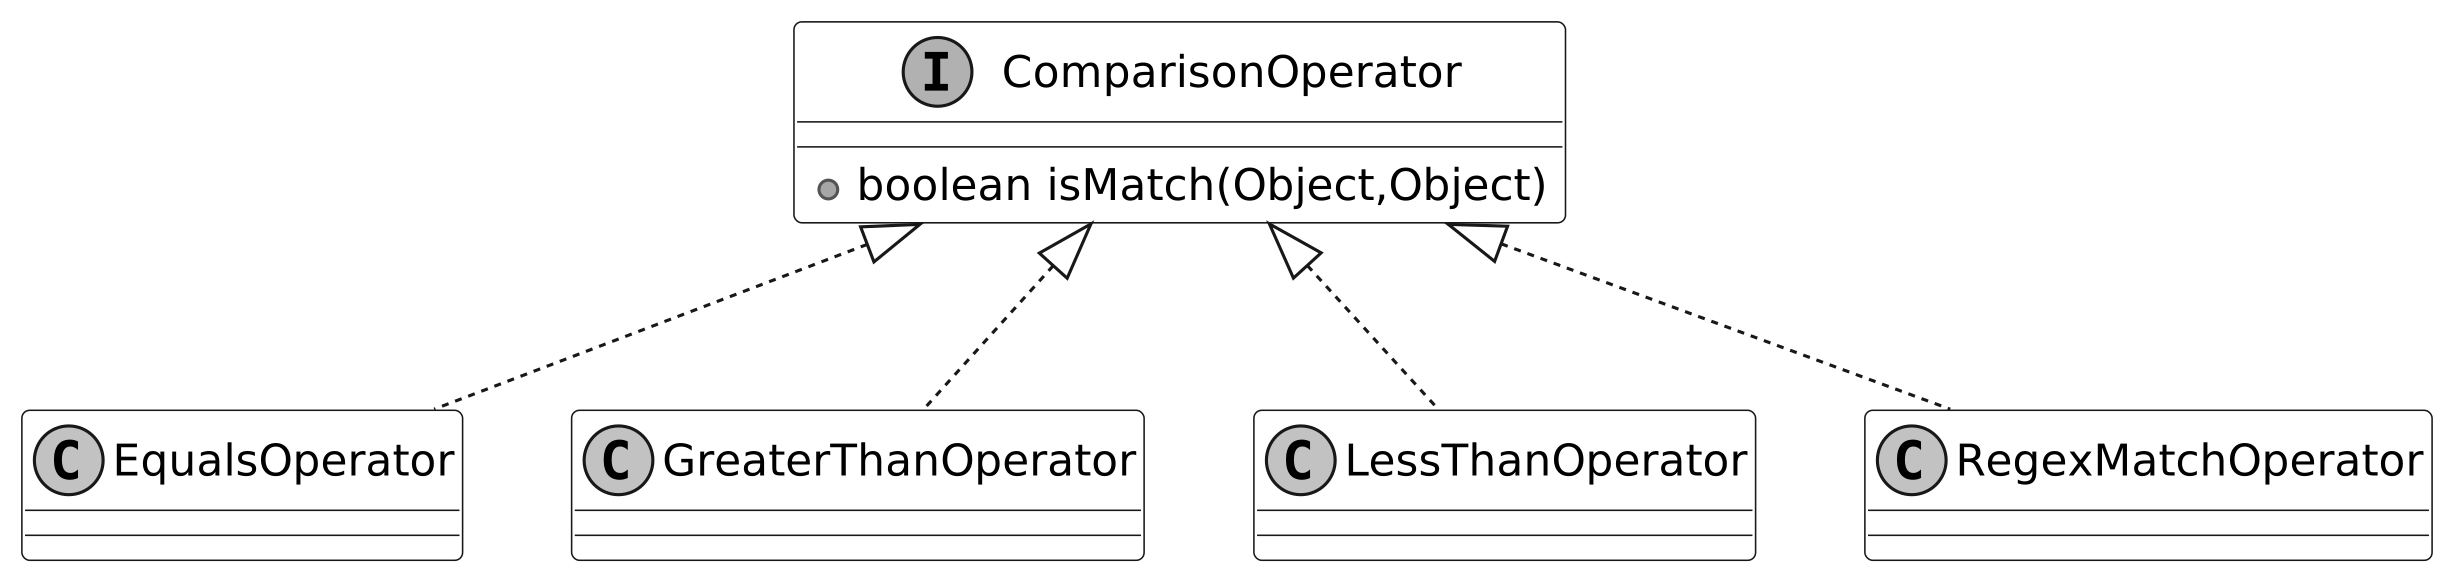
Composite Predicate Design
Real-world searches often combine multiple conditions. We use the **Composite design pattern** to build complex predicates from simpler ones.
> **Note:** To learn more about the Composite Pattern, refer to the Further Reading section.
Consider: `((size > 10 and size < 1000 and owner = "alice") or (size > 1000 and !(filename matches /prefix.*/)))`
This maps to a tree: - `A = size > 10`, `B = size < 1000`, `C = owner = "alice"`, `D = size > 1000`, `E = filename matches prefix.*` - Result: `((A and B and C) or (D and !(E)))`
The tree is evaluated recursively:
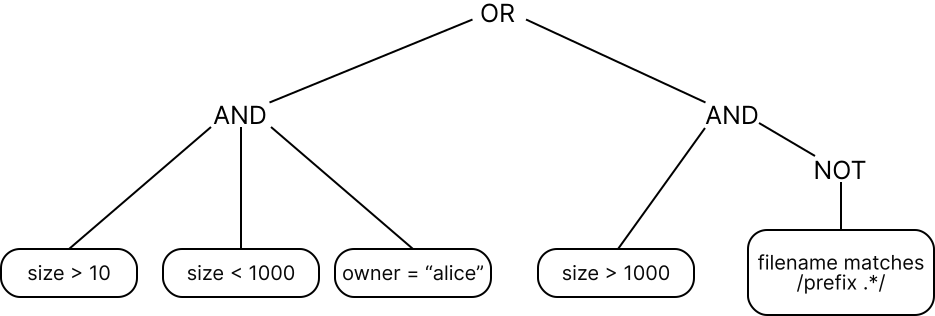
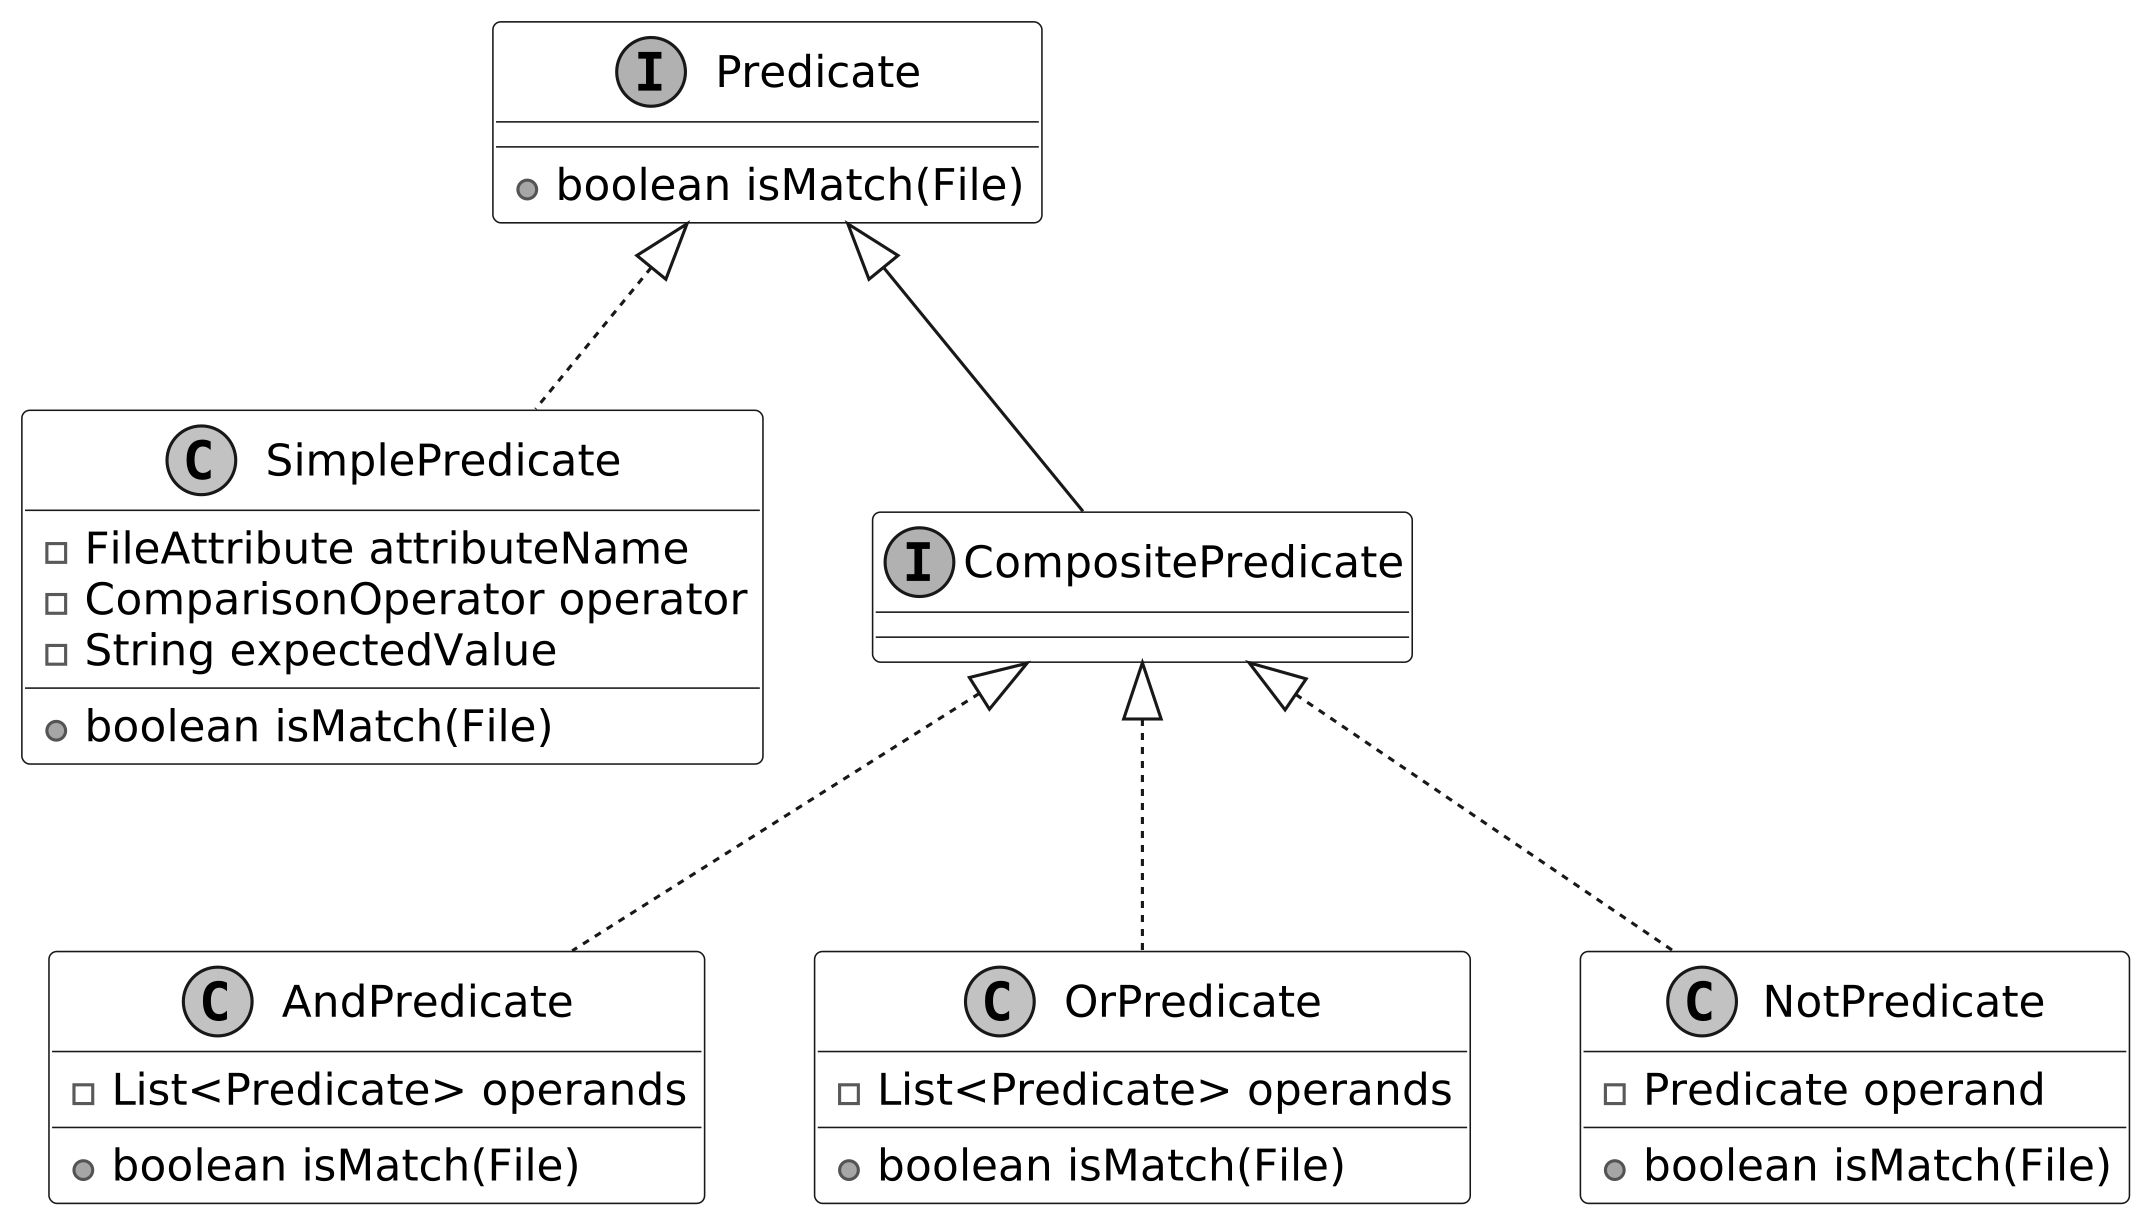
Complete Class Diagram
Having built all classes from the hierarchical File structure to the intricate predicate logic, here is the complete system in a UML class diagram.
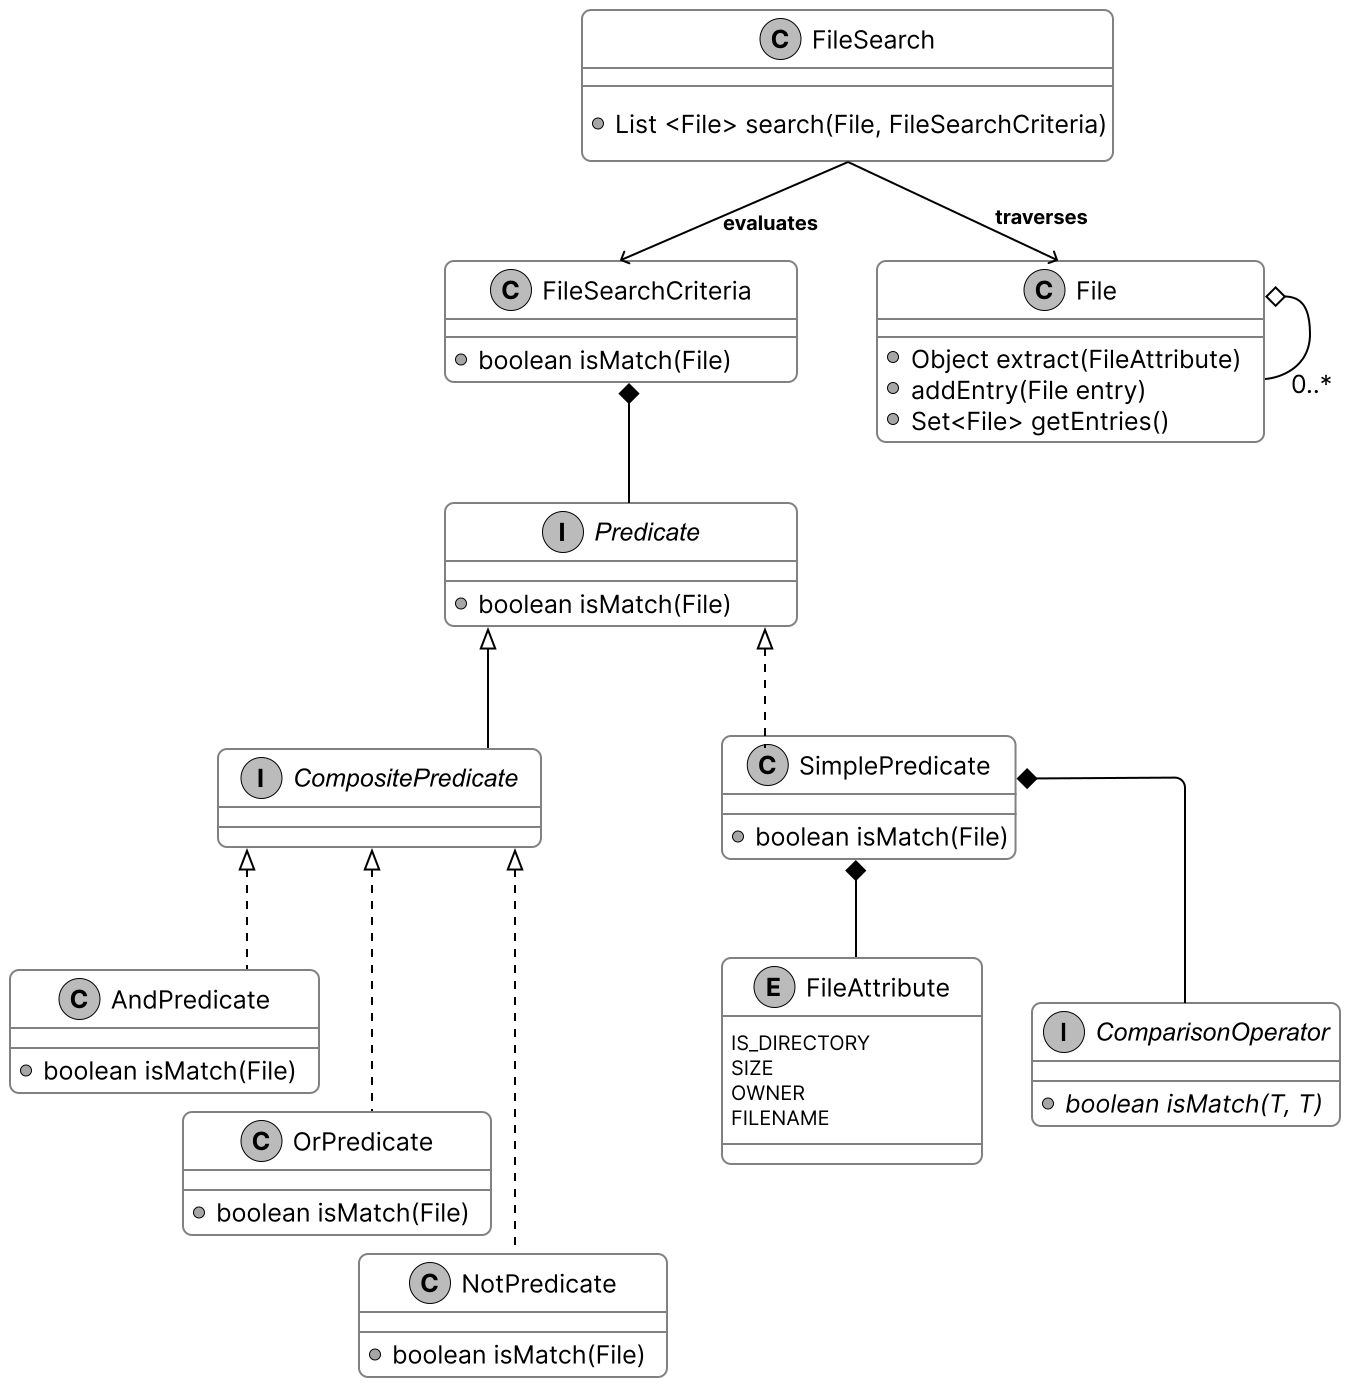
Code - Unix File Search
### File
```java // Represents a file or directory in the file system public class File { private final boolean isDirectory; private final int size; private final String owner; private final String filename; private final Set<File> entries = new HashSet<>();
public File(final boolean isDirectory, final int size, final String owner, final String filename) { this.isDirectory = isDirectory; this.size = size; this.owner = owner; this.filename = filename; }
public Object extract(final FileAttribute attributeName) { switch (attributeName) { case SIZE -> { return size; } case OWNER -> { return owner; } case IS_DIRECTORY -> { return isDirectory; } case FILENAME -> { return filename; } } throw new IllegalArgumentException("invalid filter criteria type"); }
public void addEntry(final File entry) { entries.add(entry); } // getter methods omitted for brevity }
public enum FileAttribute { IS_DIRECTORY, SIZE, OWNER, FILENAME } ```
- `extract()` retrieves a specific attribute's value by mapping a FileAttribute enum constant to its field, used by SimplePredicate to evaluate conditions. - `addEntry()` builds the directory hierarchy for recursive traversal.
### Predicate
```java // Base interface for all file search predicates public interface Predicate { boolean isMatch(final File inputFile); } ```
### ComparisonOperator
```java // Base interface for all comparison operations public interface ComparisonOperator<T> { boolean isMatch(final T attributeValue, final T expectedValue); }
public class EqualsOperator<T> implements ComparisonOperator<T> { @Override public boolean isMatch(final T attributeValue, final T expectedValue) { return Objects.equals(attributeValue, expectedValue); } }
class GreaterThanOperator<T extends Number> implements ComparisonOperator<T> { @Override public boolean isMatch(final T attributeValue, final T expectedValue) { return Double.compare(attributeValue.doubleValue(), expectedValue.doubleValue()) > 0; } }
class LessThanOperator<T extends Number> implements ComparisonOperator<T> { @Override public boolean isMatch(final T attributeValue, final T expectedValue) { return Double.compare(attributeValue.doubleValue(), expectedValue.doubleValue()) < 0; } }
public class RegexMatchOperator<T extends String> implements ComparisonOperator<T> { @Override public boolean isMatch(final T attributeValue, final T expectedValue) { final Pattern p = Pattern.compile(expectedValue); return p.matcher(attributeValue).matches(); } } ```
> **Implementation Choice:** Generics (`<T>`) enforce type safety at compile time — numeric attributes (Double) are compared only with numbers, string attributes only with strings.
### SimplePredicate
```java // A basic predicate that compares a file attribute with an expected value public class SimplePredicate<T> implements Predicate { private final FileAttribute attributeName; private final ComparisonOperator<T> operator; T expectedValue;
public SimplePredicate(final FileAttribute attributeName, final ComparisonOperator<T> operator, final T expectedValue) { this.attributeName = attributeName; this.operator = operator; this.expectedValue = expectedValue; }
@Override public boolean isMatch(final File inputFile) { Object actualValue = inputFile.extract(attributeName); if (expectedValue.getClass().isInstance(actualValue)) { return operator.isMatch((T) actualValue, expectedValue); } else { return false; } } } ```
### CompositePredicate
```java public interface CompositePredicate extends Predicate { // Marker interface: identifies predicates that combine multiple other predicates }
public class AndPredicate implements CompositePredicate { private final List<Predicate> operands;
public AndPredicate(final List<Predicate> operands) { this.operands = operands; }
@Override public boolean isMatch(final File inputFile) { return operands.stream().allMatch(predicate -> predicate.isMatch(inputFile)); } }
public class OrPredicate implements CompositePredicate { private final List<Predicate> operands;
public OrPredicate(final List<Predicate> operands) { this.operands = operands; }
@Override public boolean isMatch(final File inputFile) { return operands.stream().anyMatch(predicate -> predicate.isMatch(inputFile)); } }
public class NotPredicate implements CompositePredicate { private final Predicate operand;
public NotPredicate(final Predicate operand) { this.operand = operand; }
@Override public boolean isMatch(final File inputFile) { return !operand.isMatch(inputFile); } } ```
- `AndPredicate` and `OrPredicate` use `List<Predicate>` to support any number of conditions. - `NotPredicate` wraps a single predicate and inverts its result.
### FileSearchCriteria
```java // Wrapper class that encapsulates a search condition for file matching public class FileSearchCriteria { private final Predicate predicate;
public FileSearchCriteria(final Predicate predicate) { this.predicate = predicate; }
public boolean isMatch(final File inputFile) { return predicate.isMatch(inputFile); } } ```
> **Implementation Choice:** Wrapping Predicate in FileSearchCriteria keeps FileSearch focused on filesystem traversal and isolates condition evaluation to a separate, reusable layer.
### FileSearch
```java // Main class responsible for performing file system searches public class FileSearch { public List<File> search(final File root, final FileSearchCriteria criteria) { final List<File> result = new ArrayList<>(); final ArrayDeque<File> recursionStack = new ArrayDeque<>(); recursionStack.add(root);
while (!recursionStack.isEmpty()) { File next = recursionStack.pop(); if (criteria.isMatch(next)) { result.add(next); } for (File entry : next.getEntries()) { recursionStack.push(entry); } } return result; } } ```
> **Implementation Choice:** Stack-based traversal (`ArrayDeque`) prevents stack overflow in deep filesystems. Recursive calls would work for smaller structures but risk failure on deeply nested directories.
Deep Dive Topic
### File Search Test
Here's a test case for the condition "non-directories owned by 'ge.*'":
```java public class FileSearchTest { @Test public void testFileSearch() { final File root = new File(true, 0, "adam", "root"); final File a = new File(false, 2000, "adam", "a"); final File b = new File(false, 3000, "george", "b");
root.addEntry(a); root.addEntry(b);
// Search criteria: non-directory files owned by users matching "ge.*" final FileSearchCriteria criteria = new FileSearchCriteria( new AndPredicate(List.of( new SimplePredicate<>( FileAttribute.IS_DIRECTORY, new EqualsOperator<>(), false), new SimplePredicate<>( FileAttribute.OWNER, new RegexMatchOperator<>(), "ge.*"))));
final FileSearch fileSearch = new FileSearch(); final List<File> result = fileSearch.search(root, criteria);
assertEquals(1, result.size()); assertEquals("b", result.get(0).getFilename()); } } ```
This test sets up a root directory with two files (owned by 'adam' and 'george'), and verifies that only file 'b' (owned by 'george') matches the `AndPredicate` combining IS_DIRECTORY=false and OWNER matching 'ge.*'.
Wrap Up
With the UNIX file search system fully implemented and tested, the key takeaways are:
- Clear division of responsibilities among File, FileSearch, FileSearchCriteria, and Predicate. - Separating FileSearch from FileSearchCriteria and using generics in ComparisonOperator improves scalability and type safety. - We could merge FileSearchCriteria with Predicate for a tighter design, but this would blur their distinct roles and make it harder to swap condition logic without affecting traversal.
Further Reading: Composite Design Pattern
The Composite pattern lets you organize objects into tree structures and handle them as if they were individual objects.
**Problem:** You have Files and Folders. A Folder can contain Files and smaller Folders. How do you find all items matching a condition like `size > 10` across this entire structure?
**Solution:** Work with Files and Folders through a common interface that declares a condition-checking method: - For a File: directly checks if it matches the condition. - For a Folder: examines each contained item, recursively applying the process to nested folders.
**When to use:** - When you need to build a tree-like object structure. - When you want client code to handle both simple and complex elements uniformly.
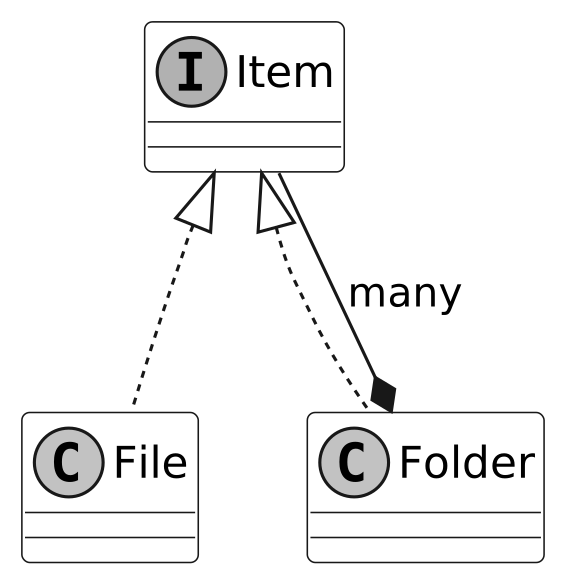
Design a Vending Machine
In this chapter, we will explore the design of a vending machine system that allows users to select and purchase products, dispense items, manage inventory, and process payments. Although real-world vending machines involve hardware components, like coin dispensers, card readers, and touchscreens, we'll focus on modeling the system's states, data, and core functionality.
Requirements Gathering
Here is an example of a typical prompt an interviewer might give:
> **Interviewer:** "Imagine you're at a vending machine, craving a snack. You insert some cash, select your favorite item, and within seconds, it drops into the tray. The machine also gives you the right change if needed. Behind the scenes, the system is working smoothly to track inventory, handle payments, and make sure everything runs efficiently. Now, let's design a vending machine that does all this."
---
> **Candidate:** Does the vending machine support different types of products?
> **Interviewer:** Yes, the vending machine supports a variety of products, such as snacks, beverages, and other items.
> **Candidate:** How are products organized within the vending machine?
> **Interviewer:** Products are placed in specific racks, with each rack holding only one type of product at a time. Each product has a unique product code and a price tag.
> **Candidate:** How will payments be processed in the vending machine?
> **Interviewer:** The vending machine should only accept cash payments and calculate change if needed.
> **Candidate:** How does the vending machine handle cases where a user selects a product that is out of stock?
> **Interviewer:** The system should check if a product is available. If not, it should display an error message.
> **Candidate:** If a user inserts money less than the product's full price, can they add more incrementally?
> **Interviewer:** For this design, let's assume users insert the full amount in one step. If insufficient, the vending machine should return the money and display an error.
> **Candidate:** Are there any restrictions on who can access the vending machine?
> **Interviewer:** Access is available to users and admins with different privileges. Users can select and purchase products. Admins can add or remove products.
> **Candidate:** Are there any security or inventory tracking requirements?
> **Interviewer:** Yes. The vending machine should track inventory, and only the admin can add or remove products.
**Requirements**
Functional requirements:
- **Product selection:** Users can select from products, each with a unique product code, description, and price tag. - **Inventory management:** Products are stored in racks. The system tracks inventory level for each product in its rack. - **Payment processing:** The system only accepts cash payments and can calculate change when needed.
Non-functional requirements:
- Intuitive UI with clear error messages to guide users. - Security: only admins can add, remove, or update products. Cash transactions must be protected against tampering.
Use Case Diagram
A use case diagram illustrates how actors interact with the vending machine system.
**User actor:** - Insert Money, Select Product, Receive Product, Receive Change
**Admin actor:** - Add Product, Remove Product, Update Inventory
**System actor:** - Process Payment, Dispense Product, Check Inventory, Display Message
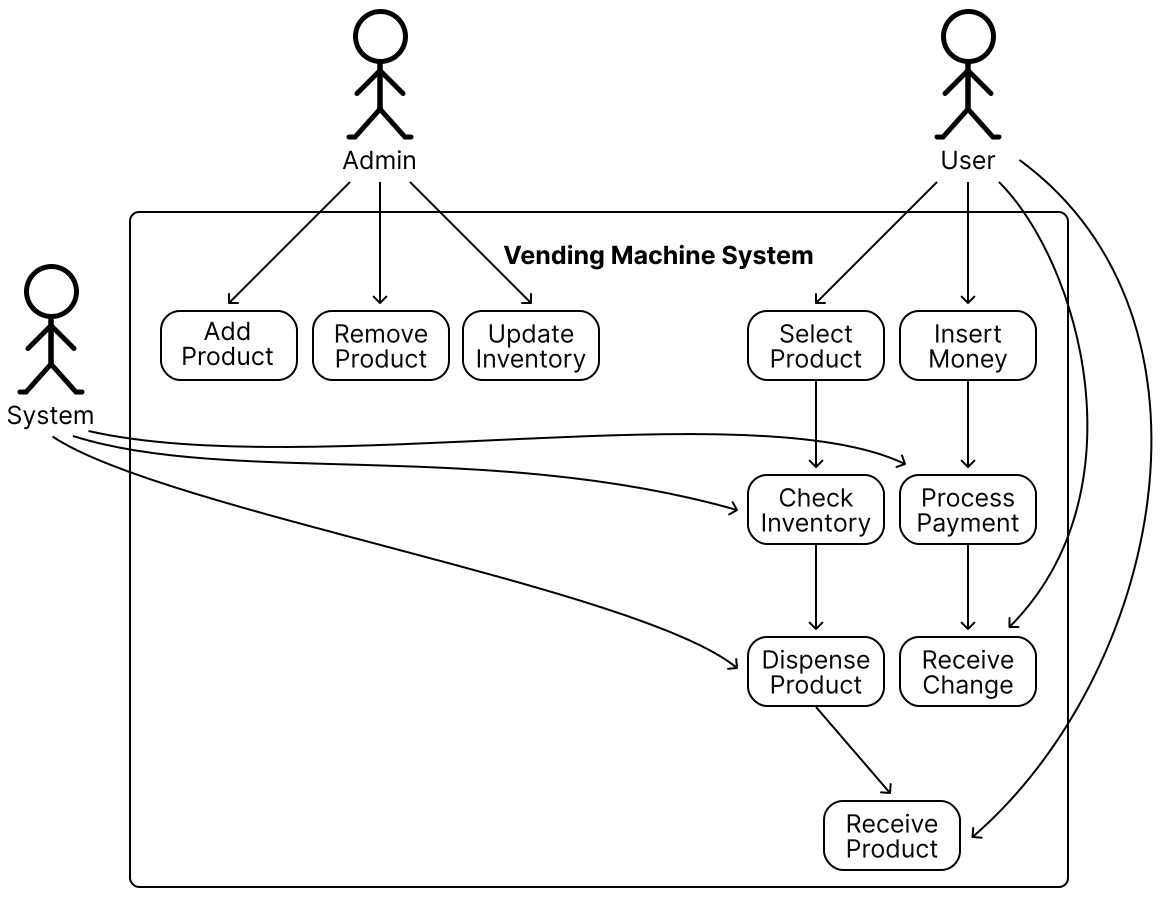
Identify Core Objects
- **VendingMachine:** The central entity that coordinates operations and serves as the main entry point. Uses the Facade pattern to prevent it from becoming a god object. - **Product:** Represents items stored in the vending machine — identifier, price, and description. Products are linked to the racks where they are stored. - **Rack:** A designated slot holding a single product type with multiple units. Includes the dispenser hardware. - **InventoryManager:** Tracks inventory level within the vending machine. - **PaymentProcessor:** Interacts with coin dispensers to process payment, tracks balance, and calculates change.
> **Design Choice:** Products are linked to racks because racks represent physical storage locations. This aligns with the Single Responsibility Principle — products don't manage their own storage.
Design Class Diagram
### Product
The Product class includes attributes: product code, description, and price.
> **Design Choice:** Inventory quantity is NOT modeled in Product — it encapsulates innate properties only. The constantly changing stock level is managed by a separate InventoryManager, supporting cleaner object decomposition and the Single Responsibility Principle.
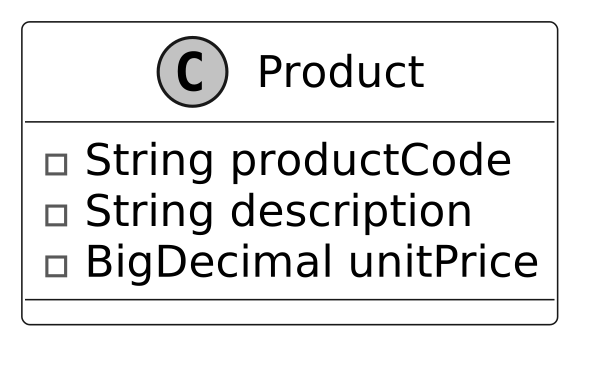
Rack Design
The Rack class models a single rack space, associated with a single product and holding multiple units.
> **Design Choice:** Rack does not include methods like `dispenseProductFromRack`. Instead, it stays focused on managing inventory count and product information. Dispensing is delegated to InventoryManager, adhering to the Single Responsibility Principle.
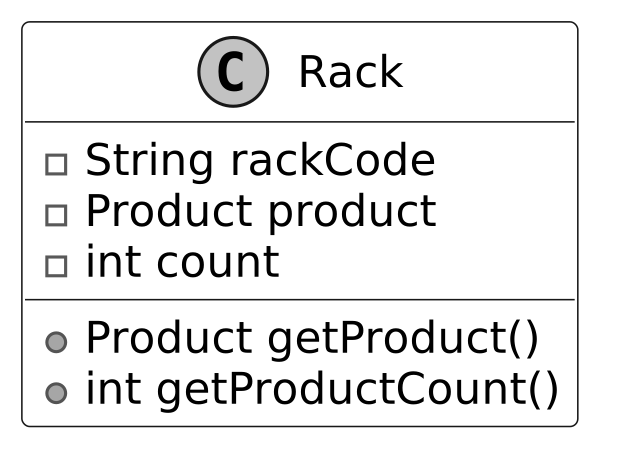
InventoryManager Design
InventoryManager handles tracking and storage of products. It supports adding, removing, and dispensing products.
Key methods: - `dispenseProductFromRack()` — dispenses a product and decrements inventory level. - `updateRack()` — allows admin to replace the entire rack structure for bulk updates. - `addRack()` / `removeRack()` — granular methods for individual rack modifications.
> **Design Choice:** `updateRack(Map racks)` is provided for bulk administrative updates. For most cases, prefer granular `addRack`/`removeRack` to limit unintended changes. Consider immutable collections or defensive copying for thread safety.
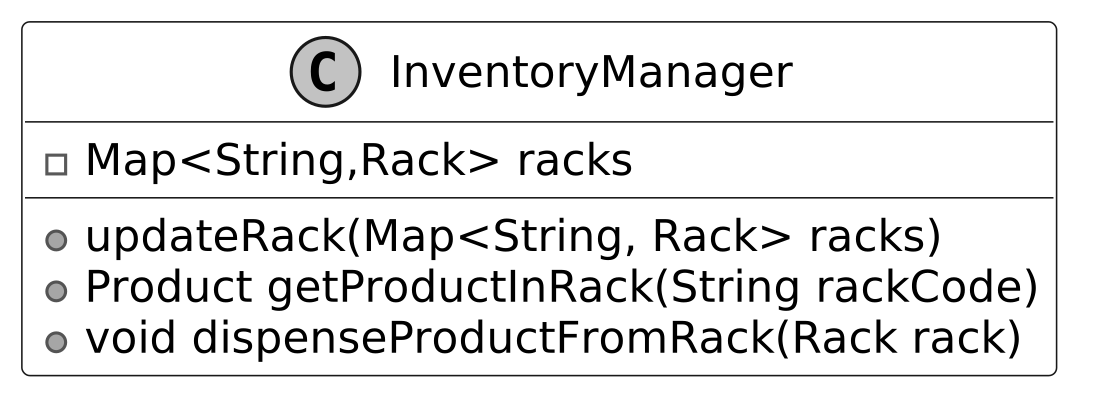
PaymentProcessor and Transaction Design
**PaymentProcessor** manages payment acceptance, tracks the current balance, and returns change. It interfaces with a coin receptacle.
**Transaction** acts as a data structure tracking the current state of a purchase. Benefits: - Encapsulates the selected product, its rack, and total cost. - Maintains a structured record of in-progress transactions. - Improves coordination — PaymentProcessor deducts the amount, InventoryManager dispenses the product, and Transaction ties it together.
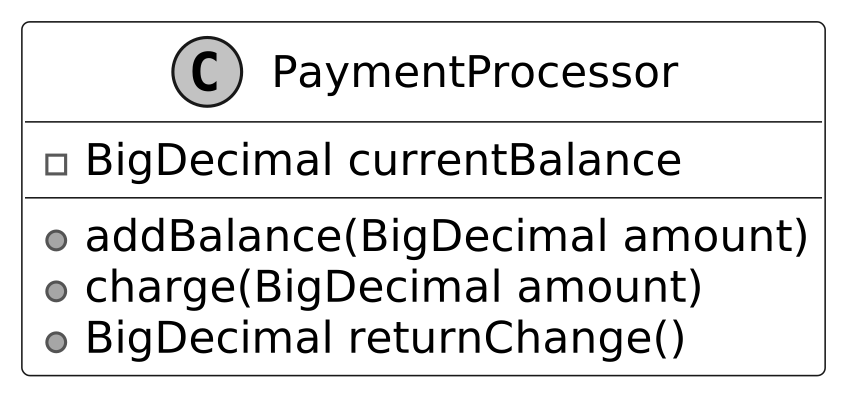
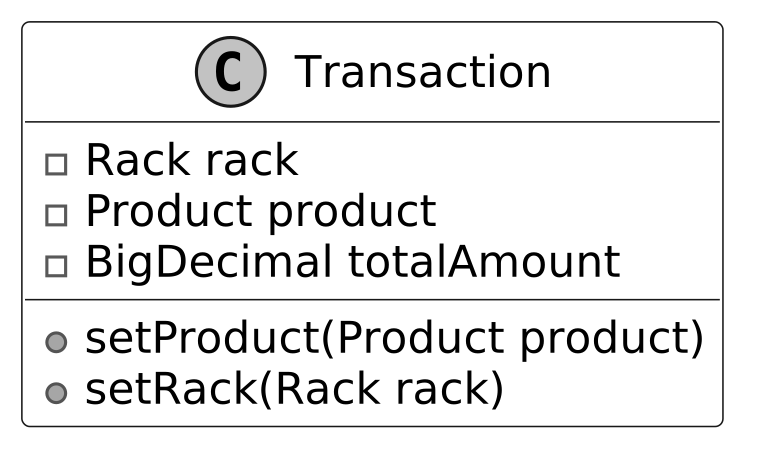
VendingMachine Design
VendingMachine is the core component, acting as a **Facade** providing a single interface to clients (software/hardware interfaces of the machine).
> **Design Choice:** To prevent VendingMachine from becoming a "god object", facades remain lightweight and delegate to other classes — InventoryManager for product management, PaymentProcessor for payment handling.
> **Note:** To learn more about the Facade pattern, refer to the Parking Lot chapter.
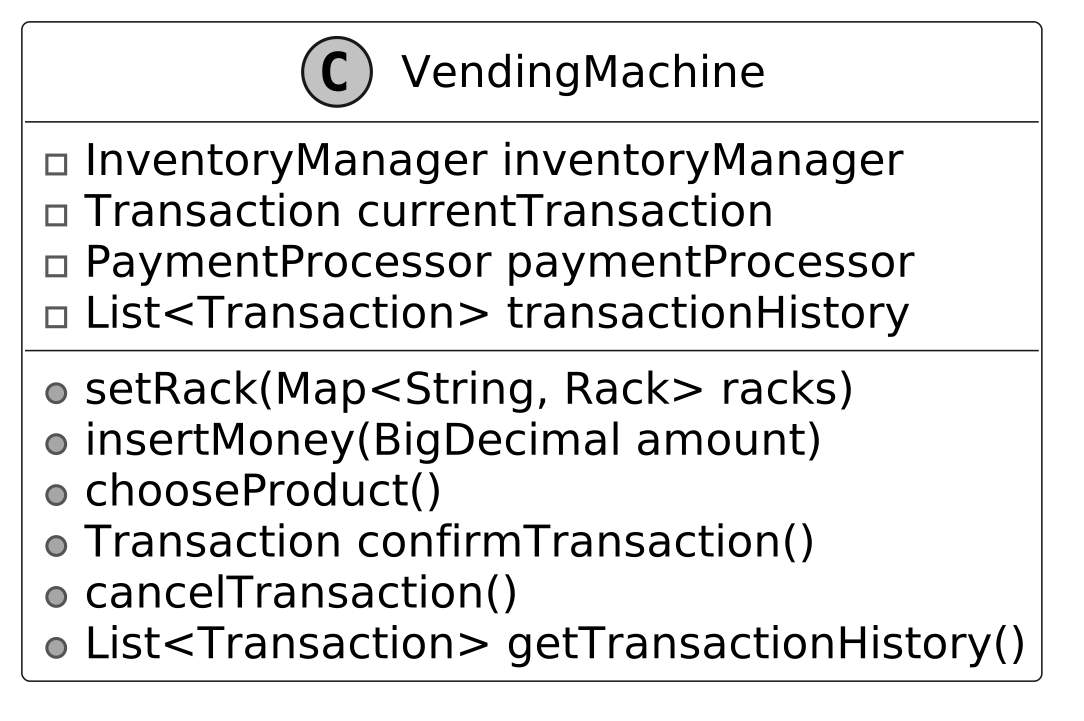
Complete Class Diagram
Below is the complete class diagram of the vending machine system.
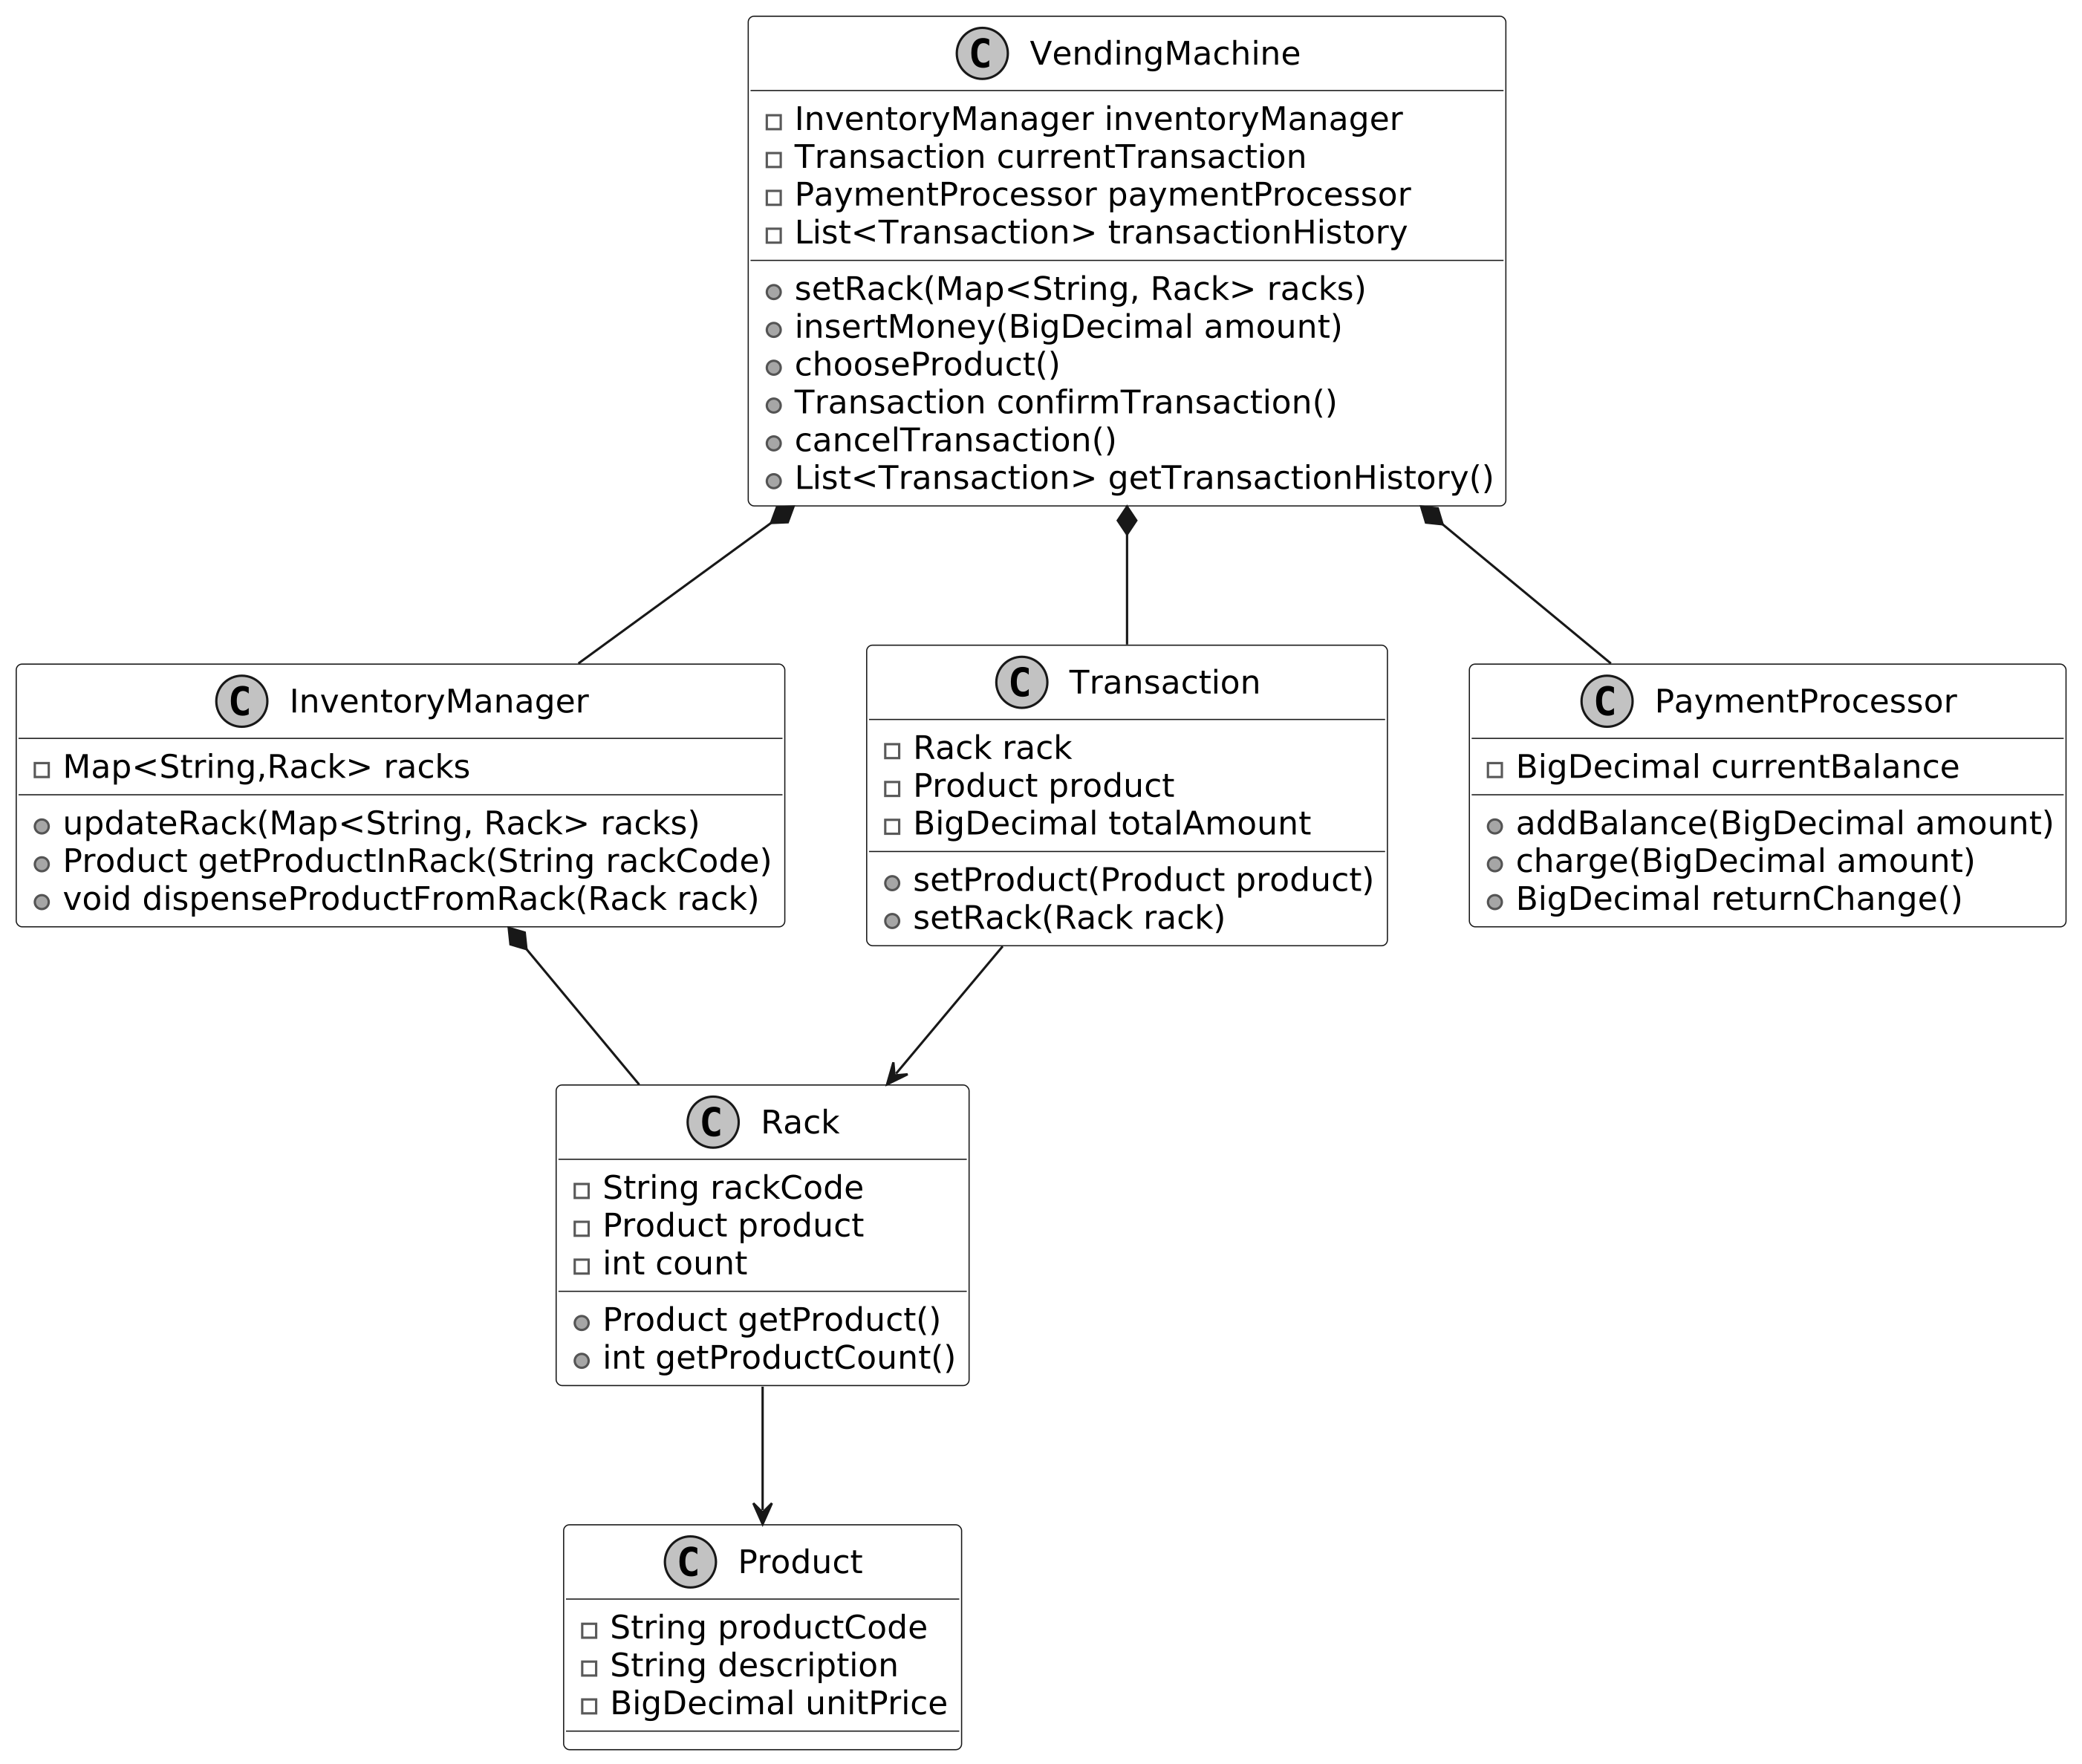
Code - Vending Machine
### Product
```java class Product { final String productCode; final String description; final BigDecimal unitPrice;
public Product(String productCode, String description, BigDecimal unitPrice) { this.productCode = productCode; this.description = description; this.unitPrice = unitPrice; } } ```
> **Implementation Choice:** Use `BigDecimal` for monetary values like `unitPrice` for precision and rounding control. Avoid `float` or `double` for currency — they introduce precision errors. Use `String` for identifiers like `productCode` even if values are numeric.
### InventoryManager and Rack
We use `HashMap<String, Rack>` for efficient O(1) lookups by rack code.
```java public class InventoryManager { private Map<String, Rack> racks;
public InventoryManager() { racks = new HashMap<>(); }
public Product getProductInRack(String rackCode) { return racks.get(rackCode).getProduct(); }
public void dispenseProductFromRack(Rack rack) { if (rack.getProductCount() > 0) { rack.setCount(rack.getProductCount() - 1); } else { throw new IllegalStateException("Cannot dispense product. Rack is empty."); } }
public void updateRack(Map<String, Rack> racks) { this.racks = racks; }
public Rack getRack(String name) { return racks.get(name); } } ```
```java public class Rack { private final String rackCode; private final Product product; private int count;
public Rack(final String rackCode, final Product product, final int count) { this.rackCode = rackCode; this.product = product; this.count = count; }
public Product getProduct() { return product; }
public int getProductCount() { return count; } } ```
### PaymentProcessor
```java public class PaymentProcessor { private BigDecimal currentBalance = BigDecimal.ZERO;
public void addBalance(BigDecimal amount) { currentBalance = currentBalance.add(amount); }
public void charge(BigDecimal amount) { currentBalance = currentBalance.subtract(amount); }
public BigDecimal returnChange() { BigDecimal change = currentBalance; currentBalance = BigDecimal.ZERO; return change; }
public BigDecimal getCurrentBalance() { return currentBalance; } } ```
### VendingMachine
```java class VendingMachine { private final List<Transaction> transactionHistory; private final InventoryManager inventoryManager; private final PaymentProcessor paymentProcessor; private Transaction currentTransaction; private VendingMachineState currentState;
public VendingMachine() { transactionHistory = new ArrayList<>(); currentTransaction = new Transaction(); inventoryManager = new InventoryManager(); paymentProcessor = new PaymentProcessor(); this.currentState = new NoMoneyInsertedState(); }
void setRack(Map<String, Rack> rack) { inventoryManager.updateRack(rack); }
void insertMoney(final BigDecimal amount) { paymentProcessor.addBalance(amount); }
void chooseProduct(String rackId) { final Product product = inventoryManager.getProductInRack(rackId); currentTransaction.setRack(inventoryManager.getRack(rackId)); currentTransaction.setProduct(product); }
Transaction confirmTransaction() throws InvalidTransactionException { validateTransaction(); paymentProcessor.charge(currentTransaction.getProduct().getUnitPrice()); inventoryManager.dispenseProductFromRack(currentTransaction.getRack()); currentTransaction.setTotalAmount(paymentProcessor.returnChange()); transactionHistory.add(currentTransaction); Transaction completedTransaction = currentTransaction; currentTransaction = new Transaction(); return completedTransaction; }
private void validateTransaction() throws InvalidTransactionException { if (currentTransaction.getProduct() == null) { throw new InvalidTransactionException("Invalid product selection"); } else if (currentTransaction.getRack().getProductCount() == 0) { throw new InvalidTransactionException("Insufficient inventory for product."); } else if (paymentProcessor.getCurrentBalance() .compareTo(currentTransaction.getProduct().getUnitPrice()) < 0) { throw new InvalidTransactionException("Insufficient fund"); } }
public List<Transaction> getTransactionHistory() { return Collections.unmodifiableList(transactionHistory); }
public void cancelTransaction() { paymentProcessor.returnChange(); currentTransaction = new Transaction(); }
public InventoryManager getInventoryManager() { return inventoryManager; } } ```
- `insertMoney()` — adds amount to machine's balance via PaymentProcessor. - `chooseProduct()` — retrieves product and rack from InventoryManager, links to current transaction. - `confirmTransaction()` — validates transaction, processes payment, dispenses product, updates history.
Deep Dive Topics
### Enforcing Task Sequences with the State Pattern
To ensure users insert money before selecting a product, we introduce the **State Pattern**.
> **Note:** To learn more about the State Pattern, refer to the Further Reading section.
Three distinct states:
**NoMoneyInsertedState:** - Initial state. Displays "Insert money to proceed." - Only allows money insertion. Product selection raises an exception. - Transitions to MoneyInsertedState on money insertion.
**MoneyInsertedState:** - Displays "Select a product." - Enables product selection; prevents additional money insertion. - Validates product availability and sufficient funds. - Transitions to DispenseState on successful product selection.
**DispenseState:** - Displays "Dispensing product..." or "Please collect your change." - Handles dispensing and resets machine to initial state after completion. - Prevents further actions until process is complete.
This guarantees the sequence: **Insert Money → Select Product → Dispense Product**.
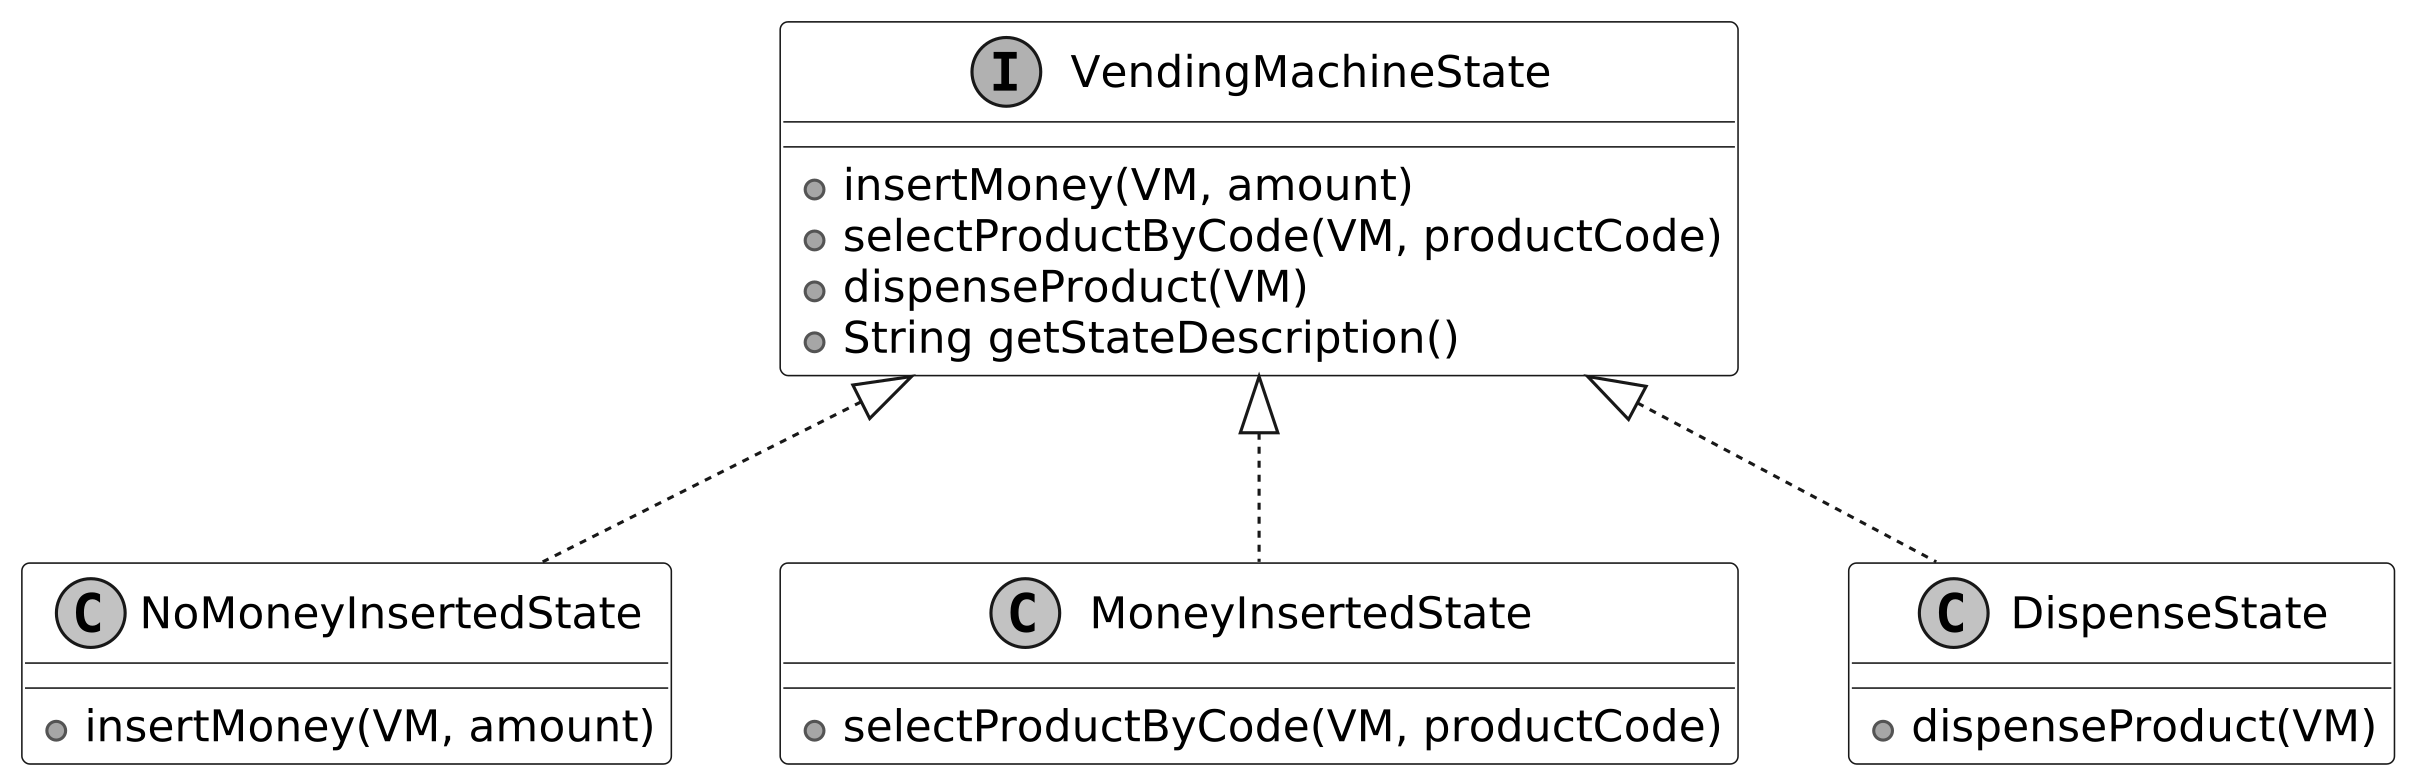
State Pattern Code
### VendingMachineState Interface
```java public interface VendingMachineState { void insertMoney(VendingMachine VM, double amount);
void selectProductByCode(VendingMachine VM, String productCode) throws InvalidStateException;
void dispenseProduct(VendingMachine VM) throws InvalidStateException;
String getStateDescription(); } ```
### NoMoneyInsertedState
```java public class NoMoneyInsertedState implements VendingMachineState { @Override public void insertMoney(VendingMachine VM, double amount) { VM.addBalance(amount); VM.setState(new MoneyInsertedState()); }
@Override public void selectProductByCode(VendingMachine VM, String productCode) throws InvalidStateException { throw new InvalidStateException("Cannot select a product without inserting money."); }
@Override public void dispenseProduct(VendingMachine VM) throws InvalidStateException { throw new InvalidStateException("Cannot dispense product without inserting money."); }
@Override public String getStateDescription() { return "No Money Inserted State - Please insert money to proceed"; } } ```
MoneyInsertedState and DispenseState follow the same structure.
Wrap Up
In this chapter, we designed and implemented a Vending Machine system. Key takeaways:
- Dividing responsibilities across Product, Rack, InventoryManager, and PaymentProcessor while unifying them under a facade. - The facade pattern simplified the external interface while adhering to the Single Responsibility Principle. - The State Pattern (deep dive) enforces a strict sequence of actions and prevents invalid behaviors like dispensing without payment.
In interviews, emphasize validation and error handling after core functionality, especially for systems where improper behavior could cause financial loss.
Further Reading: State Design Pattern
The State pattern allows an object to alter its behavior when its internal state changes, making it appear as though it's behaving like a different class.
**Problem:** A TrafficLight with Red, Yellow, and Green states. Using conditionals to manage these states leads to scalability and maintainability issues as more states are added.
**Solution:** Encapsulate each state's behavior into a separate class (RedLightState, GreenLightState, YellowLightState). The context (TrafficLight) holds a reference to the current state object and delegates state-related tasks to it. State transitions simply replace the current state object.
**When to use:** - When an object's behavior changes based on its internal state. - When you want to avoid large conditional statements for state management. - When states have distinct behaviors that can be cleanly separated into classes.
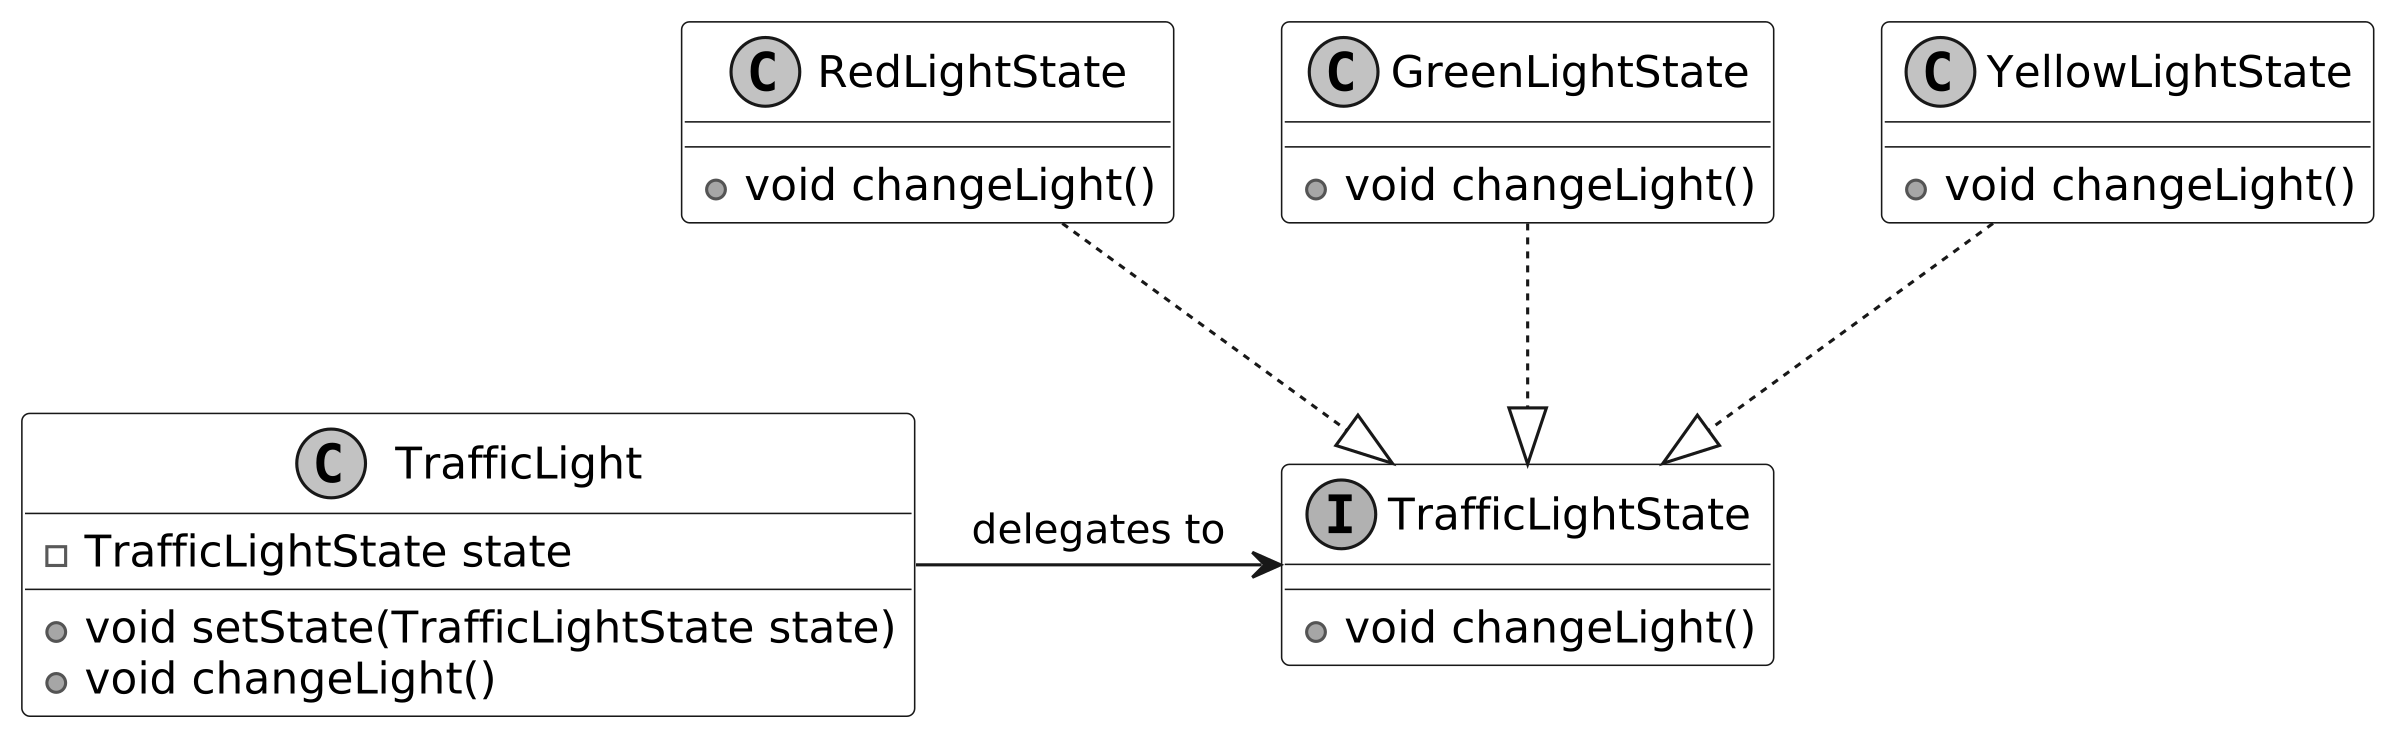
Design an Elevator System
In this chapter, we will explore the object-oriented design of an Elevator System. Compared to some of the other popular interview problems, this one places a stronger emphasis on modeling behavior, rather than on modeling data. Our approach will focus on designing key components such as how to represent real-world elevators, the elevator's state, incoming hallway call requests, and the algorithm that determines the elevator's movement.
Requirements Gathering
Here is an example of a typical prompt an interviewer might give:
> **Interviewer:** "Imagine you are in an office building with a bunch of identical elevator cars, and they all go to the same set of floors. You press the 'up' or 'down' button on your floor, and an elevator arrives promptly. Inside, you select your desired floor from a panel of buttons, and the elevator takes you there. Behind the scenes, the system efficiently manages elevator assignments and ignores requests in the wrong direction. Now, let's design an elevator system that handles all of this."
---
> **Candidate:** Are we designing an elevator system for an office building, or do we need to consider other types of elevators as well?
> **Interviewer:** Only for office buildings.
> **Candidate:** Do all elevator cars serve the same set of floors?
> **Interviewer:** Yes, all elevator cars can serve every floor.
> **Candidate:** What strategy should the system use to determine which elevator to dispatch?
> **Interviewer:** The specific strategy is up to you. Ideally, it could be configurable — we should be able to easily swap strategies. It could be first-come, first-served or other strategies.
> **Tip:** The top floor should only have a 'down' button, and the bottom floor should only have an 'up' button. While it's great to recognize this detail during design, it's not critical if it isn't the primary focus.
**Requirements**
Functional requirements:
- The system manages multiple elevator cars, all serving the same set of floors. - On each floor, there are 'up' and 'down' hallway buttons to call an elevator. - Each elevator car displays its current floor and state (moving up, down, or idle). - Each elevator car has an internal control panel with buttons for every floor. - If a user presses a floor button in a direction opposite to the elevator's current movement, the request is ignored.
Non-functional requirements:
- The dispatching algorithm should be configurable, allowing easy switching between optimization strategies.
**Elevator Control Panels:** - **Hallway Buttons (Outside):** Located on each floor — 'up' to call elevator going up, 'down' for going down. - **Floor Buttons (Inside):** On the control panel inside the car, each button corresponds to a specific floor.
Use Case Diagram
**Passenger actor:** - Request Elevator (press hallway button) - Select Floor (press floor button inside car)
**System actor:** - Assign Elevator, Move Elevator, Report Elevator Status
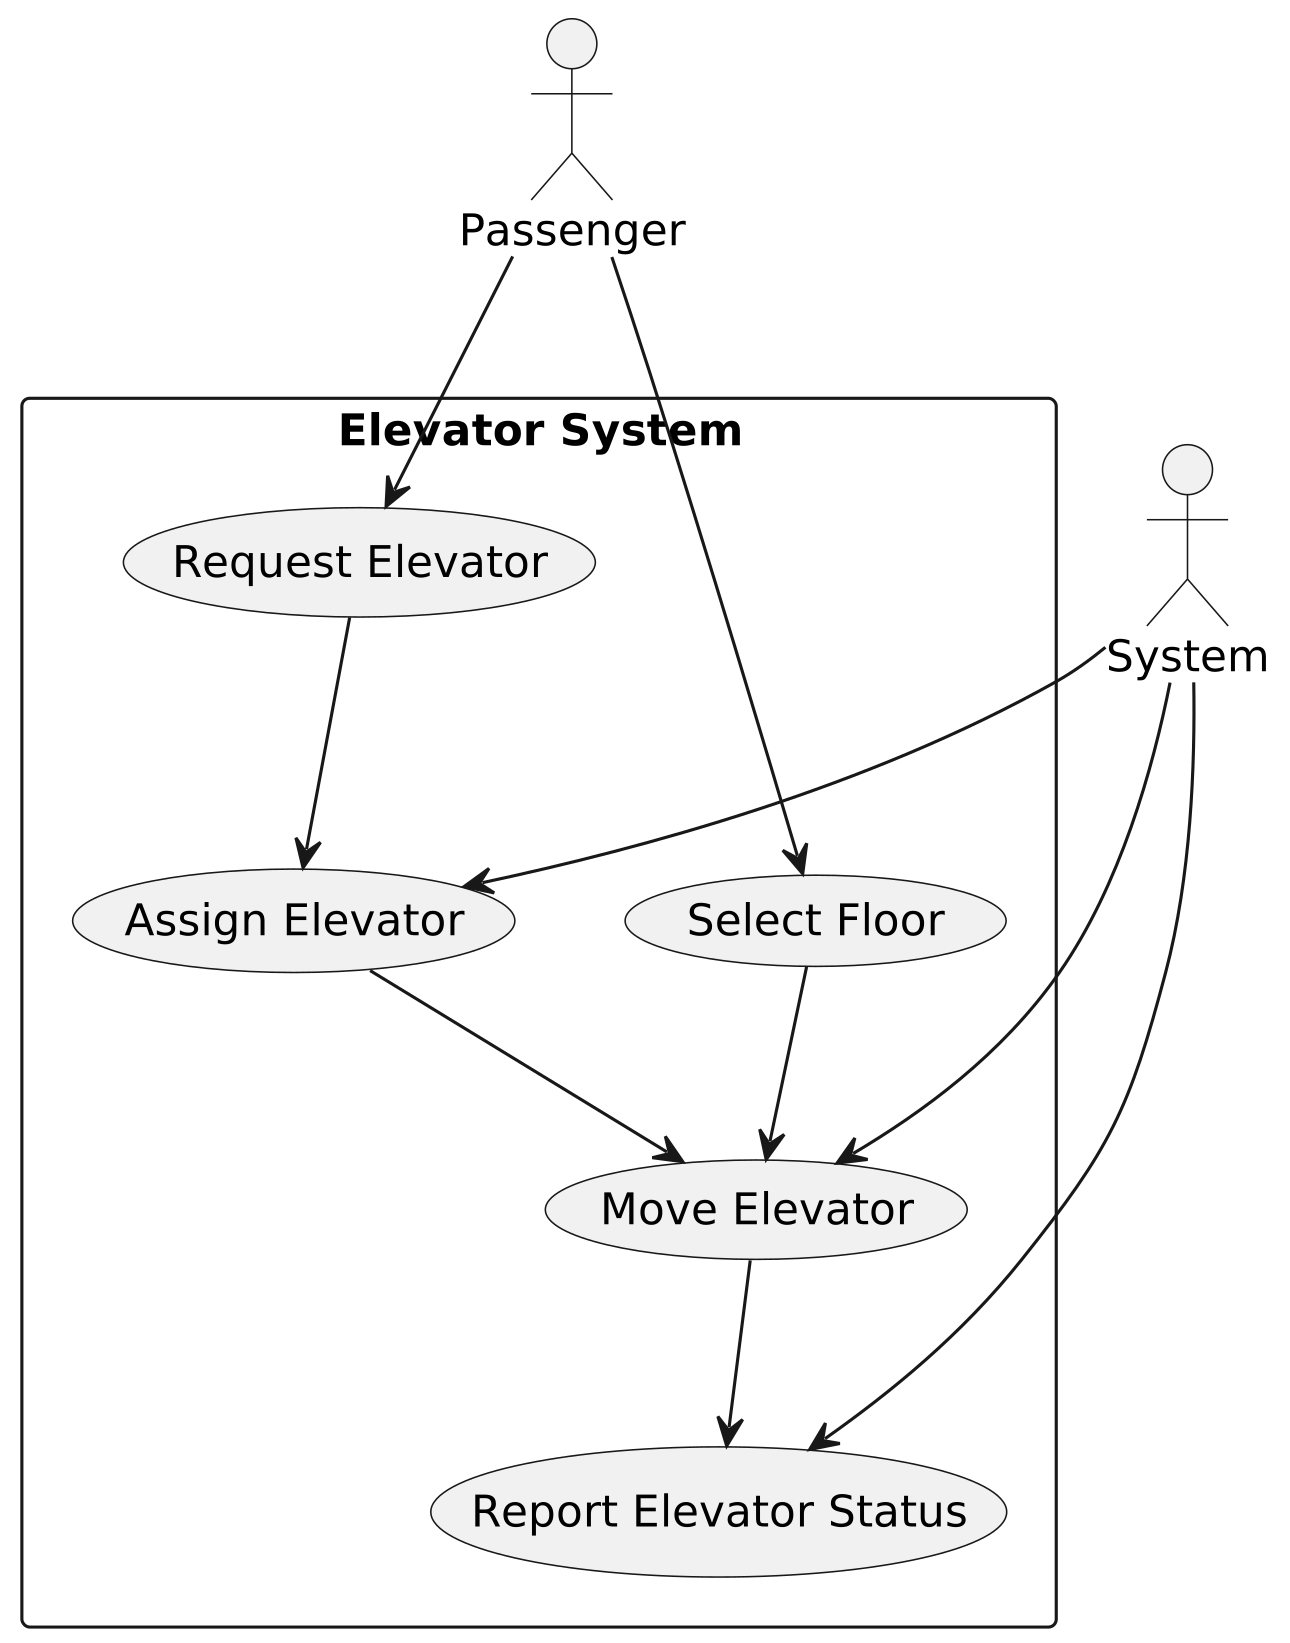
Identify Core Objects
- **ElevatorSystem:** The facade class providing the main interface. Coordinates the overall operation, tracks all elevator car statuses, and delegates hallway call requests to ElevatorDispatch. - **ElevatorDispatch:** Handles hallway calls by assigning the most appropriate elevator using the dispatching strategy. - **ElevatorCar:** A single elevator unit that transports passengers. Operates independently with an internal control panel and queue of target floors.
Design Class Diagram
Since the use cases are clearer than the underlying data model, we start with behaviors and user interactions, then translate them into key classes.
### ElevatorSystem
The ElevatorSystem class is the central controller providing an API for controlling all elevator cars. Three core responsibilities: - **Get status:** Check current state of each elevator. - **Request elevator:** When user presses hallway button, triggers request to assign an elevator. - **Select destination:** When inside elevator, user presses floor button.
> **Tip:** In OOD, naming things correctly is very important. Use clear suffixes like System, Dispatch, or Strategy to avoid confusion between a single elevator car and the whole system.
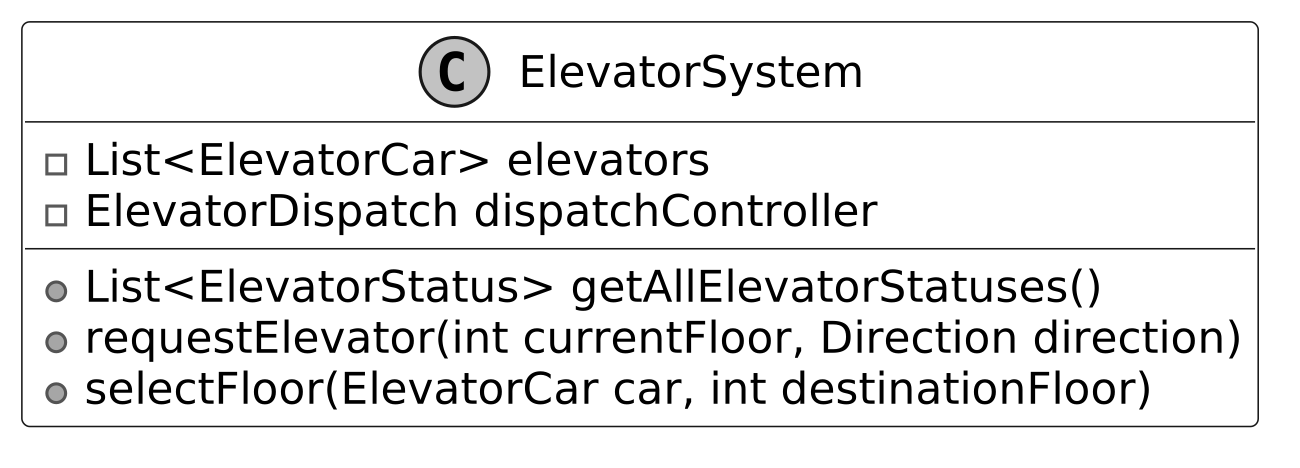
ElevatorCar, ElevatorStatus, and Direction
**ElevatorCar** models the behaviors of an elevator car. It maintains a queue of target floors and delegates state management to ElevatorStatus.
**ElevatorStatus** provides a snapshot of the elevator's current floor and direction. Updated dynamically as the elevator moves.
**Direction** enum provides type-safe movement direction: UP, DOWN, IDLE. Using an enum prevents unnecessary direction changes and helps prioritize elevators already moving toward the requested floor.
> **Design Choice:** Separating elevator state into ElevatorStatus promotes reusability and clarity, allowing status-related logic to be managed independently and future attributes (e.g., door status) to be added without modifying ElevatorCar.
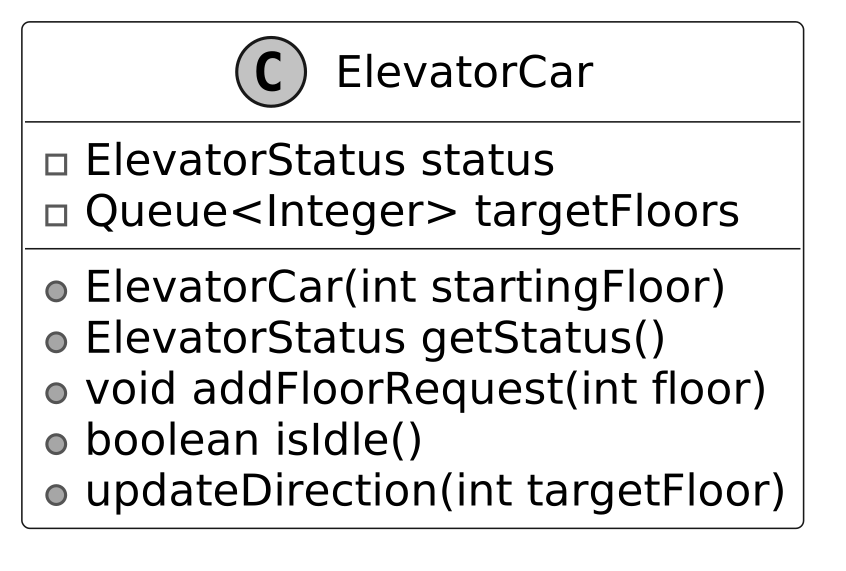
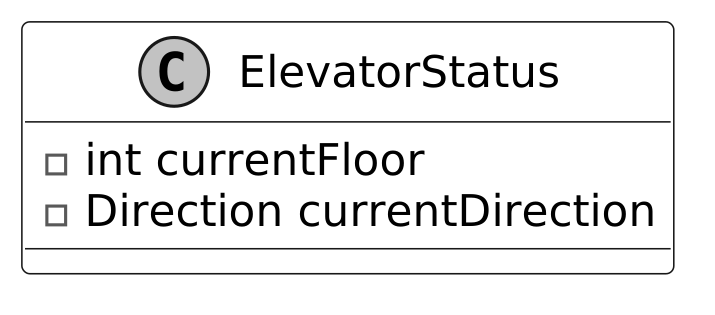
ElevatorDispatch and DispatchingStrategy
ElevatorDispatch manages hallway button requests and assigns the appropriate elevator. The dispatch logic relies on the **Strategy Pattern** to dynamically select between algorithms.
> **Note:** To learn more about the Strategy Pattern, refer to the Parking Lot chapter.
The general dispatching process: 1. **Review** the request and elevator statuses. 2. **Select** the best elevator car based on the strategy (proximity, direction, minimizing wait time). 3. **Update** the selected elevator's next stops.
Common dispatching strategies: - **FCFS (First Come, First Serve):** Assigns to next available elevator, simple but may not be most efficient. - **SSTF (Shortest Seek Time First):** Assigns to the elevator closest to the requested floor that's idle or moving in the right direction. - **Dynamic Strategies:** Configurable based on traffic patterns — 'high throughput' during busy periods, FCFS during quiet hours.
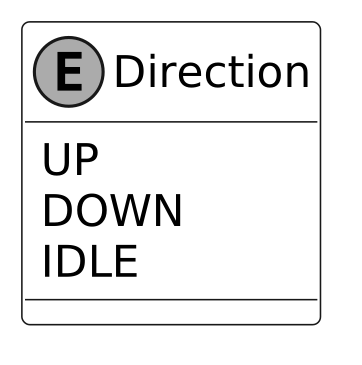
Complete Class Diagram
Below is the complete class diagram of the elevator system.
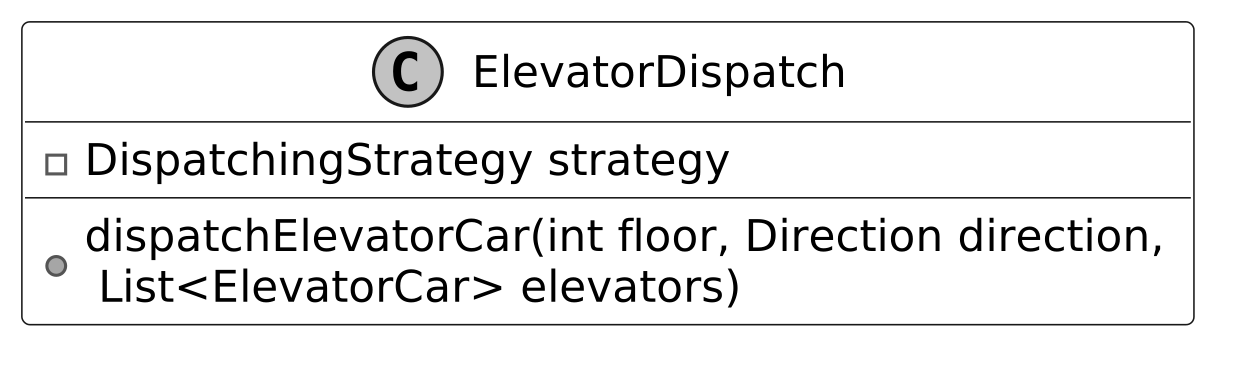
Code - Elevator System
### ElevatorSystem
```java public class ElevatorSystem { private final List<ElevatorCar> elevators; private final ElevatorDispatch dispatchController;
public ElevatorSystem(List<ElevatorCar> elevators, DispatchingStrategy strategy) { this.elevators = elevators; this.dispatchController = new ElevatorDispatch(strategy); }
public List<ElevatorStatus> getAllElevatorStatuses() { List<ElevatorStatus> statuses = new ArrayList<>(); for (ElevatorCar elevator : elevators) { statuses.add(elevator.getStatus()); } return statuses; }
public void requestElevator(int currentFloor, Direction direction) { dispatchController.dispatchElevatorCar(currentFloor, direction, elevators); }
public void selectFloor(ElevatorCar car, int destinationFloor) { car.addFloorRequest(destinationFloor); } } ```
- `requestElevator()` — user presses hallway button, delegates to ElevatorDispatch. - `selectFloor()` — user inside elevator presses floor button, handled directly by ElevatorCar.
### ElevatorCar
```java public class ElevatorCar { private ElevatorStatus status; private final Queue<Integer> targetFloors;
public ElevatorCar(int startingFloor) { this.status = new ElevatorStatus(startingFloor, Direction.IDLE); this.targetFloors = new LinkedList<>(); }
public ElevatorStatus getStatus() { return status; }
public void addFloorRequest(int floor) { if (!targetFloors.contains(floor)) { targetFloors.offer(floor); updateDirection(floor); } }
public boolean isIdle() { return targetFloors.isEmpty(); }
private void updateDirection(int targetFloor) { if (status.getCurrentFloor() < targetFloor) { status = new ElevatorStatus(status.getCurrentFloor(), Direction.UP); } else if (status.getCurrentFloor() > targetFloor) { status = new ElevatorStatus(status.getCurrentFloor(), Direction.DOWN); } } // getters omitted for brevity } ```
> **Implementation Choice:** `Queue` (FIFO) for `targetFloors` ensures fairness — floor requests processed in order received. A `PriorityQueue` could save travel time by sorting floors by closeness, but reordering may confuse passengers and requires extra logic to prevent stops in the wrong direction.
### ElevatorDispatch
```java public class ElevatorDispatch { private final DispatchingStrategy strategy;
public ElevatorDispatch(DispatchingStrategy strategy) { this.strategy = strategy; }
public void dispatchElevatorCar(int floor, Direction direction, List<ElevatorCar> elevators) { ElevatorCar selectedElevator = strategy.selectElevator(elevators, floor, direction); if (selectedElevator != null) { selectedElevator.addFloorRequest(floor); } } } ```
### First-Come-First-Serve Strategy
```java public class FirstComeFirstServeStrategy implements DispatchingStrategy { @Override public ElevatorCar selectElevator(List<ElevatorCar> elevators, int floor, Direction direction) { for (ElevatorCar elevator : elevators) { if (elevator.isIdle() || elevator.getCurrentDirection() == direction) { return elevator; } } return elevators.get((int) (Math.random() * elevators.size())); } } ```
### Shortest-Seek-Time-First Strategy
```java public class ShortestSeekTimeFirstStrategy implements DispatchingStrategy { @Override public ElevatorCar selectElevator(List<ElevatorCar> elevators, int floor, Direction direction) { ElevatorCar bestElevator = null; int shortestDistance = Integer.MAX_VALUE;
for (ElevatorCar elevator : elevators) { int distance = Math.abs(elevator.getCurrentFloor() - floor); if ((elevator.isIdle() || elevator.getCurrentDirection() == direction) && distance < shortestDistance) { bestElevator = elevator; shortestDistance = distance; } } return bestElevator; } } ```
Deep Dive Topics
### Event-Driven Elevator Request Handling (Observer Pattern)
Currently, hallway and floor button requests are added to the same queue sequentially. Limitations: - Tightly coupled components. - Potential delays under heavy load.
Solution: Use the **Observer Pattern** to decouple hallway buttons from the dispatch controller.
> **Note:** To learn more about the Observer Pattern, refer to the Further Reading section.
- **Observable Subject:** Hallway buttons — when pressed, trigger an observer event. - **Observer:** Dispatch controller listens to button-press events and allocates an elevator.
```java // Observable Subject: HallwayButtonPanel public class HallwayButtonPanel { private final int floor; private final List<ElevatorObserver> observers;
public HallwayButtonPanel(int floor) { this.floor = floor; this.observers = new ArrayList<>(); }
public void pressButton(Direction direction) { notifyObservers(direction); }
public void addObserver(ElevatorObserver observer) { observers.add(observer); }
private void notifyObservers(Direction direction) { for (ElevatorObserver observer : observers) { observer.update(floor, direction); } } }
// Observer Interface public interface ElevatorObserver { void update(int floor, Direction direction); }
// Observer Implementation public class ElevatorDispatchController implements ElevatorObserver { @Override public void update(int floor, Direction direction) { // Logic to handle the floor request } } ```
**Benefits:** - Decoupled architecture — easier to maintain, test, and extend. - Faster response during rush hours — bypasses queue buildup.
### Elevators Serving Different Floor Sets
To support elevators that only stop at specific floors: 1. Each `ElevatorCar` gets a `Set<Integer> accessibleFloors`. 2. `addFloorRequest()` validates the floor before adding to queue. 3. Dispatching strategies only consider elevators that can reach the requested floor.
```java // In ElevatorCar — add accessible floors set private final Set<Integer> accessibleFloors;
// Modified addFloorRequest — check accessibility first public void addFloorRequest(int floor) { if (accessibleFloors.contains(floor) && !targetFloors.contains(floor)) { targetFloors.offer(floor); updateDirection(floor); } }
// Updated ShortestSeekTimeFirst — also checks accessible floors public class ShortestSeekTimeFirstStrategy implements DispatchingStrategy { @Override public ElevatorCar selectElevator(List<ElevatorCar> elevators, int floor, Direction direction) { ElevatorCar bestElevator = null; int shortestDistance = Integer.MAX_VALUE;
for (ElevatorCar elevator : elevators) { int distance = Math.abs(elevator.getCurrentFloor() - floor); if ((elevator.isIdle() || elevator.getCurrentDirection() == direction) && elevator.getAccessibleFloors().contains(floor) // New check && distance < shortestDistance) { bestElevator = elevator; shortestDistance = distance; } } return bestElevator; } } ```
**Example:** Building with 20 floors. Elevator 1 serves floors 1, 5, 10, 15, 20. Elevator 2 serves all floors. A user on floor 3 pressing 'up' will get Elevator 2, since Elevator 1 cannot stop at floor 3.
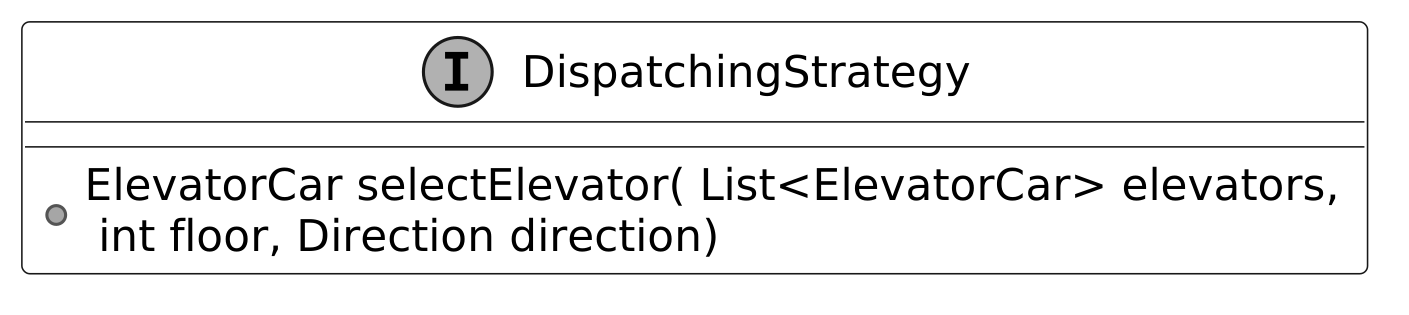
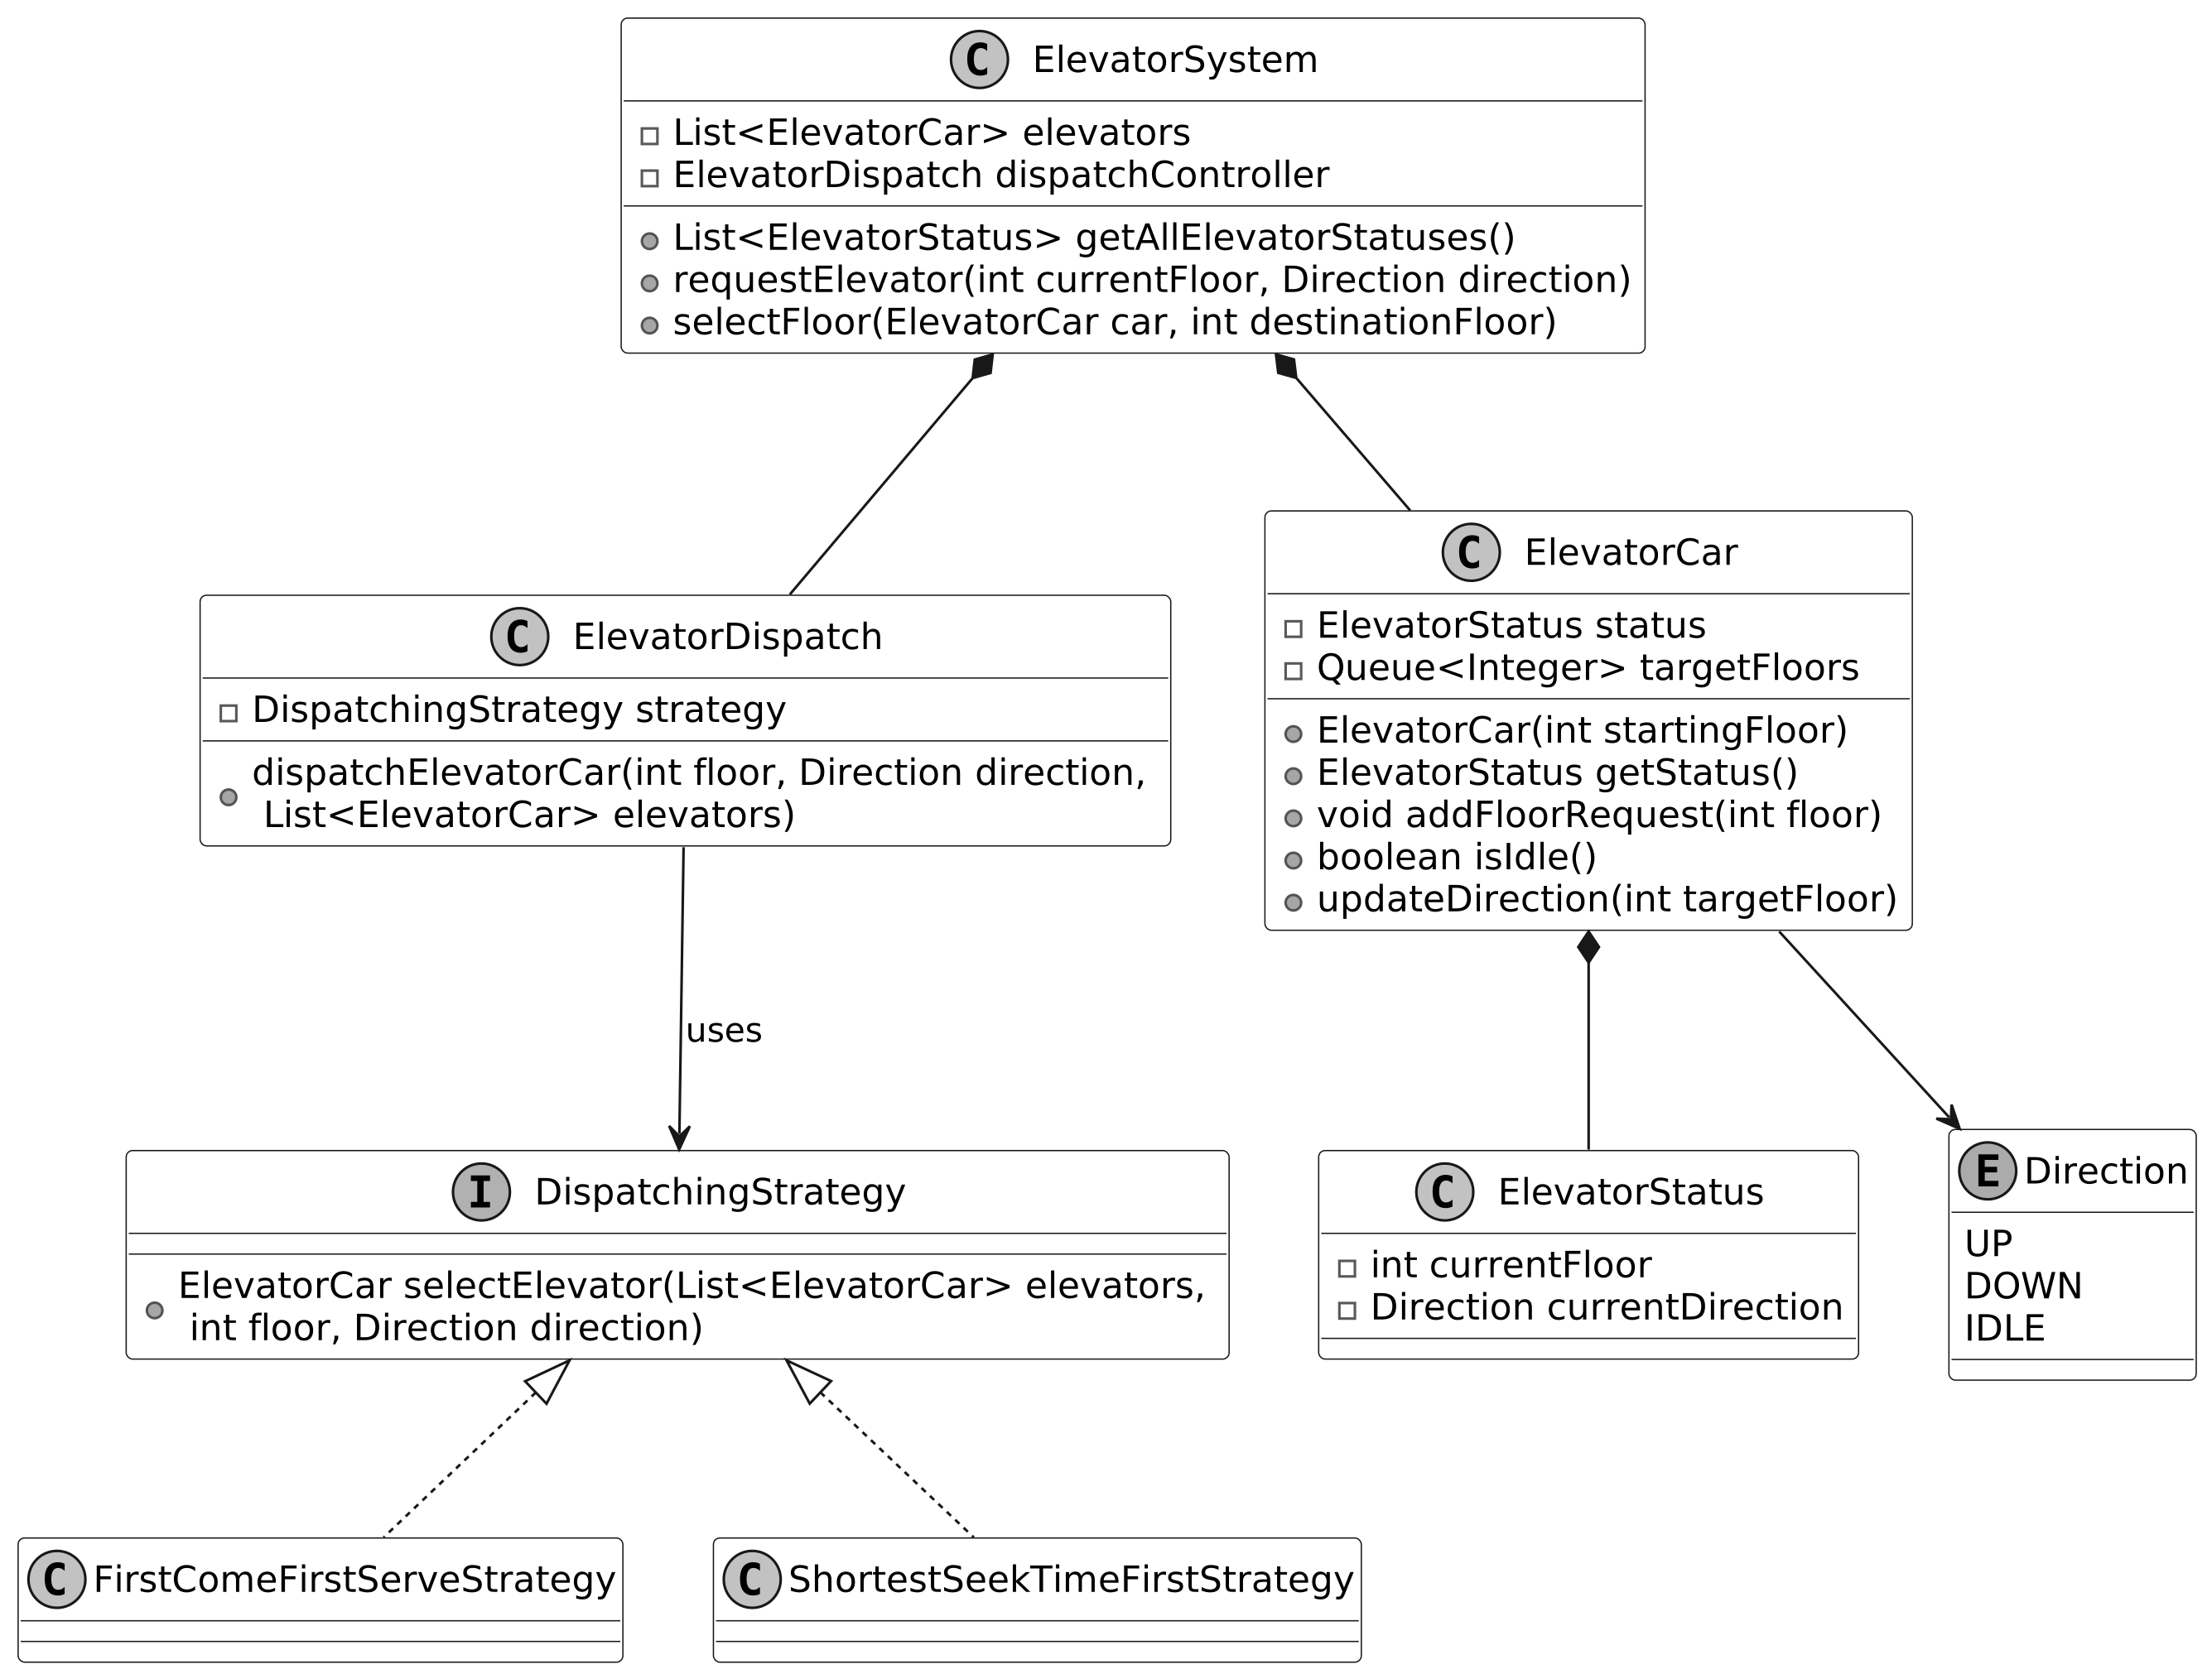
Wrap Up
In this chapter, we designed an Elevator System following a structured OOD approach. Key takeaways:
- Modularity: ElevatorSystem, ElevatorCar, ElevatorDispatch, and DispatchingStrategy each focus on a specific responsibility. - Configurable dispatching strategy allows easy switching between algorithms. - Observer Pattern (deep dive) enables event-driven hallway call handling for faster assignments. - Accessible floors support (deep dive) demonstrates extensibility without breaking existing design.
Further Reading: Observer Design Pattern
The Observer pattern lets you define a subscription mechanism, allowing multiple objects to receive notifications automatically whenever the object they observe changes state.
**Problem:** A news application delivers real-time updates to users. Directly linking the news publisher to each user creates tight coupling — hard to maintain and scale.
**Solution:** One-to-many relationship between subject (news publisher) and observers (users): - Subject maintains a list of observers and notifies them on state change. - Observers implement an `update()` method to receive notifications.
**When to use:** - Changes in one object require notifying other objects, especially when the set of notified objects isn't known in advance. - Objects need to observe other objects only under specific conditions or for a limited time.
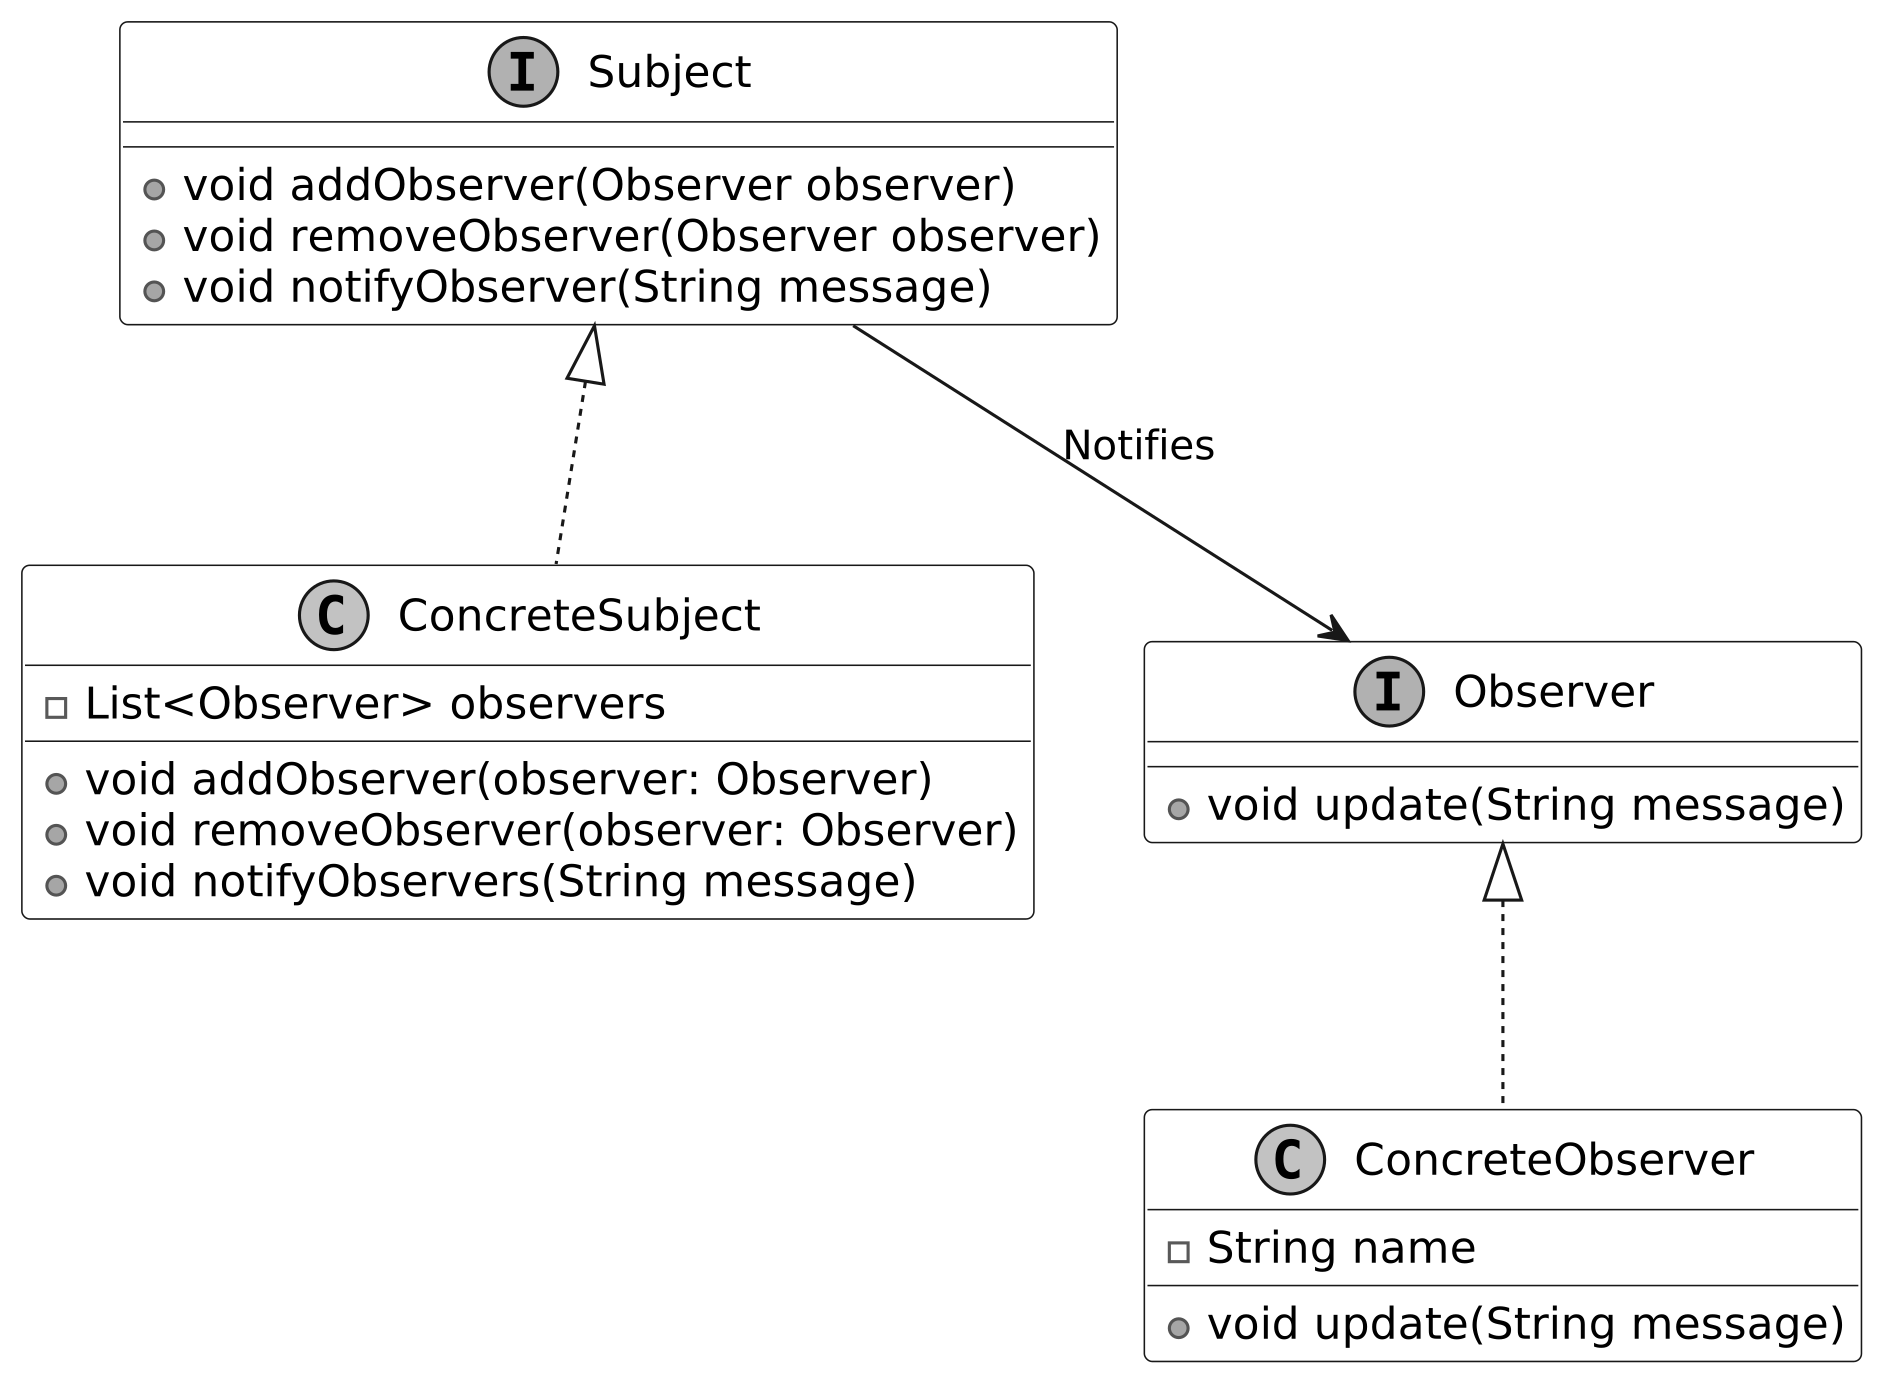
Design a Grocery Store System
In this chapter, we will explore the design of a grocery store system. This system is tailored for grocery store workers to streamline operations like managing the item catalog, configuring pricing, and applying discounts.
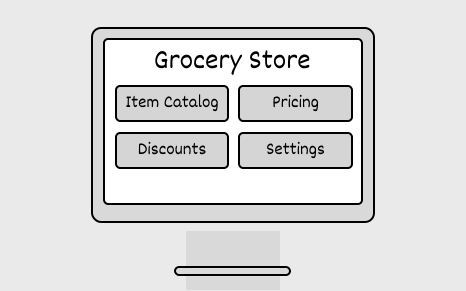
Requirements Gathering
Here is an example of a typical prompt an interviewer might give:
"Imagine you're at a grocery store, filling your cart with fresh produce, snacks, and household essentials. At the checkout, the cashier scans each item, and the system instantly tracks the order, applies any discounts, and displays the final total. Behind the scenes, the system is seamlessly managing the item catalog, updating inventory as stock arrives or sells, and ensuring every transaction is smooth and accurate. Now, let's design a grocery store system that does all this."
**Requirements clarification**
> **Candidate:** What are the primary operations the grocery store system needs to support? > **Interviewer:** The system should support store workers, including shipment handlers and cashiers, in managing the item catalog, tracking inventory, and processing customer checkouts with applicable discounts.
> **Candidate:** I'd like to confirm my understanding of the checkout process. The cashier scans or enters a code for each item, and the system keeps track of the order. It calculates the subtotal, applies any discounts, and updates the total. Once all items are entered, the cashier sees the final amount, accepts payment, and provides change if needed. A receipt is then generated. Does this sound correct? > **Interviewer:** Yes, that's an accurate understanding of the system.
> **Candidate:** How should the system handle inventory management? > **Interviewer:** The system should track inventory for all items, increasing inventory when new stock arrives and automatically decreasing inventory during checkout for items sold.
> **Candidate:** Should the system categorize items into different categories, such as food, beverages, etc.? > **Interviewer:** Yes, that's a good idea.
> **Candidate:** For discounts, can I assume it works this way? The system should track discount campaigns, which can apply to specific items or categories. If multiple discounts apply to the same item, the system should automatically apply the highest discount. > **Interviewer:** That sounds great.
**Requirements**
This question has multiple requirements, so grouping similar ones makes it easier to manage and track. The requirements can be broken down into four groups.
**Catalog management** - Admins can add, update, and remove items from the catalog. - The catalog tracks item details, including name, category, price, and barcode.
**Inventory management** - Shipment handlers can update inventory when shipments arrive. - The system should automatically decrease inventory when items are sold.
**Checkout process** - Cashiers can scan barcodes or manually enter item codes to build an order. - Cashiers can view details of the active order, including items, discounts, and the subtotal. - The system calculates and applies relevant discounts automatically. - Cashiers can finalize an order, calculate the total, handle payments, and calculate change. - A detailed receipt is generated.
**Discount campaigns** - Admins can define discount campaigns for specific items or categories. - If multiple discounts apply to an item, the system selects the highest discount.
Below are the non-functional requirements: - The system should provide clear, user-friendly error messages (e.g., for invalid barcodes or insufficient inventory) to the cashier. - The system's components (catalog, inventory, checkout, discounts) must be modular to allow updates or replacements of individual modules without affecting the entire system.
Identify Core Objects
Before diving into the design, it's important to enumerate the core objects.
- **Item:** Represents an individual product in the grocery store, encapsulating details such as name, barcode, category, and price. - **Catalog:** Acts as the central repository for all items, managing the collection of products and supporting operations like adding, updating, and removing items. - **Inventory:** Tracks the stock levels for each item. It updates the count of available items when new stock arrives (via shipments) or when items are sold during the checkout process. - **Order:** This object tracks the ongoing checkout process. It manages details such as the items in the order, active discounts, and the calculation of subtotals and total prices. This data is used to generate a receipt once the order is finalized. - **DiscountCampaign:** The DiscountCampaign object defines promotional rules for applying discounts.
Design Class Diagram
Now that we know the core objects and their roles, the next step is to create classes and methods that turn the requirements into an easy-to-maintain system. Let's take a closer look.
**Item**
The first component in our class diagram is the `Item` class, which represents individual products in the store. It encapsulates attributes like name, barcode, category, and price.
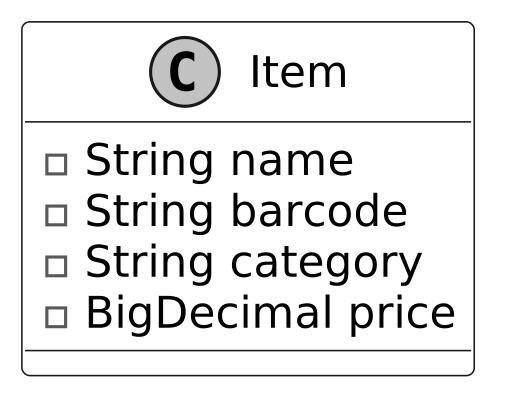
Catalog, Inventory, and Discount Classes
**Catalog**
The `Catalog` class is responsible for maintaining a structured list of all available products, each uniquely identified by a barcode. It provides methods to add, update, remove, and retrieve items.
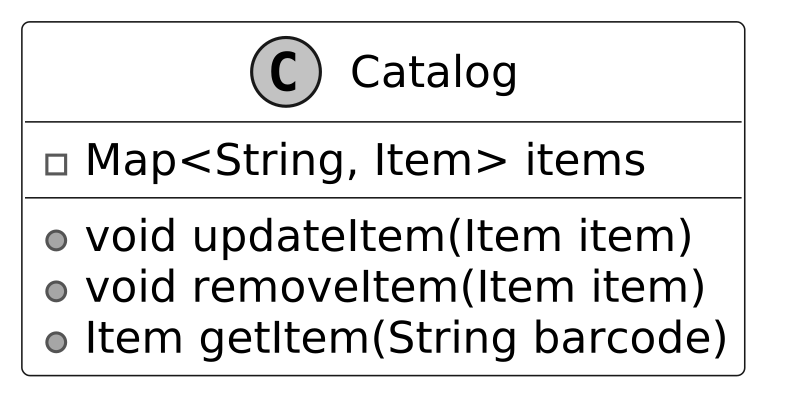
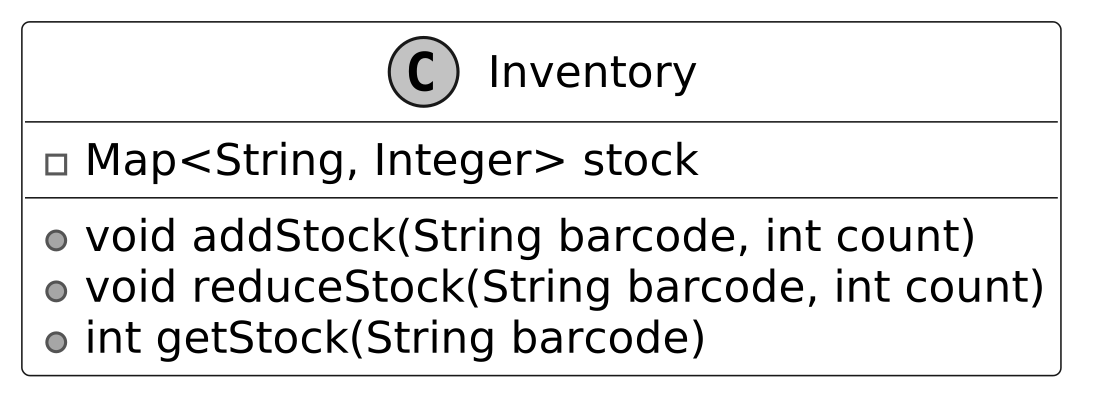
Discount Design (Strategy + Composite Patterns)
> **Design Choice:** To ensure modularity and maintainability, we have deliberately separated static product details from dynamic stock levels: **Static Data (Catalog)** manages product metadata; **Dynamic Data (Inventory)** handles stock levels which change frequently. This separation adheres to the Single Responsibility Principle.
**DiscountCriteria**
The `DiscountCriteria` interface encapsulates the logic to determine whether a discount applies to an item. It provides a flexible, extensible framework for defining applicability checks, such as item-based and category-based criteria.
- **CategoryBasedCriteria:** Determines whether a discount is applicable by verifying if an item belongs to a specific category. - **ItemBasedCriteria:** Checks whether a discount applies to a specific item by matching its unique identifier.
**DiscountCalculationStrategy**
The `DiscountCalculationStrategy` interface encapsulates the logic for calculating discounts using the Strategy Pattern.
- **AmountBasedStrategy:** Applies a fixed discount amount to the original price. - **PercentageBasedStrategy:** Applies a percentage-based discount to the original price.
> **Design Choice:** This design is highly extensible, as new discount strategies can be added seamlessly without modifying the existing implementation, adhering to the Open/Closed Principle.
**DiscountCampaign**
The `DiscountCampaign` class models active discount campaigns. It leverages the Strategy Pattern to encapsulate different calculation strategies and uses a `DiscountCriteria` interface to specify which items qualify for a discount.
> **Design Choice:** By separating the applicability logic (criteria) from the calculation strategy, the class is more modular and easier to extend.
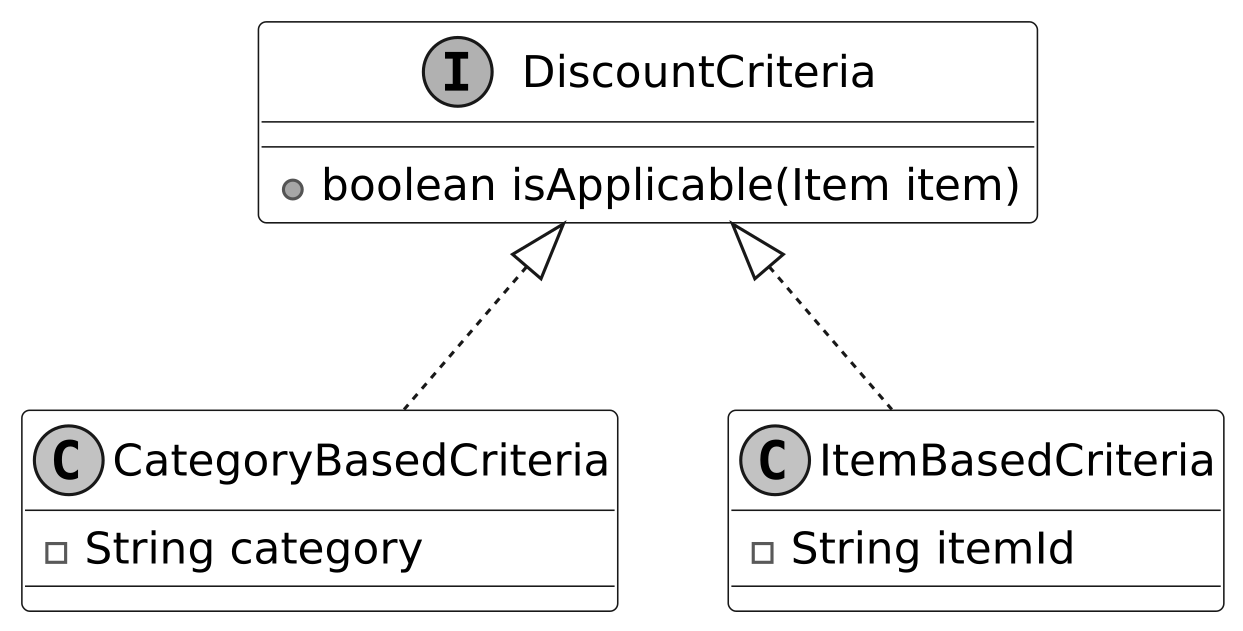
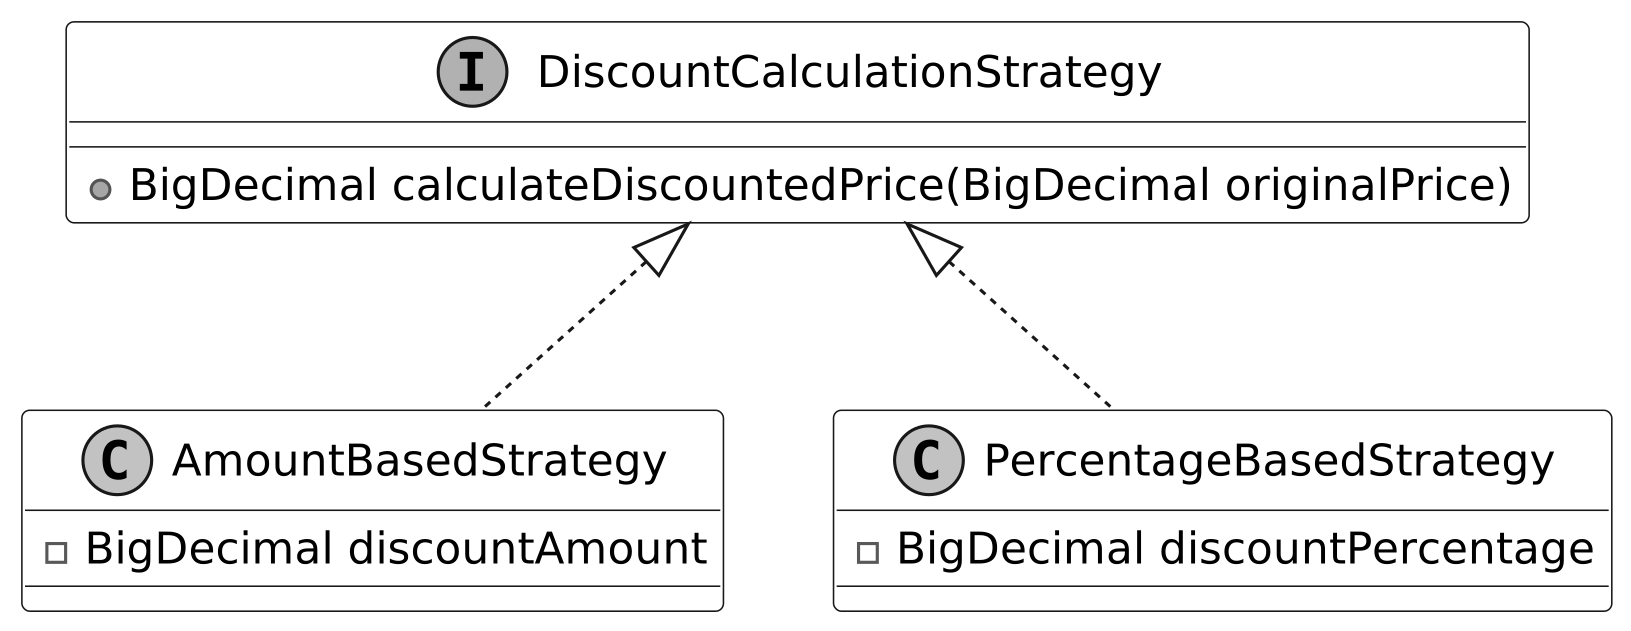
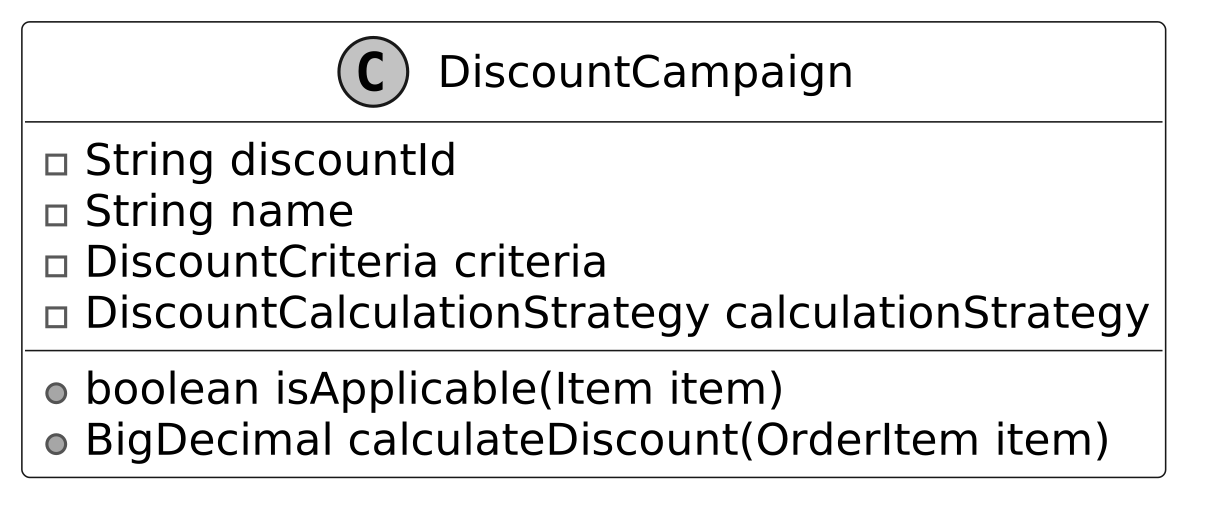
Order, Receipt, and Checkout Classes
**OrderItem**
The `OrderItem` class represents a specific item in an order, along with its quantity. It encapsulates methods to calculate the total price based on unit price and quantity.
> **Design Choice:** The `OrderItem` class separates item-level details from the higher-level order, ensuring that each item's quantity and price logic are encapsulated.
**Order**
The `Order` class represents an active transaction during the checkout process. It tracks the list of items and applied discounts, providing methods to calculate the subtotal (before discounts) and total (after discounts).
> **Design Choice:** The `Order` class delegates the handling of individual item quantities to `OrderItem`, ensuring a clean separation of responsibilities.
**Receipt**
The `Receipt` class acts as the final record of a completed transaction, consolidating order summary, payment details, and change.
> **Design Choice:** The `Receipt` class focuses solely on presenting transaction data in a customer-friendly format, delegating all business logic to `Order` and `OrderItem`.
**Checkout**
The `Checkout` class encapsulates the logic for handling the checkout process. It maintains an active `Order` object and applies active discount campaigns.
> **Design Choice:** Despite its central role, the `Checkout` class remains lightweight because responsibilities are delegated to `Order`, `DiscountCampaign`, and the underlying strategy classes.
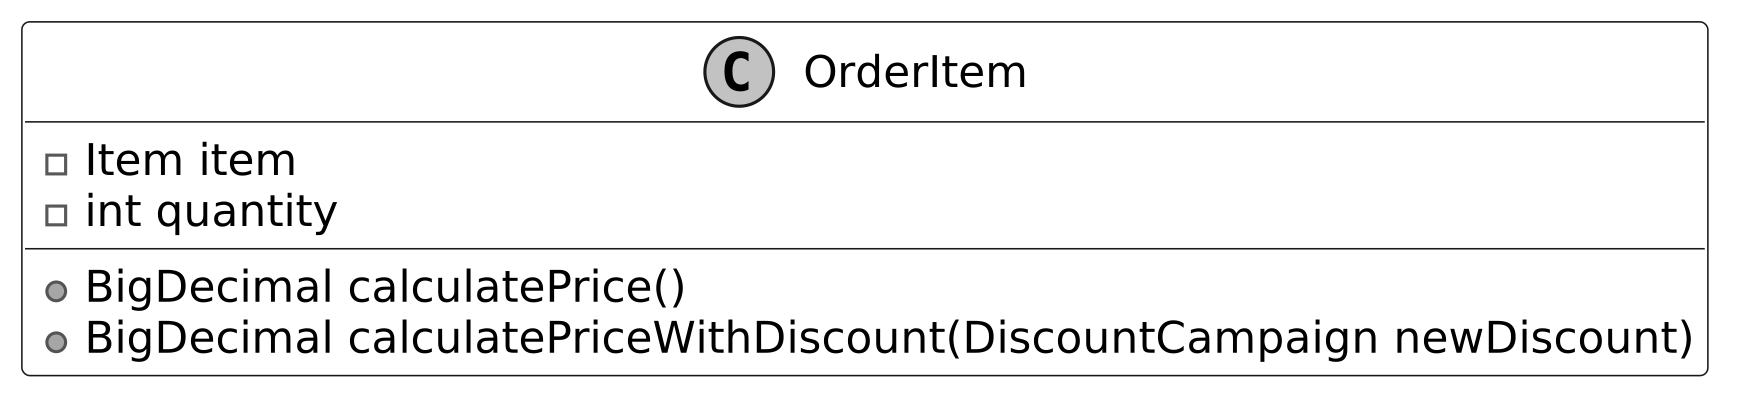
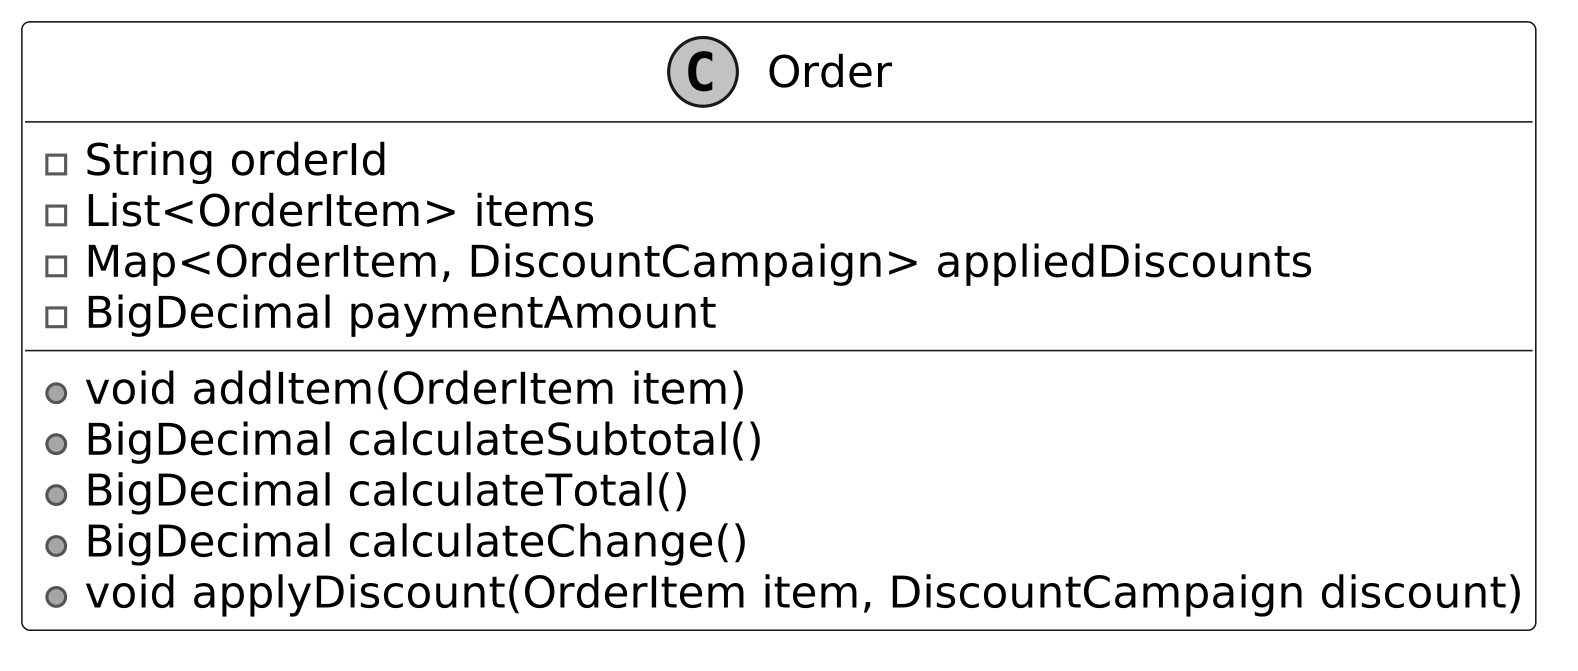
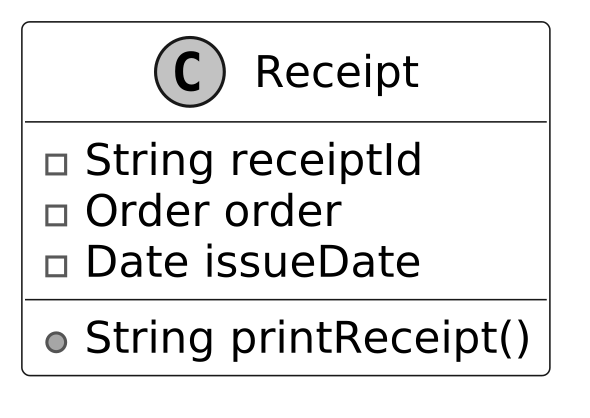
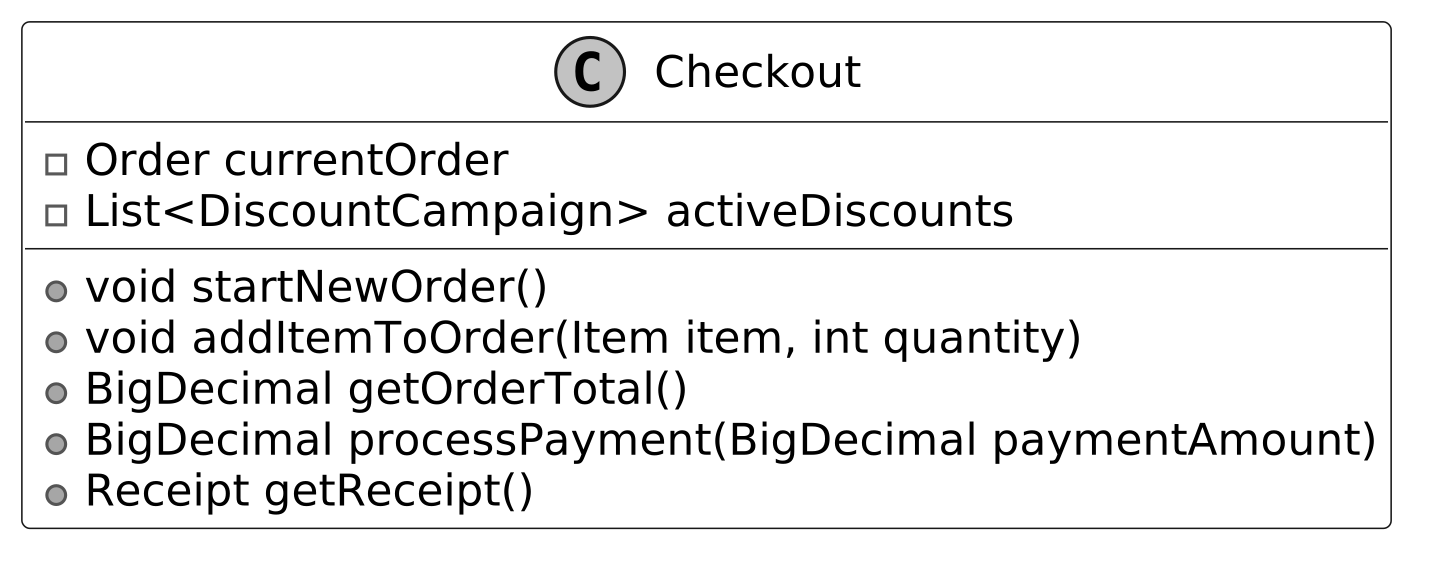
GroceryStoreSystem (Facade)
The `GroceryStoreSystem` class serves as a **Facade** that simplifies interaction with the system's components (Catalog, Inventory, Checkout). By providing a unified interface, it abstracts away the underlying complexity.
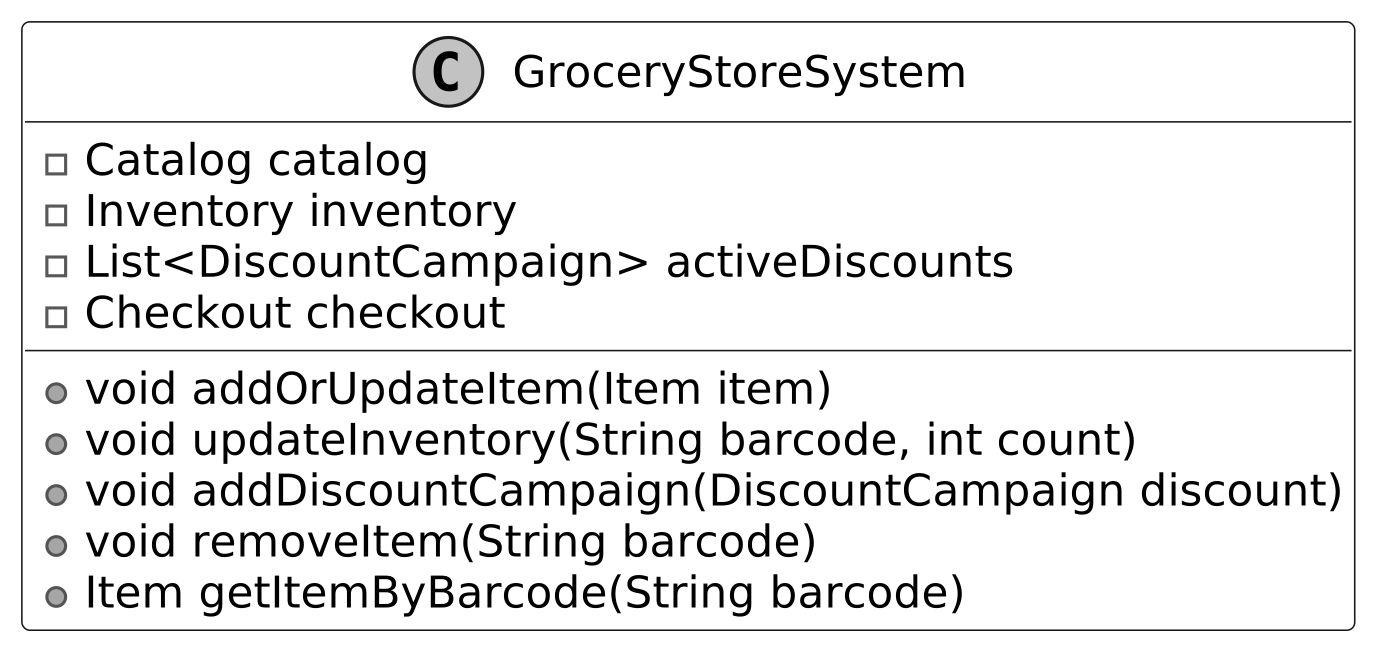
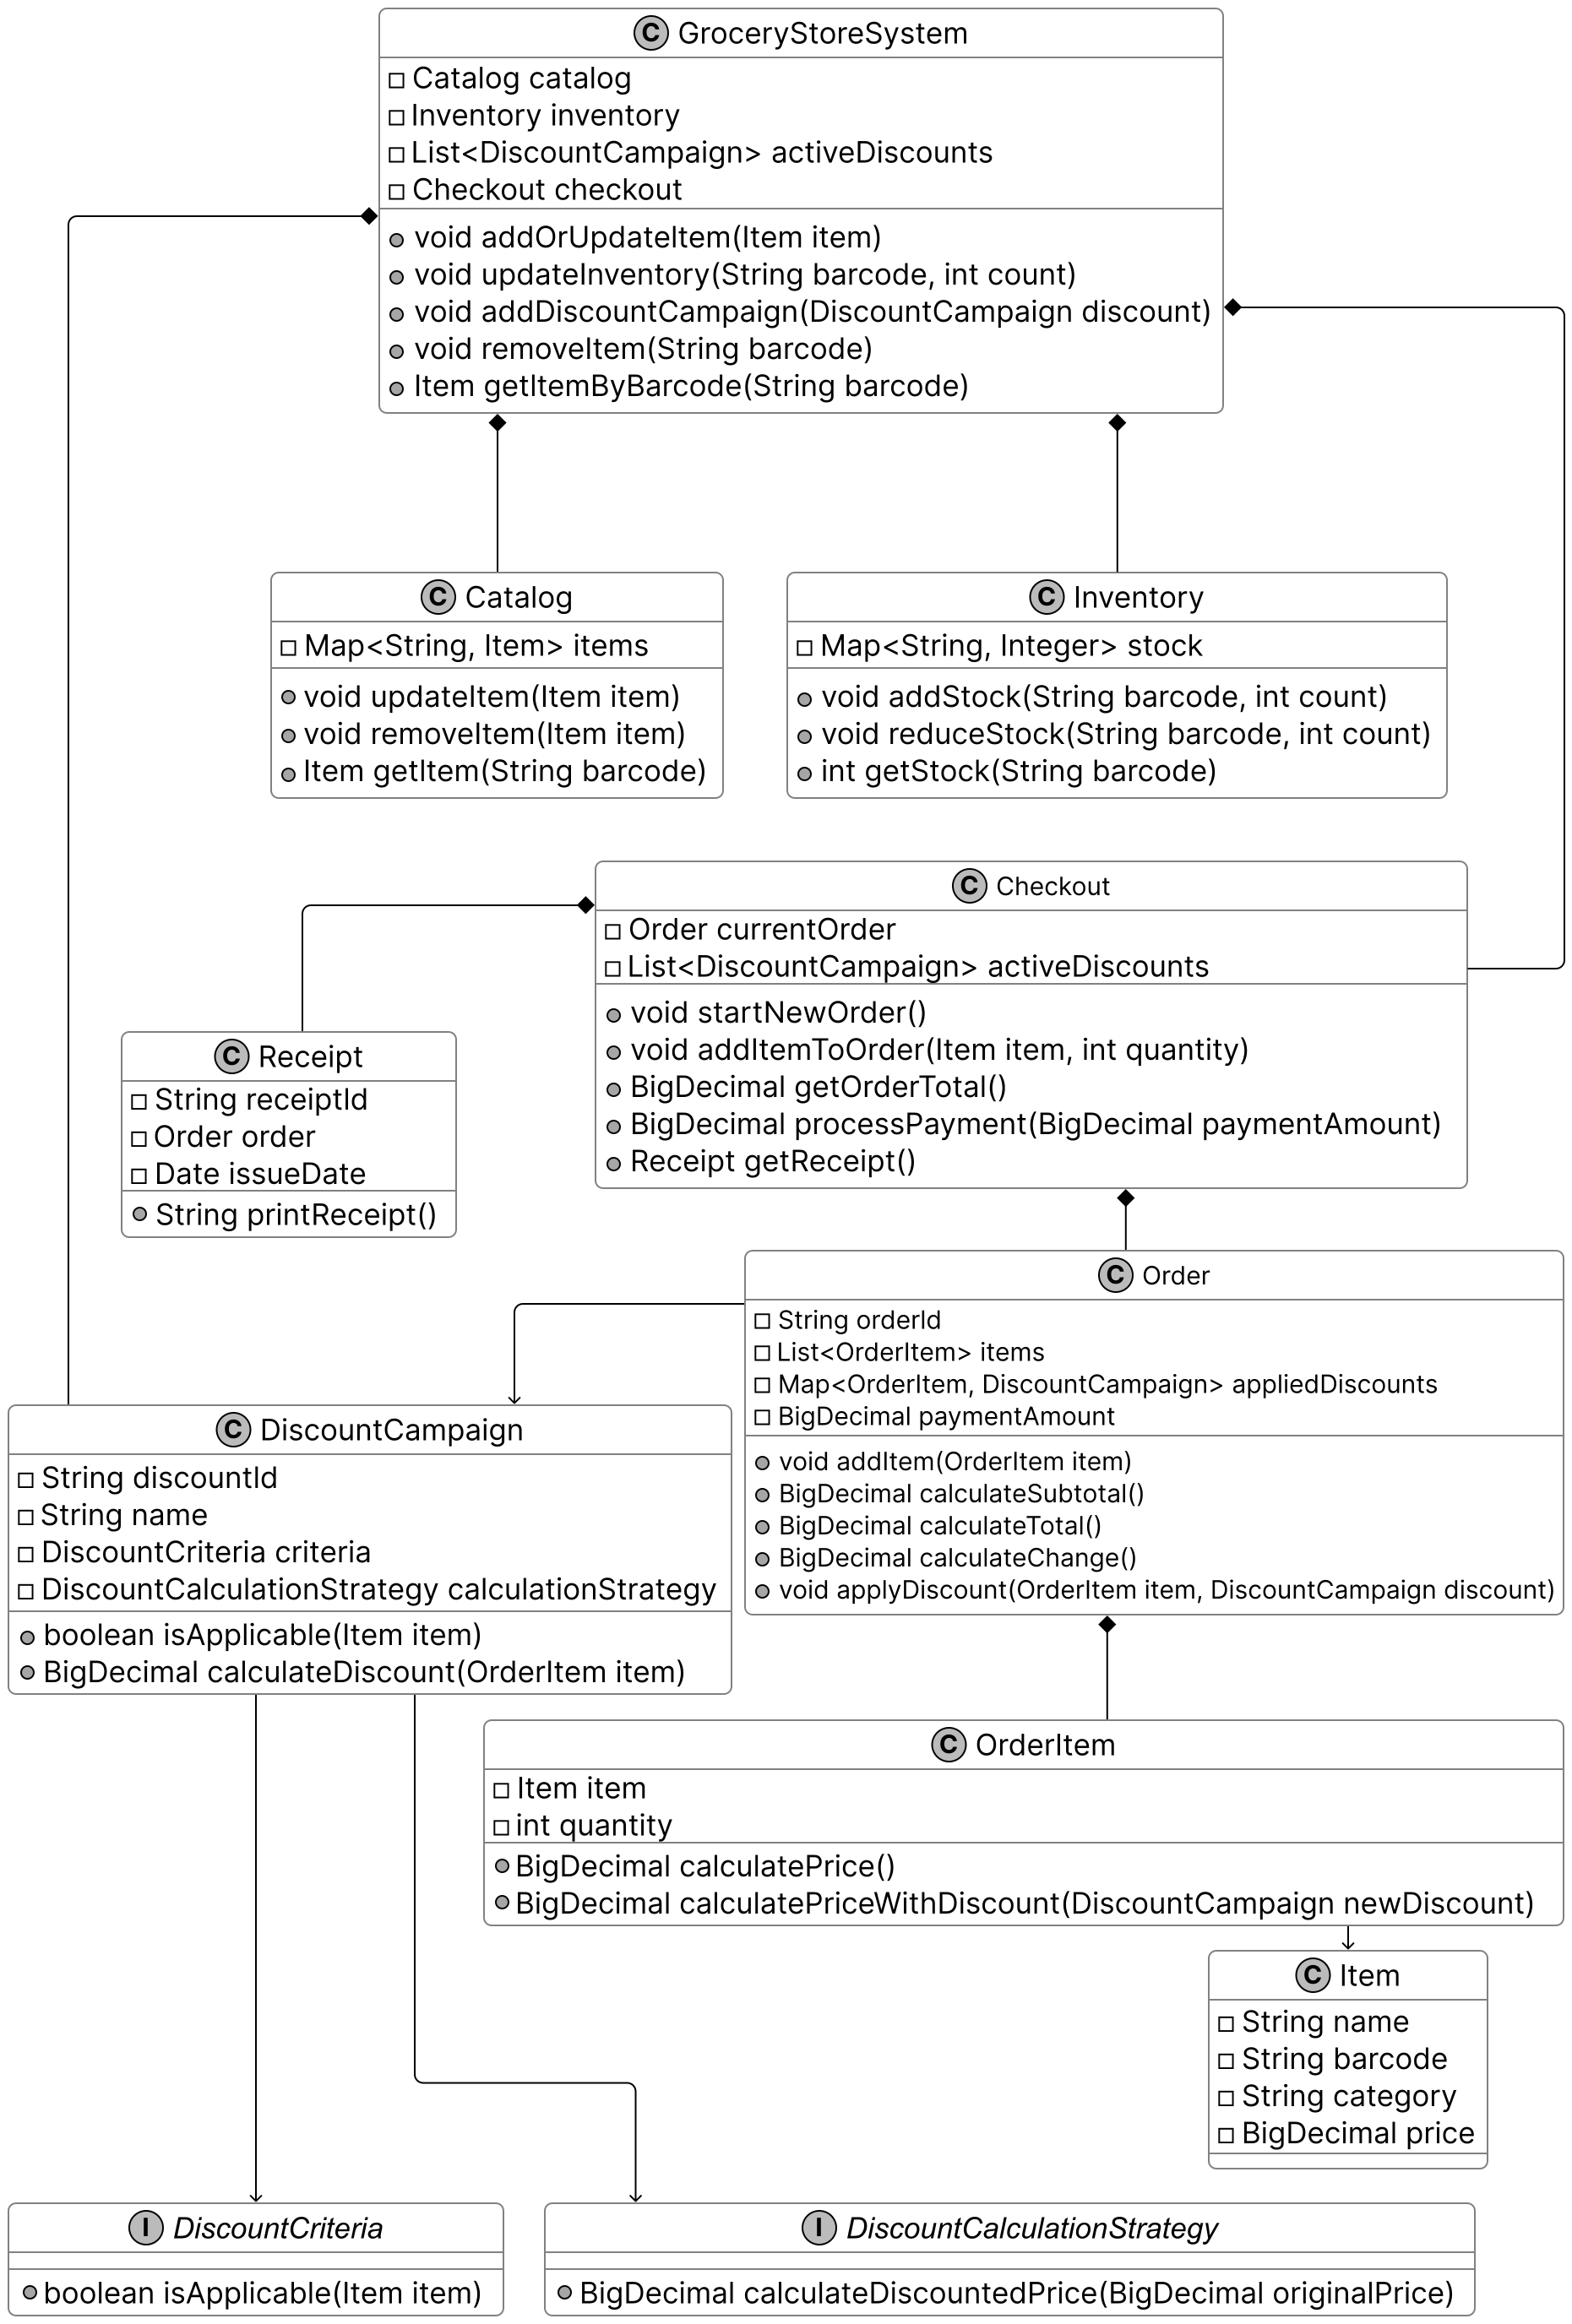
Code — Grocery Store System
**Item**
```java public class Item { private final String name; private final String barcode; private final String category; private BigDecimal price;
public Item(String name, String barcode, String category, BigDecimal price) { this.name = name; this.barcode = barcode; this.category = category; this.price = price; }
// getter and setter methods are omitted for brevity } ```
**Catalog**
```java public class Catalog { // Map of barcodes to their corresponding items private final Map<String, Item> items = new HashMap<>();
public void updateItem(Item item) { items.put(item.getBarcode(), item); }
public void removeItem(String barcode) { items.remove(barcode); }
public Item getItem(String barcode) { return items.get(barcode); } } ```
**Inventory**
```java public class Inventory { // Map of barcodes to their stock quantities private final Map<String, Integer> stock = new HashMap<>();
public void addStock(String barcode, int count) { stock.put(barcode, stock.getOrDefault(barcode, 0) + count); }
public void reduceStock(String barcode, int count) { stock.put(barcode, stock.getOrDefault(barcode, 0) - count); }
public int getStock(String barcode) { return stock.getOrDefault(barcode, 0); } } ```
> **Implementation Choice:** The `Inventory` class uses a `HashMap` to map barcodes to stock quantities, enabling O(1) average-case time complexity for updates and queries.
**DiscountCampaign**
```java public class DiscountCampaign { private final String discountId; private final String name; private final DiscountCriteria criteria; private final DiscountCalculationStrategy calculationStrategy;
public DiscountCampaign( String discountId, String name, DiscountCriteria criteria, DiscountCalculationStrategy calculationStrategy) { this.discountId = discountId; this.name = name; this.criteria = criteria; this.calculationStrategy = calculationStrategy; }
// Checks if this discount applies to the given item public boolean isApplicable(Item item) { return criteria.isApplicable(item); }
// Calculates the discounted price for the given order item public BigDecimal calculateDiscount(OrderItem item) { return calculationStrategy.calculateDiscountedPrice(item.calculatePrice()); } // getter and setter methods are omitted for brevity } ```
> **Implementation Choice:** The `DiscountCampaign` class uses composition to hold a single `DiscountCriteria` and `DiscountCalculationStrategy`, leveraging polymorphism for flexible discount configurations.
**OrderItem**
```java public class OrderItem { private final Item item; private final int quantity;
public OrderItem(Item item, int quantity) { this.item = item; this.quantity = quantity; }
// Calculates the total price for this order item without any discount public BigDecimal calculatePrice() { return item.getPrice().multiply(BigDecimal.valueOf(quantity)); }
// Calculates the total price for this order item with the given discount public BigDecimal calculatePriceWithDiscount(DiscountCampaign newDiscount) { return newDiscount.calculateDiscount(this); } // getter and setter methods are omitted for brevity } ```
**Order**
```java public class Order { private final String orderId; private final List<OrderItem> items = new ArrayList<>(); private final Map<OrderItem, DiscountCampaign> appliedDiscounts = new HashMap<>(); private BigDecimal paymentAmount = BigDecimal.ZERO;
public Order() { this.orderId = String.valueOf(UUID.randomUUID()); }
public void addItem(OrderItem item) { items.add(item); }
// Calculates the subtotal of all items without discounts public BigDecimal calculateSubtotal() { return items.stream() .map(OrderItem::calculatePrice) .reduce(BigDecimal.ZERO, BigDecimal::add); }
// Calculates the total price including all applied discounts public BigDecimal calculateTotal() { return items.stream() .map(item -> { DiscountCampaign discount = appliedDiscounts.get(item); return discount != null ? item.calculatePriceWithDiscount(discount) : item.calculatePrice(); }) .reduce(BigDecimal.ZERO, BigDecimal::add); }
public void applyDiscount(OrderItem item, DiscountCampaign discount) { appliedDiscounts.put(item, discount); }
public BigDecimal calculateChange() { return paymentAmount.subtract(calculateTotal()); } // getter and setter methods are omitted for brevity } ```
> **Implementation Choice:** The `Order` class uses an `ArrayList` for fast O(1) item additions and a `HashMap<OrderItem, DiscountCampaign>` for O(1) discount lookups.
**Checkout**
```java public class Checkout { private Order currentOrder; private final List<DiscountCampaign> activeDiscounts;
public Checkout(List<DiscountCampaign> activeDiscounts) { this.activeDiscounts = activeDiscounts; startNewOrder(); }
public void startNewOrder() { this.currentOrder = new Order(); }
public BigDecimal processPayment(BigDecimal paymentAmount) { currentOrder.setPayment(paymentAmount); return currentOrder.calculateChange(); }
// Adds an item to the current order and applies applicable discounts public void addItemToOrder(Item item, int quantity) { OrderItem orderItem = new OrderItem(item, quantity); currentOrder.addItem(orderItem);
for (DiscountCampaign newDiscount : activeDiscounts) { if (newDiscount.isApplicable(item)) { // If multiple discounts apply, keep the higher (lower final price) if (currentOrder.getAppliedDiscounts().containsKey(orderItem)) { DiscountCampaign existingDiscount = currentOrder.getAppliedDiscounts().get(orderItem); if (orderItem.calculatePriceWithDiscount(newDiscount) .compareTo(orderItem.calculatePriceWithDiscount(existingDiscount)) > 0) { currentOrder.applyDiscount(orderItem, newDiscount); } } else { currentOrder.applyDiscount(orderItem, newDiscount); } } } }
public Receipt getReceipt() { return new Receipt(currentOrder); }
public BigDecimal getOrderTotal() { return currentOrder.calculateTotal(); } } ```
> **Implementation Choice:** The `Checkout` class uses an `ArrayList` to store active discounts, enabling linear iteration (O(n)) to evaluate applicability and select the highest discount.
**GroceryStoreSystem**
```java public class GroceryStoreSystem { private final Catalog catalog; private final Inventory inventory; private List<DiscountCampaign> activeDiscounts = new ArrayList<>(); private final Checkout checkout;
public GroceryStoreSystem() { this.catalog = new Catalog(); this.inventory = new Inventory(); this.checkout = new Checkout(activeDiscounts); }
public void addOrUpdateItem(Item item) { catalog.updateItem(item); }
public void updateInventory(String barcode, int count) { inventory.addStock(barcode, count); }
public void addDiscountCampaign(DiscountCampaign discount) { activeDiscounts.add(discount); }
public Item getItemByBarcode(String barcode) { return catalog.getItem(barcode); }
public void removeItem(String barcode) { catalog.removeItem(barcode); } } ```
Deep Dive — Flexible Discount Criteria
The current design encapsulates discount logic into two components: **Criteria** (determines whether an item qualifies) and **Price Calculation Strategy** (computes the discounted price). But what if the interviewer asks for more complex composite discounts?
**Combining Multiple Criteria (Composite Pattern)**
To handle nested or combined criteria, we use the **Composite Pattern**. Composite criteria allow combining multiple rules using logical operators like AND and OR.
> **Note:** To learn more about the Composite Pattern, refer to the Unix File Search chapter.
```java public class CompositeCriteria implements DiscountCriteria { private final List<DiscountCriteria> criteriaList;
public CompositeCriteria(List<DiscountCriteria> criteriaList) { this.criteriaList = new ArrayList<>(criteriaList); }
@Override public boolean isApplicable(Item item) { return criteriaList.stream().allMatch(criteria -> criteria.isApplicable(item)); }
public void addCriteria(DiscountCriteria criteria) { criteriaList.add(criteria); }
public void removeCriteria(DiscountCriteria criteria) { criteriaList.remove(criteria); } } ```
**Layering Discount Calculations (Decorator Pattern)**
To manage sequential discount calculations, we use the **Decorator Pattern**. By wrapping multiple calculation strategies, we can apply discounts in a specific order: 1. Apply a fixed discount first. 2. Then apply a percentage-based discount to the remaining price.
```java public class FixedDiscountDecorator implements DiscountCalculationStrategy { private final DiscountCalculationStrategy strategy; private final BigDecimal fixedAmount;
public FixedDiscountDecorator(DiscountCalculationStrategy strategy, BigDecimal fixedAmount) { this.strategy = strategy; this.fixedAmount = fixedAmount; }
@Override public BigDecimal calculateDiscountedPrice(BigDecimal originalPrice) { return strategy.calculateDiscountedPrice(originalPrice).subtract(fixedAmount); } }
public class PercentageDiscountDecorator implements DiscountCalculationStrategy { private final DiscountCalculationStrategy strategy; private final BigDecimal additionalPercentage;
public PercentageDiscountDecorator( DiscountCalculationStrategy strategy, BigDecimal additionalPercentage) { this.strategy = strategy; this.additionalPercentage = additionalPercentage; }
@Override public BigDecimal calculateDiscountedPrice(BigDecimal originalPrice) { BigDecimal baseDiscountedPrice = strategy.calculateDiscountedPrice(originalPrice); return baseDiscountedPrice.multiply( BigDecimal.ONE.subtract(additionalPercentage.divide(BigDecimal.valueOf(100)))); } } ```
Wrap Up
In this chapter, we designed a grocery store system. We started by listing requirements through a candidate/interviewer dialogue, identified core objects, created the class diagram, and presented the implementation code.
The most important takeaway is the **clear separation of concerns**: each component (Catalog, Inventory, Order, DiscountCampaign) focuses on a specific responsibility, ensuring modularity and seamless integration.
In the deep dive, we explored advanced topics like composite discounts and layering multiple calculation strategies using the Composite and Decorator patterns. These enhancements showcase how abstraction and extensibility handle complex real-world scenarios.
Further Reading — Decorator Design Pattern
**Decorator design pattern**
Decorator is a structural design pattern that allows you to add new behaviors to an object by wrapping it in another object that provides the additional functionality, without modifying the original object's code.
In the grocery store system, we used the Decorator pattern to layer multiple discount calculations by wrapping `DiscountCalculationStrategy` objects in `FixedDiscountDecorator` and `PercentageDiscountDecorator`. This allows applying discounts sequentially without altering core discount strategies.
**Problem**
Imagine a text editor where users format text with bold, italic, or underline styles. Subclassing leads to an explosion of combinations (BoldText, BoldItalicText...) making it hard to add new styles.
**Solution**
The Decorator Pattern creates decorator classes that implement the same interface as the Text class and wrap a Text object. Decorators can be stacked to combine styles (bold + italic), providing flexibility without altering the Text class.
**When to use**
- When you need to add features or behaviors to objects dynamically at runtime without modifying their code. - When subclassing results in too many feature combinations, composition is a simpler alternative.
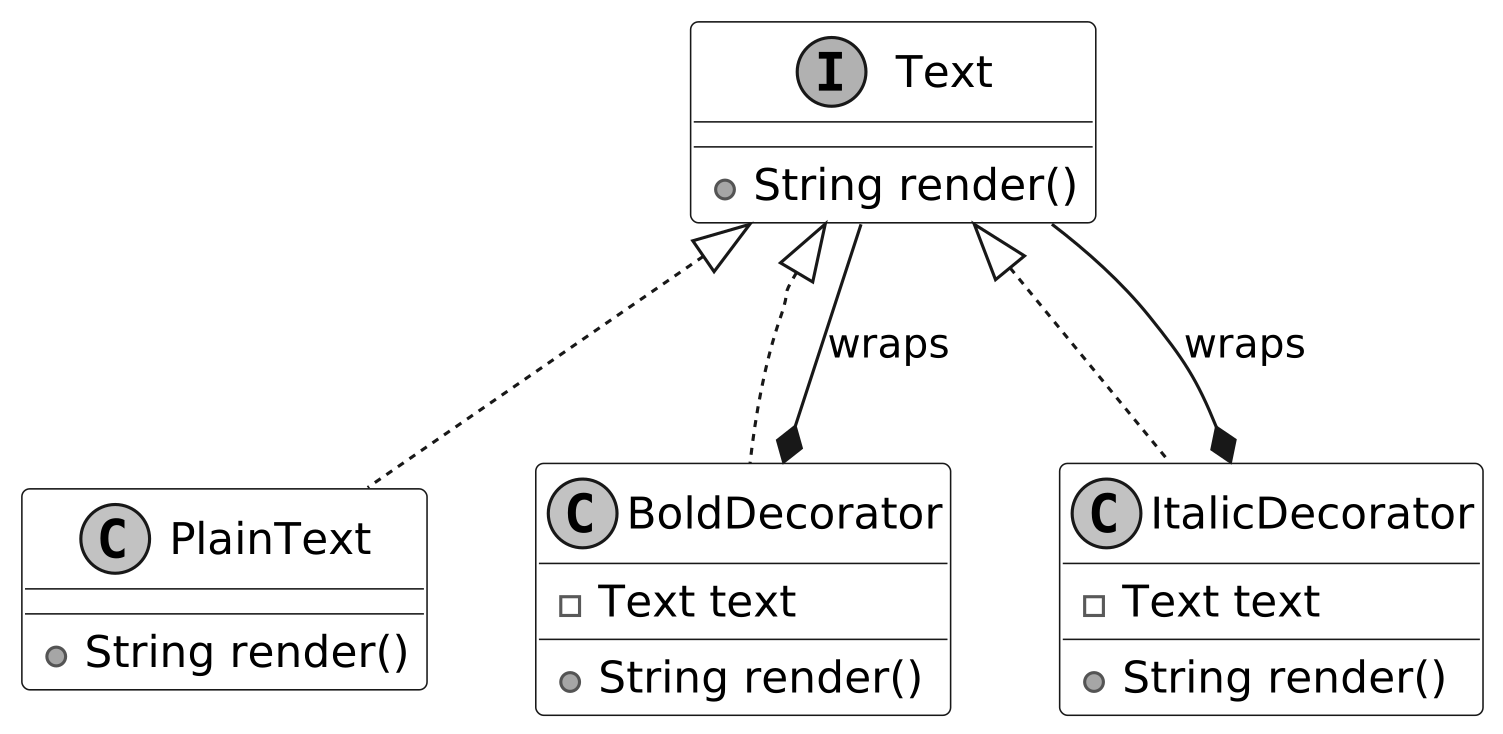
Design a Tic Tac Toe Game
In this chapter, we will explore the object-oriented design of a Tic-Tac-Toe game. We aim to create an interactive platform where two players alternate turns, placing their symbols on a virtual board. We'll design key components such as the game board, player move tracking, outcome determination, and a score tracker for managing player ratings.
**How Tic-Tac-Toe Works:** Tic-Tac-Toe is a classic two-player game played on a 3×3 grid. Each player selects a symbol ("X" or "O") and takes turns placing it in an empty cell. The goal is to align three identical symbols horizontally, vertically, or diagonally. The game concludes with a win if a player achieves this alignment, or a draw if all nine cells are filled without a winner.
Requirements Gathering
Here's an example of a typical prompt an interviewer might present:
"Imagine you and a friend are sitting down for a quick game of Tic-Tac-Toe. You each choose a symbol (e.g., "X" or "O") and take turns placing your symbol on a board. After each move, the game checks if someone has won or if the board is full, signaling a draw. Behind the scenes, the game tracks your moves, updates a scoreboard to reflect wins, and maintains player rankings for future matches. Let's design a Tic-Tac-Toe game system that handles all this."
> **Candidate:** Does the game support different board sizes? > **Interviewer:** No, let's stick to the standard 3×3 board for simplicity.
> **Candidate:** How should the game handle outcomes like wins, losses, and draws? > **Interviewer:** The system must detect winning patterns and notify players of the result: win, draw, or ongoing.
> **Candidate:** Should the game track player ratings? > **Interviewer:** Yes, the game should maintain a score tracker that updates player ratings based on game outcomes (win, loss, or draw).
> **Candidate:** How does the game handle invalid moves? > **Interviewer:** If a player attempts a move in an occupied or invalid position, notify them and prompt them for a new move.
**Requirements**
- The game is played on a 3×3 board. - The system determines the game's status: a win (three identical symbols aligned), a draw (full board with no winner), or in progress. - A score tracker records player performance, updates ratings based on wins, and supports queries like rankings or top players. - Invalid moves (e.g., placing a symbol in an occupied cell) are rejected with feedback.
**Non-functional requirements:** - The user interface should be intuitive, providing clear feedback for invalid moves and game outcomes. - The system should support future enhancements (different board sizes, game modes) without major architectural changes.
Identify Core Objects
- **Board:** Models the 3×3 game grid. Handles updates to the grid, checks for a winner by examining rows, columns, and diagonals, and determines if the board is full. - **Player:** Represents an individual playing the game. - **Game:** The central entity that coordinates turn-taking, validates moves, and tracks the game's status. - **ScoreTracker:** Tracks player ratings across games, updating them based on outcomes.
> **Design Choice:** The `Game` class can become overloaded. To keep it manageable, we delegate the `Board` to manage the grid and `ScoreTracker` to handle player ratings. This modularity enhances maintainability and scalability.
Design Class Diagram
**Game**
The `Game` class is the central coordinator. It manages gameplay flow, initializes components, handles turns, and determines outcomes. The `ScoreTracker` is responsible for tracking player performance, the `Board` manages the grid, and the `Player` class remains stateless (no stored win counts).
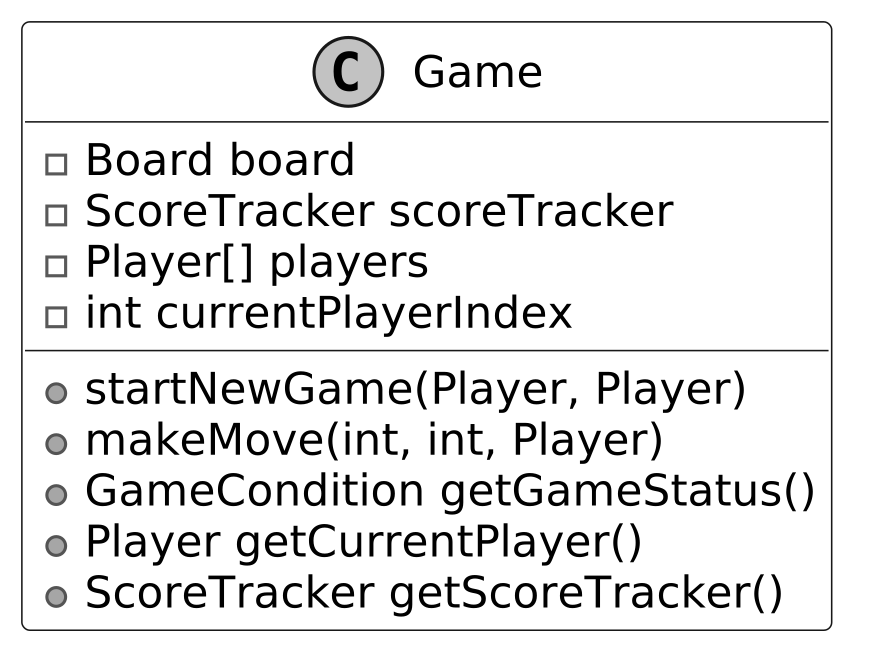
Board, ScoreTracker, Move, and Player Classes
**Board**
The `Board` class represents the 3×3 game grid as a two-dimensional array of `Player` objects. It enforces move validity, determines winners by checking rows/columns/diagonals, and supports grid reset.
> **Design Choice:** Win-checking logic belongs in `Board` (not `Game`), aligning with the Single Responsibility Principle — the Board owns grid-related rules.
**ScoreTracker**
The `ScoreTracker` maintains a centralized `HashMap<Player, Integer>` of win counts. Ratings are intentionally separated from the `Player` class because they are contextual (relative to others), shift as games are played, and may evolve in advanced systems (e.g., different leagues).
**Move**
The `Move` class bundles `row`, `column`, and `player` into a single data structure, improving code readability versus passing them as separate parameters.
**Player**
The `Player` class encapsulates `name` and `symbol`. Move validation and rating updates are deliberately excluded to honor SRP — the `Board` validates moves, and `ScoreTracker` manages ratings.
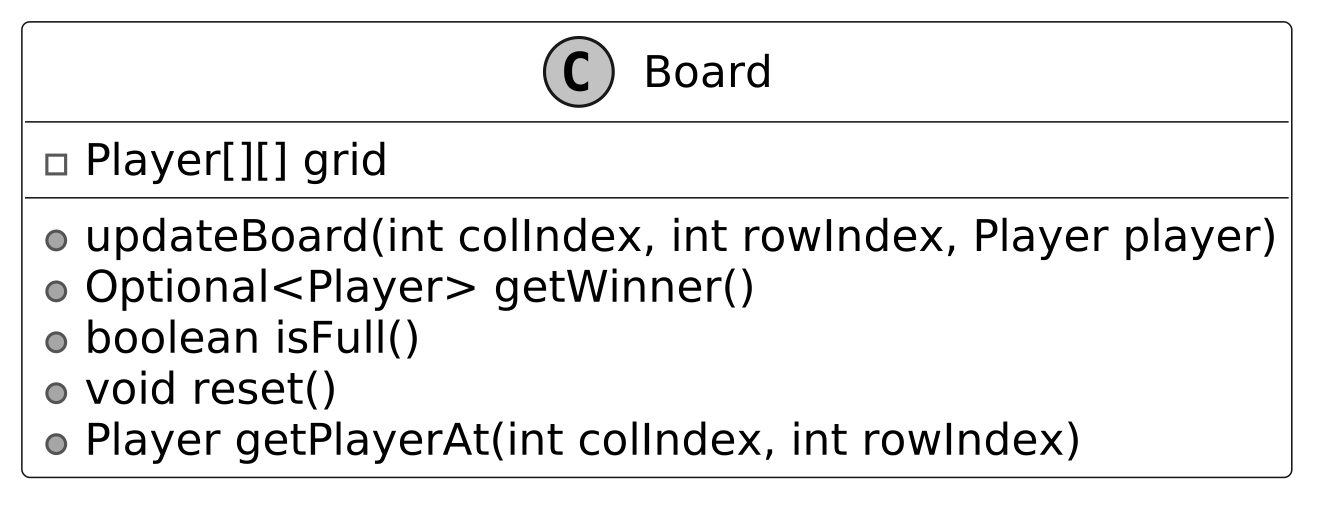
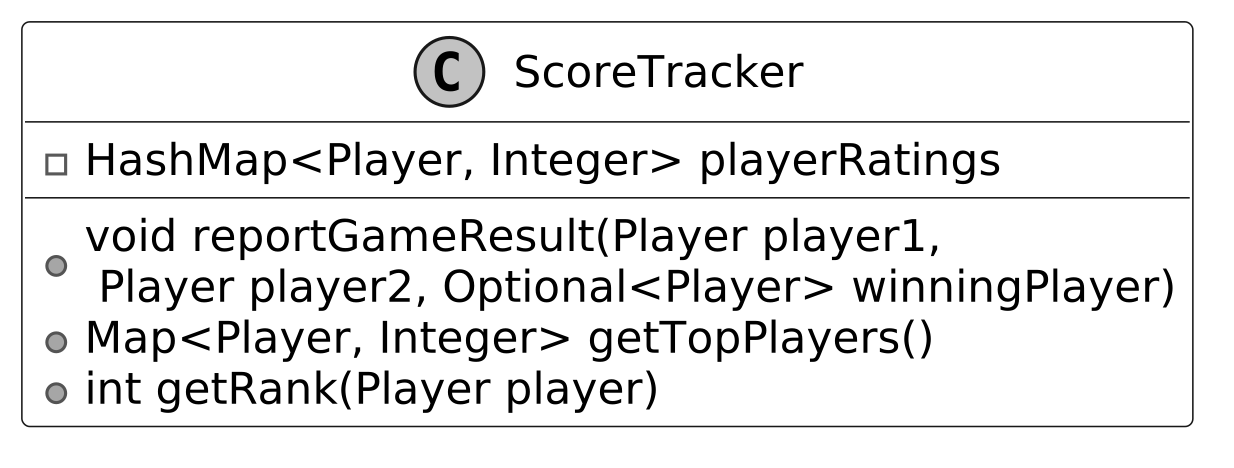
Complete Class Diagram
Below is the complete class diagram of the Tic-Tac-Toe game.
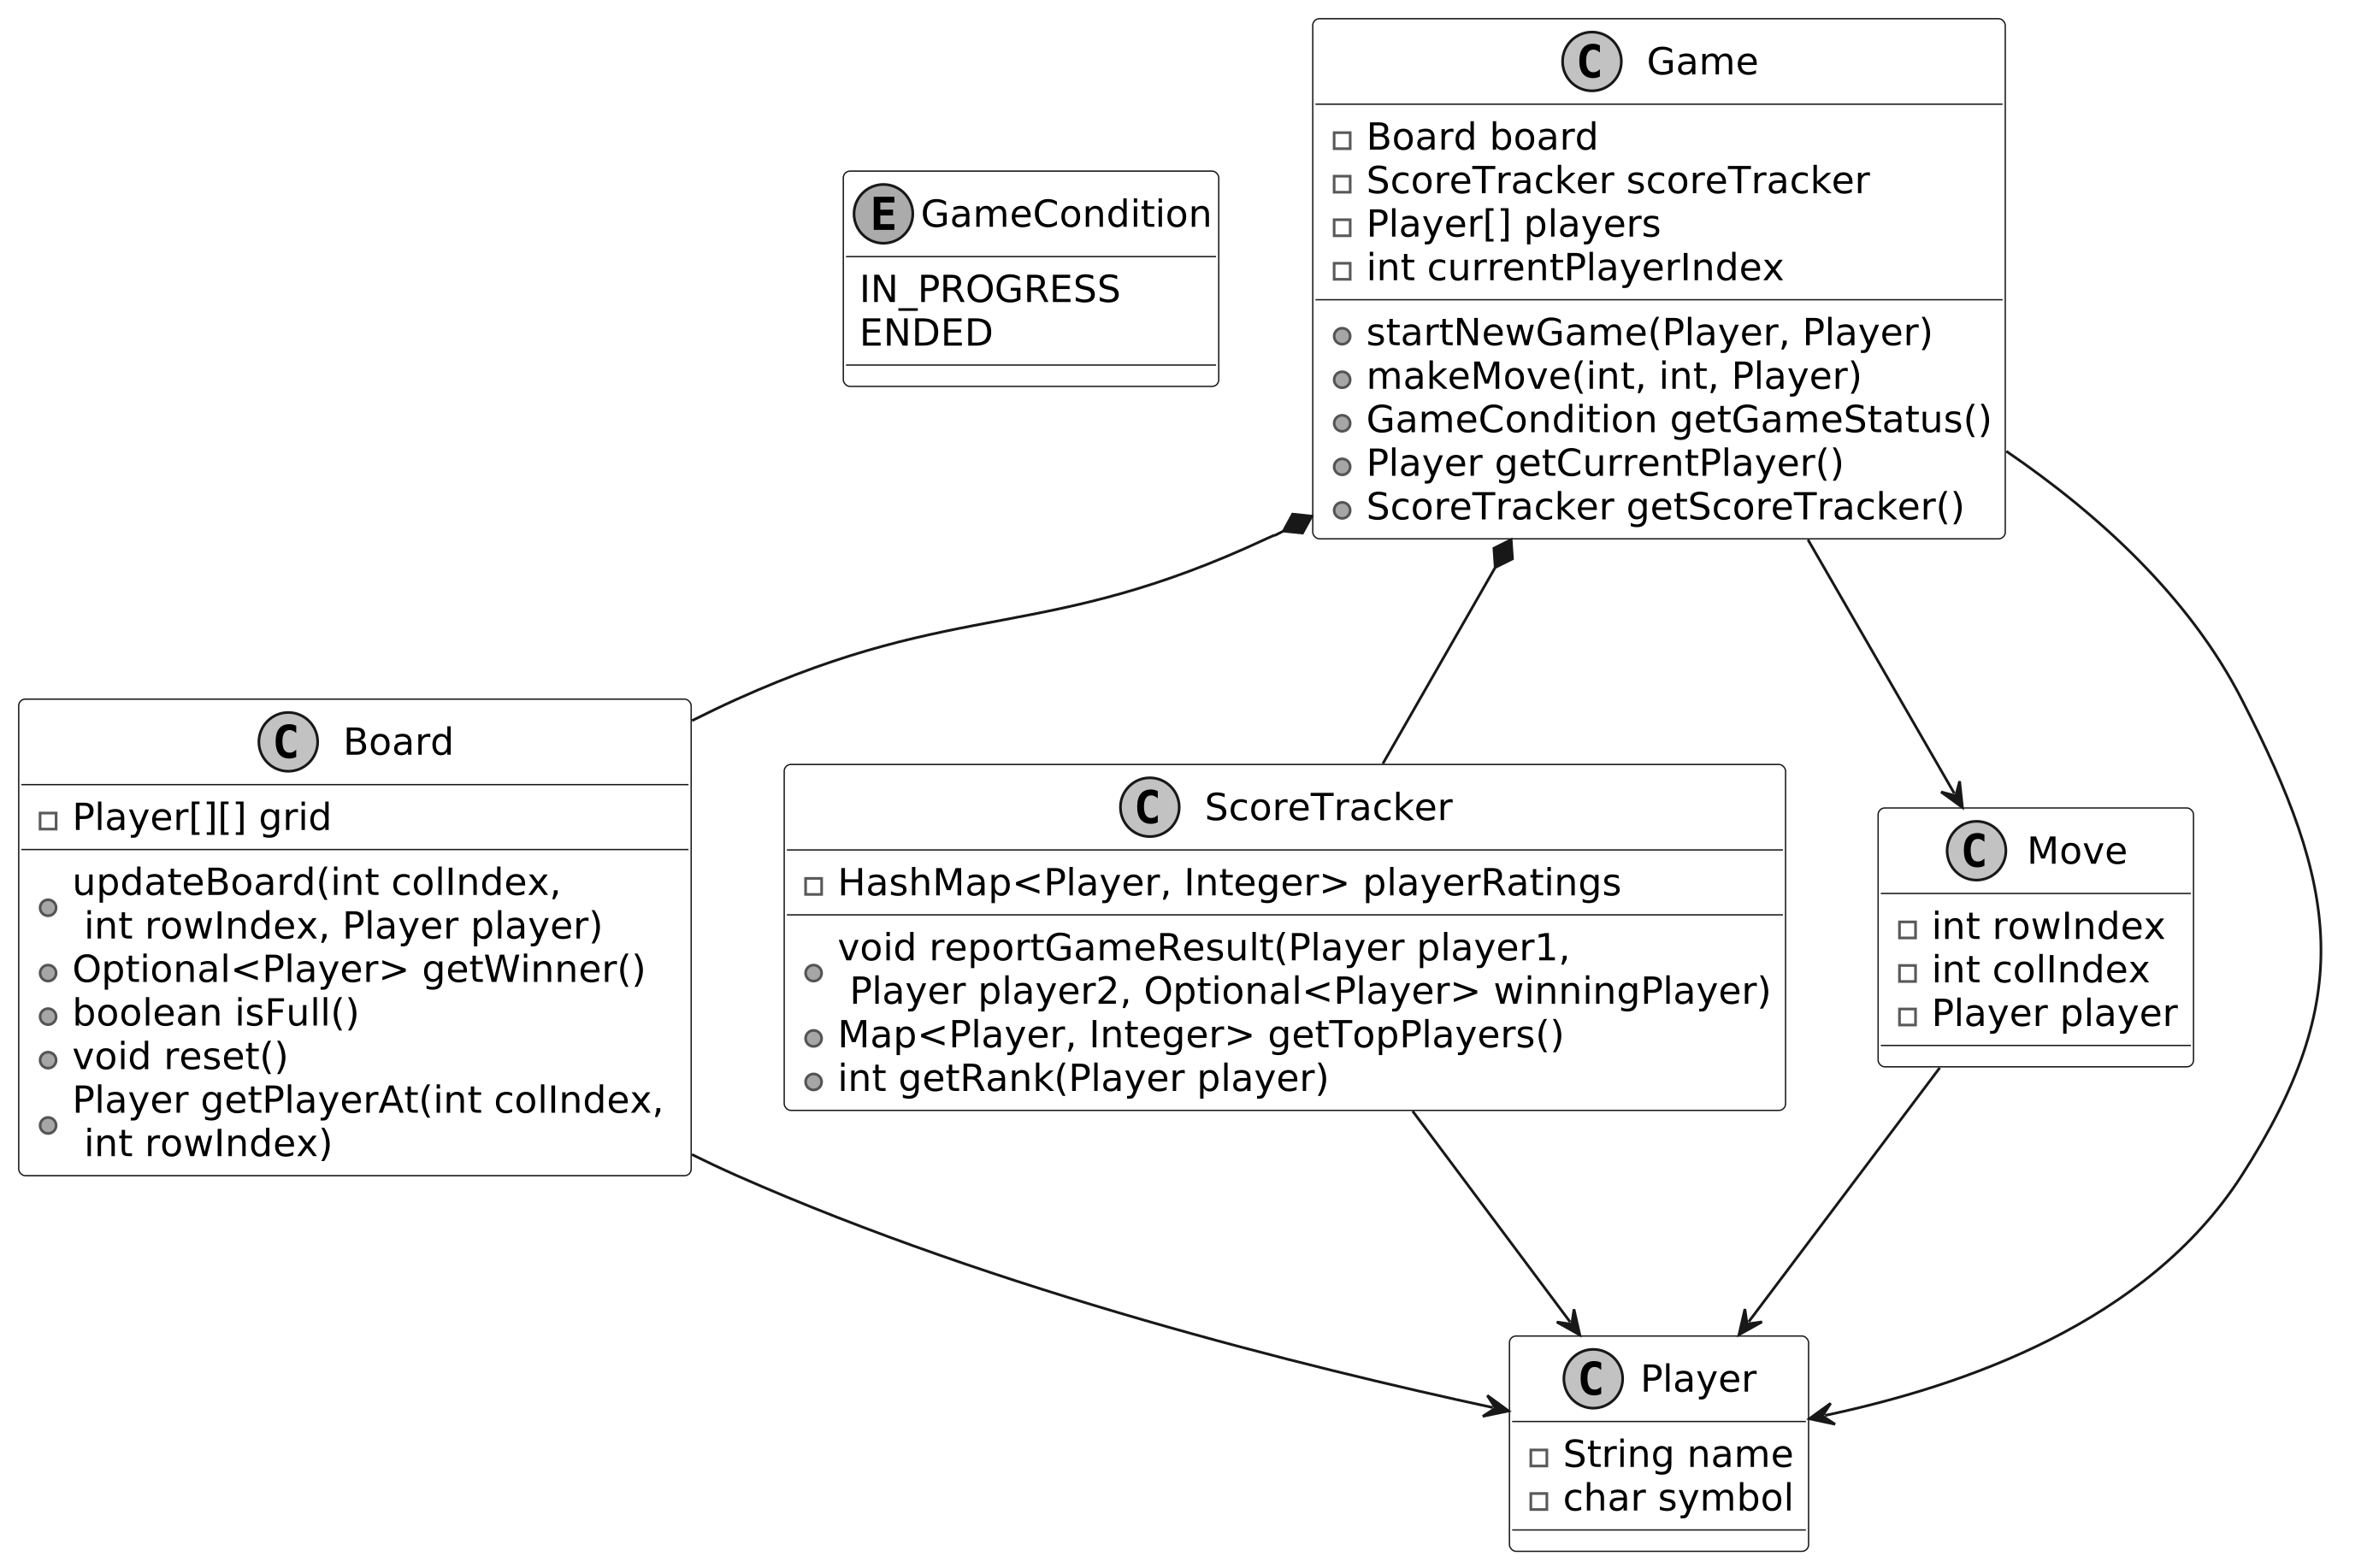
Code — Tic-Tac-Toe Game
**Game**
```java public class Game { private final Board board; private final ScoreTracker scoreTracker; private Player[] players; private int currentPlayerIndex;
public Game(Player playerX, Player playerY) { board = new Board(); scoreTracker = new ScoreTracker(); startNewGame(playerX, playerY); }
public void startNewGame(Player playerX, Player playerY) { board.reset(); players = new Player[] {playerX, playerY}; currentPlayerIndex = 0; }
public void makeMove(int colIndex, int rowIndex, Player player) { if (getGameStatus().equals(GameCondition.ENDED)) { throw new IllegalStateException("game ended"); } if (players[currentPlayerIndex] != player) { throw new IllegalArgumentException("not the current player"); } if (board.getPlayerAt(colIndex, rowIndex) != null) { throw new IllegalArgumentException("board position is taken"); } board.updateBoard(colIndex, rowIndex, player); final Move newMove = new Move(colIndex, rowIndex, player); currentPlayerIndex = (currentPlayerIndex + 1) % players.length; if (getGameStatus().equals(GameCondition.ENDED)) { scoreTracker.reportGameResult(players[0], players[1], board.getWinner()); } }
public GameCondition getGameStatus() { Optional<Player> winner = board.getWinner(); if (winner.isPresent()) { return GameCondition.ENDED; } return board.isFull() ? GameCondition.ENDED : GameCondition.IN_PROGRESS; }
public Player getCurrentPlayer() { return players[currentPlayerIndex]; }
public ScoreTracker getScoreTracker() { return scoreTracker; } } ```
> **Implementation Choice:** The `Game` class uses a state machine-like approach with a `GameCondition` enum (IN_PROGRESS or ENDED), ensuring only one player moves at a time and the game stops when a win or draw occurs.
**Board**
```java public class Board { private final Player[][] grid = new Player[3][3];
public void updateBoard(int colIndex, int rowIndex, Player player) { if (grid[colIndex][rowIndex] == null) { grid[colIndex][rowIndex] = player; } }
public Optional<Player> getWinner() { // Check rows for three in a row for (int i = 0; i < grid.length; i++) { Player first = grid[i][0]; if (first != null && Arrays.stream(grid[i]).allMatch(p -> p == first)) { return Optional.of(first); } }
// Check columns for three in a column for (int j = 0; j < grid[0].length; j++) { final Player first = grid[0][j]; int finalJ = j; if (first != null && Arrays.stream(grid).allMatch(row -> row[finalJ] == first)) { return Optional.of(first); } }
// Check main diagonal (top-left to bottom-right) Player topLeft = grid[0][0]; if (topLeft != null && IntStream.range(0, grid.length).allMatch(i -> grid[i][i] == topLeft)) { return Optional.of(topLeft); }
// Check anti-diagonal (top-right to bottom-left) Player topRight = grid[0][grid[0].length - 1]; if (topRight != null && IntStream.range(0, grid.length) .allMatch(i -> grid[i][grid[0].length - 1 - i] == topRight)) { return Optional.of(topRight); }
return Optional.empty(); }
public boolean isFull() { return Arrays.stream(grid).flatMap(Arrays::stream).noneMatch(Objects::isNull); }
public void reset() { for (Player[] players : grid) { Arrays.fill(players, null); } }
public Player getPlayerAt(int colIndex, int rowIndex) { return grid[colIndex][rowIndex]; } } ```
> **Implementation Choice:** The `Board` uses a 2D array (`Player[][]`) for direct spatial mapping and O(1) position access.
**Player**
```java public class Player { private final String name; private final char symbol;
public Player(String name, char symbol) { this.name = name; this.symbol = symbol; }
public String getName() { return name; }
public char getSymbol() { return symbol; } } ```
**ScoreTracker**
```java class ScoreTracker { private HashMap<Player, Integer> playerRatings = new HashMap<>();
// Simple victory count system: winner +1, loser -1, draw no change public void reportGameResult(Player player1, Player player2, Optional<Player> winningPlayer) { if (winningPlayer.isPresent()) { Player winner = winningPlayer.get(); Player loser = player1 == winner ? player2 : player1; playerRatings.putIfAbsent(winner, 0); playerRatings.put(winner, playerRatings.get(winner) + 1); playerRatings.putIfAbsent(loser, 0); playerRatings.put(loser, playerRatings.get(loser) - 1); } }
public Map<Player, Integer> getTopPlayers() { return playerRatings.entrySet().stream() .sorted(Map.Entry.comparingByValue(Comparator.reverseOrder())) .map(Map.Entry::getKey) .collect(Collectors.toMap(player -> player, player -> playerRatings.get(player))); }
public int getRank(Player player) { List<Player> sortedPlayers = playerRatings.entrySet().stream() .sorted(Map.Entry.comparingByValue(Comparator.reverseOrder())) .map(Map.Entry::getKey) .collect(Collectors.toList()); return sortedPlayers.indexOf(player) + 1; } } ```
> **Implementation Choice:** `HashMap<Player, Integer>` provides O(1) average-case lookup and update for frequent score updates and ranking queries.
Deep Dive — Undo Functionality (Memento Pattern)
**Implement undo functionality in Tic-Tac-Toe**
**Step 1: Track move history**
Every time a player makes a move, we store that `Move` object (already designed with `rowIndex`, `colIndex`, and `player`).
**Step 2: Store Moves with a Stack**
Since moves occur in LIFO order, we use an `ArrayDeque<Move>`. When a move is made, push it. When undo is requested, pop the most recent move and revert the board.
```java class MoveHistory { private final ArrayDeque<Move> history = new ArrayDeque<>();
public void recordMove(Move move) { history.push(move); }
public Move undoMove() { return history.pop(); }
public void clearHistory() { history.clear(); } } ```
**Step 3: Reverse the Board State**
```java public void makeMove(int colIndex, int rowIndex, Player player) { if (getGameStatus().equals(GameCondition.ENDED)) { throw new IllegalStateException("game ended"); } if (players[currentPlayerIndex] != player) { throw new IllegalArgumentException("not the current player"); } if (board.getPlayerAt(colIndex, rowIndex) != null) { throw new IllegalArgumentException("board position is taken"); } board.updateBoard(colIndex, rowIndex, player); final Move newMove = new Move(colIndex, rowIndex, player); moveHistory.recordMove(newMove); currentPlayerIndex = (currentPlayerIndex + 1) % players.length; if (getGameStatus().equals(GameCondition.ENDED)) { scoreTracker.reportGameResult(players[0], players[1], board.getWinner()); } }
public void undoMove() { if (getGameStatus().equals(GameCondition.ENDED)) { throw new IllegalStateException("game ended and winner already reported"); } final Move lastMove = moveHistory.undoMove();
if (currentPlayerIndex == 0) { currentPlayerIndex = players.length - 1; } else { currentPlayerIndex--; }
board.updateBoard(lastMove.getColIndex(), lastMove.getRowIndex(), null); } ```
**Memento Pattern**
This is the essence of the **Memento Pattern** — a behavioral design pattern that allows saving and restoring previous state without exposing implementation details.
- **Memento:** The `Move` class — stores the state of a single move. - **Caretaker:** The `MoveHistory` class — maintains a stack of `Move` objects and provides `undoMove()`. - **Originator:** The `Game` class — creates `Move` objects and uses `undoMove()` to restore state.
> **Note:** One potential challenge is memory overhead. In Tic-Tac-Toe this is minimal, but in more complex games with larger states, storing each memento could become a bottleneck.
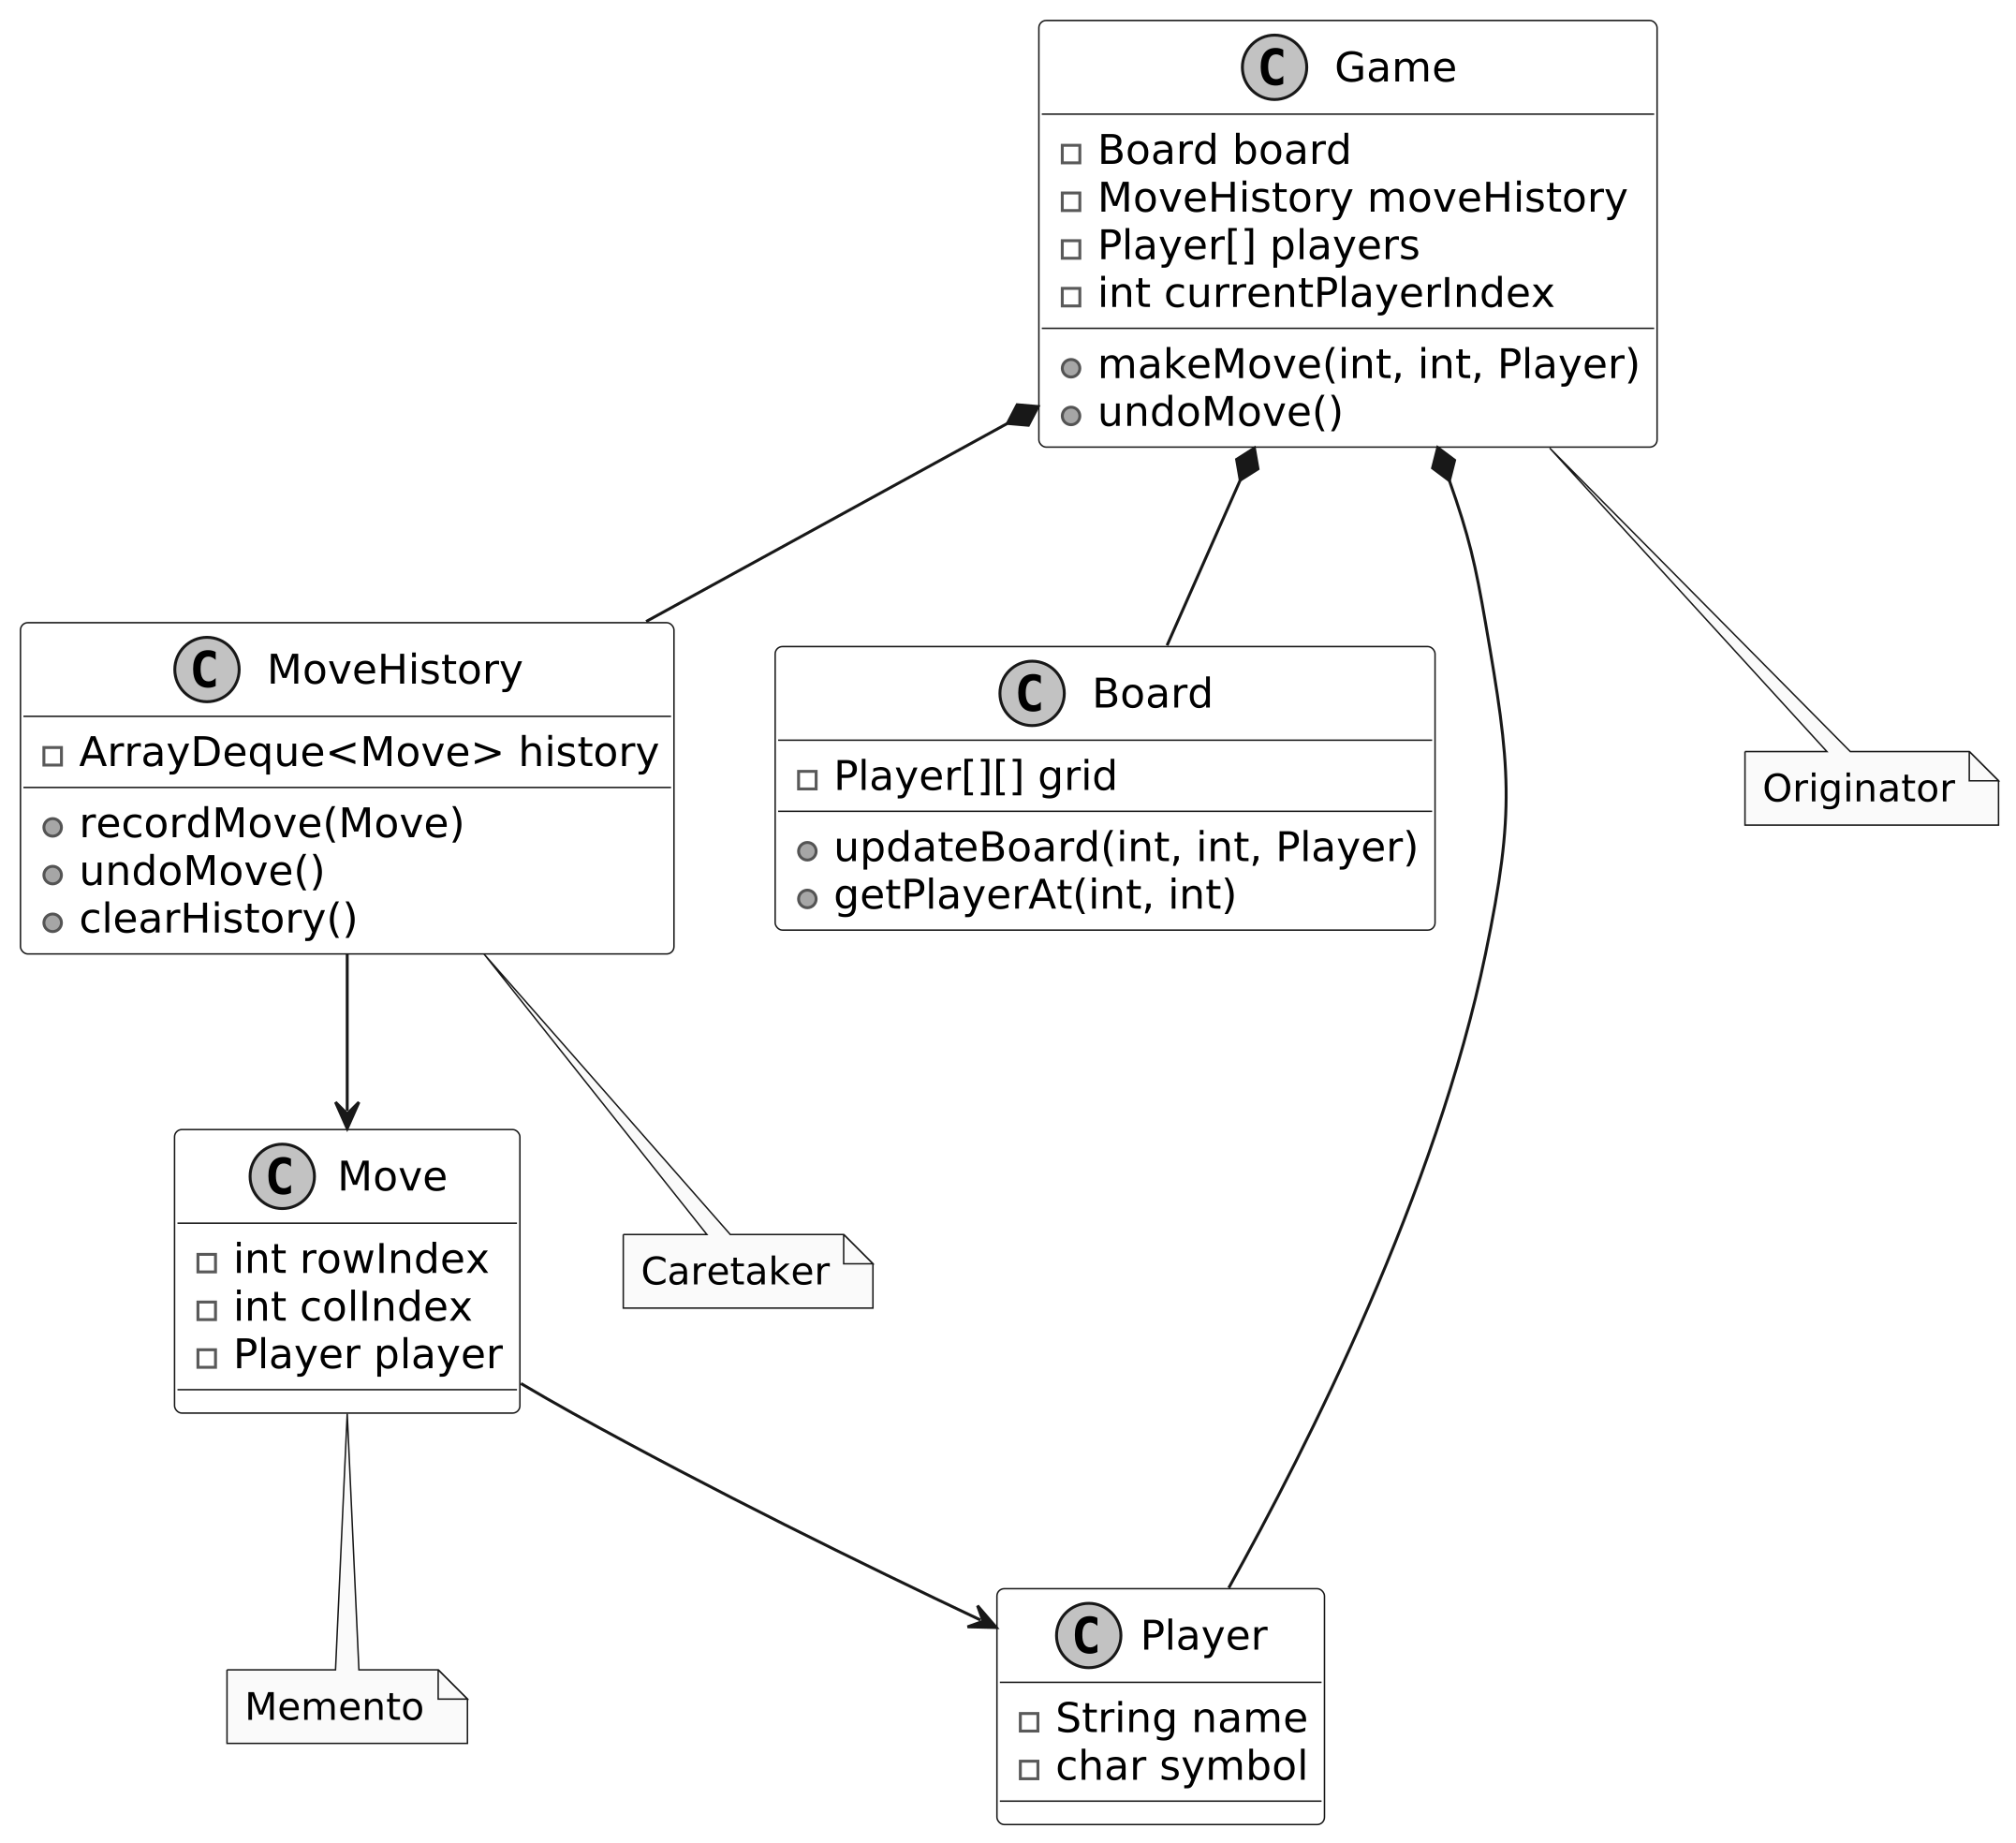
Wrap Up
In this chapter, we designed the Tic-Tac-Toe game. We gathered requirements through a candidate/interviewer dialogue, identified core objects, designed the class diagram, and implemented the key components.
A key takeaway is the importance of **modularity and clear separation of concerns**: `Board`, `Game`, `Player`, and `ScoreTracker` each focus on a specific responsibility.
In the deep dive, we explored the **Memento Pattern** for undo functionality, enabling players to revert moves while maintaining game state integrity.
Design a Blackjack Game
In this chapter, we will discuss the object-oriented design of the Blackjack game (also called "21"). Blackjack is a popular card game where the goal is to get a hand of cards that adds up to 21, or as close as possible, without going over. The game is a mix of strategy (deciding when to hit or stand) and luck (the cards you get), making it a captivating and iconic casino game.
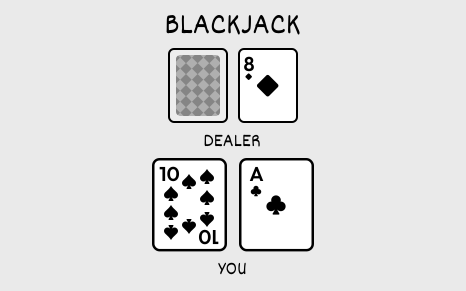
Requirements Gathering
> **Note:** Blackjack has various rules (e.g., soft 17, double down, splitting). This chapter focuses on the technical design of a simplified standard Blackjack game.
> **Candidate:** Should I design the game to support multiple players or just one player competing against the dealer? > **Interviewer:** The game should support multiple players.
> **Candidate:** What happens after a player takes their turn? > **Interviewer:** After each player takes their turn ("hit" or "stand"), the game checks if all players have either stood or busted. The game then determines the winner by comparing hand values and settles the bets.
> **Candidate:** Should the dealer follow specific rules for when to hit or stand? > **Interviewer:** Yes, the dealer must hit until their hand totals at least 17, then stand.
> **Candidate:** How are bets handled? > **Interviewer:** Players place bets before cards are dealt. Winners receive a payout equal to their bet (1:1 plus original bet returned). Players who bust lose their bet.
**Requirements** - The game supports multiple players and a dealer. - Players are dealt two cards at the beginning. - Players can "hit" (request a card) or "stand" (keep their hand). - Aces are valued as 1 or 11, optimizing the player's hand. - After all players act, the dealer hits until reaching 17, then stands. The game determines winners and settles bets. - Winners receive 1:1 payout; players who bust lose their bet.
Activity Diagram
An activity diagram visualizes the workflow of the game, capturing each action, decision, and transition — from dealing cards to determining winners, including paths like a player busting or the dealer hitting until 17.
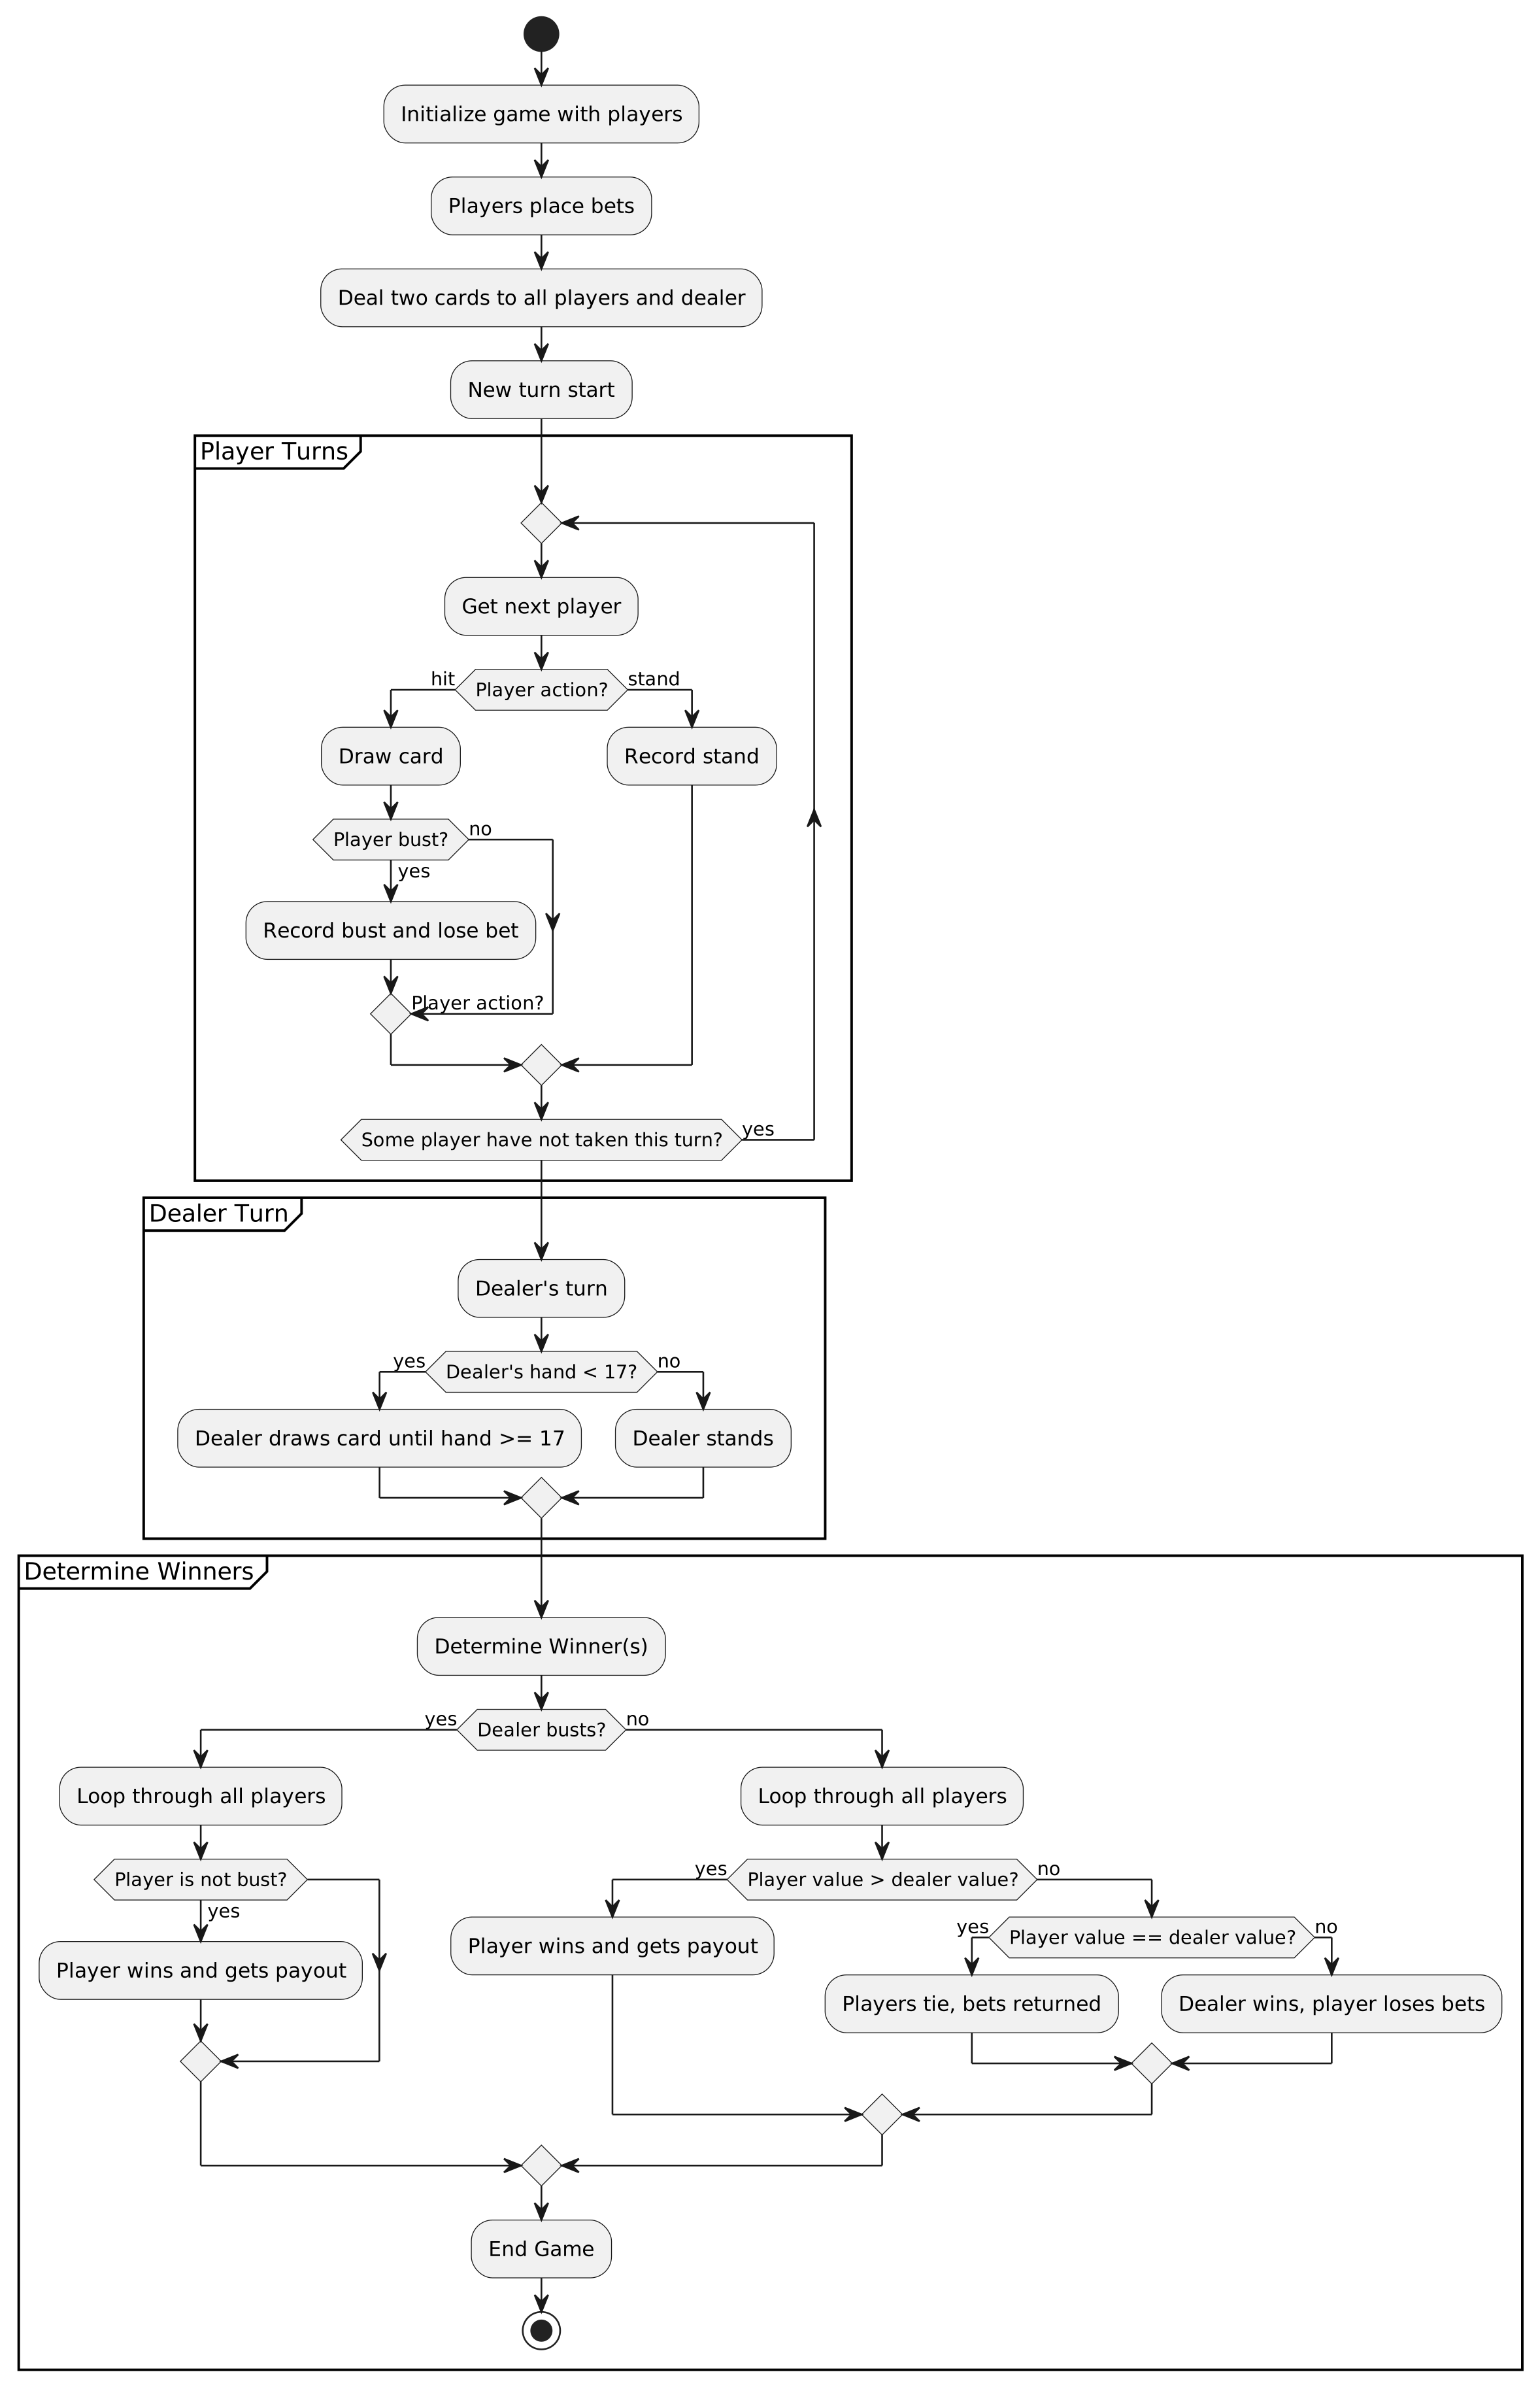
Identify Core Objects
- **BlackJackGame:** Central entity managing the overall flow from start to finish — dealing cards, tracking player actions, and determining winners. - **Player:** Interface with two implementations: `RealPlayer` (tracks bets and balance) and `DealerPlayer` (hits until 17, no betting). - **Hand:** Manages the cards a player holds and calculates all possible values — critical for Ace handling (1 or 11). - **Deck:** Manages the 52-card collection, shuffles, and provides cards on draw. - **Card:** Immutable entity defined by `Rank` and `Suit` enums.
Design Class Diagram
**Card**
The `Card` class is an immutable building block holding a rank and suit. It uses `getRankValues()` to fetch values from `Rank` — returning a list of integers because Ace has two possible values (1 or 11).
> **Design Choice:** Designed as a standalone entity to enable reuse across multiple decks or game variants.
**Rank and Suit enumerations**
Enums are ideal: type-safe, readable, and easy to maintain. `Rank` captures card values (numbers 2–10 at face value, face cards = 10, Ace = 1 or 11). `Suit` lists Hearts, Diamonds, Clubs, Spades.
> **Design Choice:** Enums over strings (which need validation and messy conversions) or integers (error-prone, lacking clarity). For precise values and named constants, enums are the clear winner.
**Deck**
Handles a standard 52-card deck: shuffling, drawing, counting remaining cards, and resetting for new rounds.
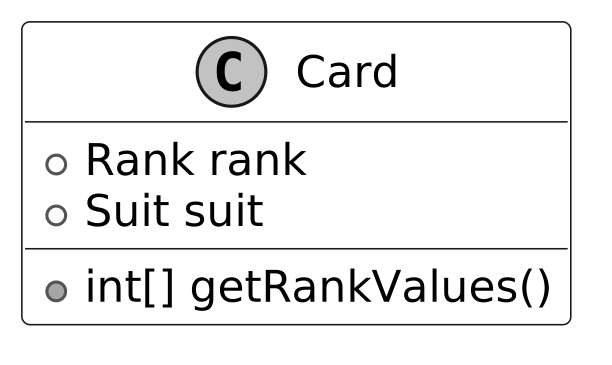
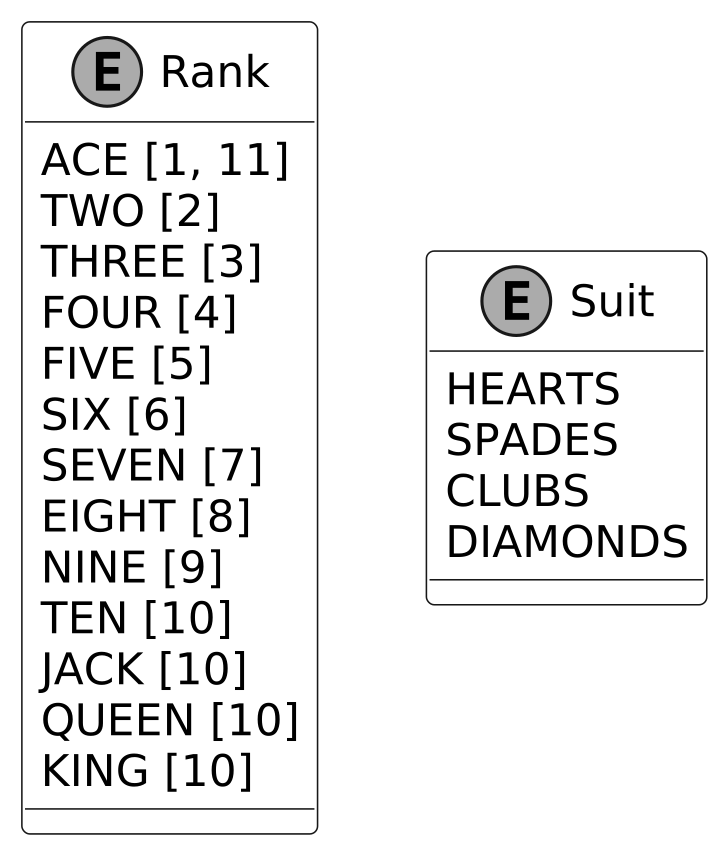
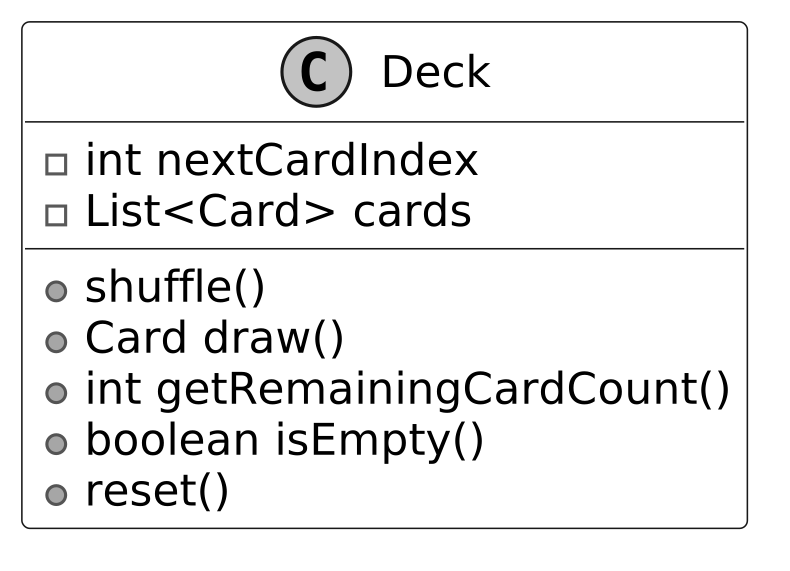
Player, Hand, and BlackJackGame Classes
**Player**
The `Player` interface serves as the blueprint for all participants. `RealPlayer` tracks name, hand, bet, and balance. `DealerPlayer` has no betting or balance — just hits until 17.
> **Design Choice:** Interface-based design abstracts common behaviors, promoting extensibility for new player types.
**Hand**
Manages cards and all possible hand totals. Handles Aces as 1 or 11 via a `SortedSet<Integer>` of all possible values. Methods: `addCard()`, `getCards()`, `getPossibleValues()`, `clear()`, `isBust()`.
> **Design Choice:** Keeping `Hand` separate from `Player` enforces SRP — Hand handles cards and values, Player handles bets and balance.
**BlackJackGame**
The central orchestrator managing players, dealer, deck, turns, and game rules.
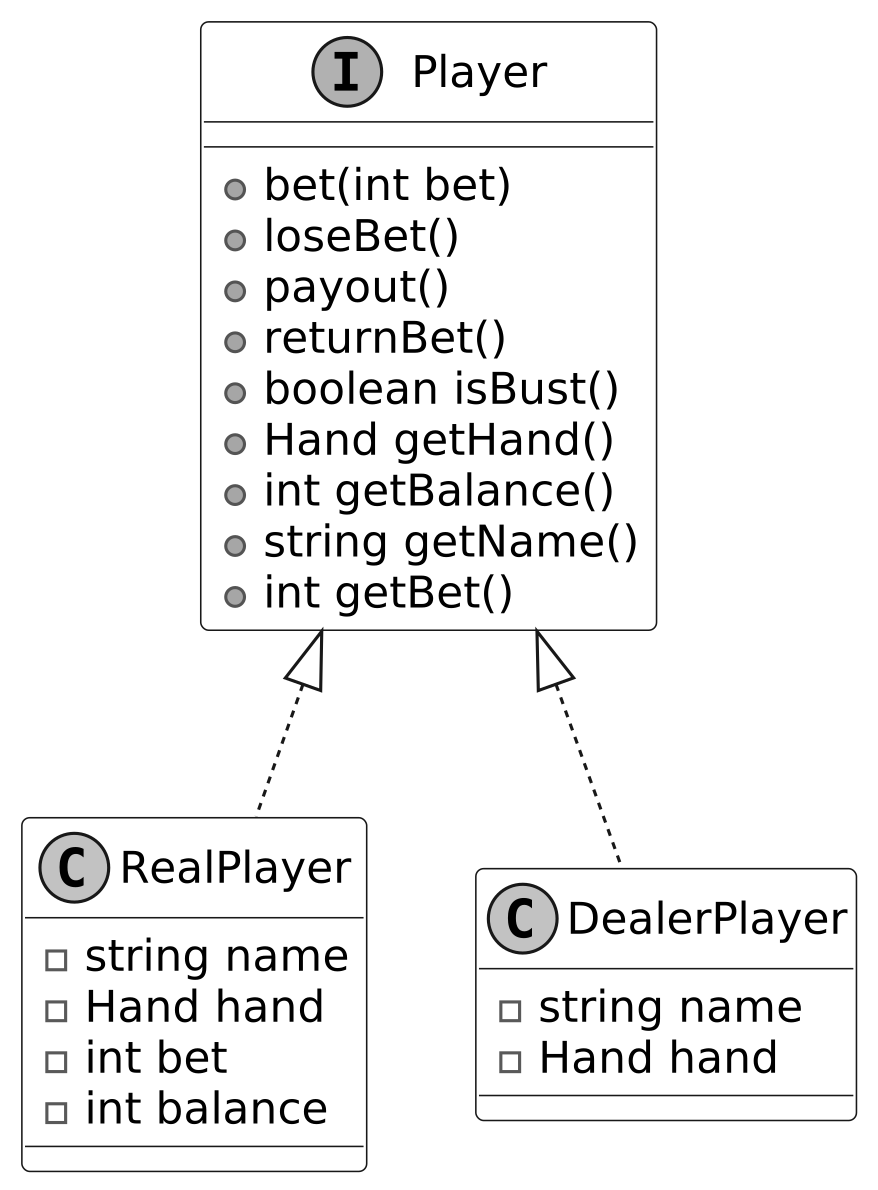
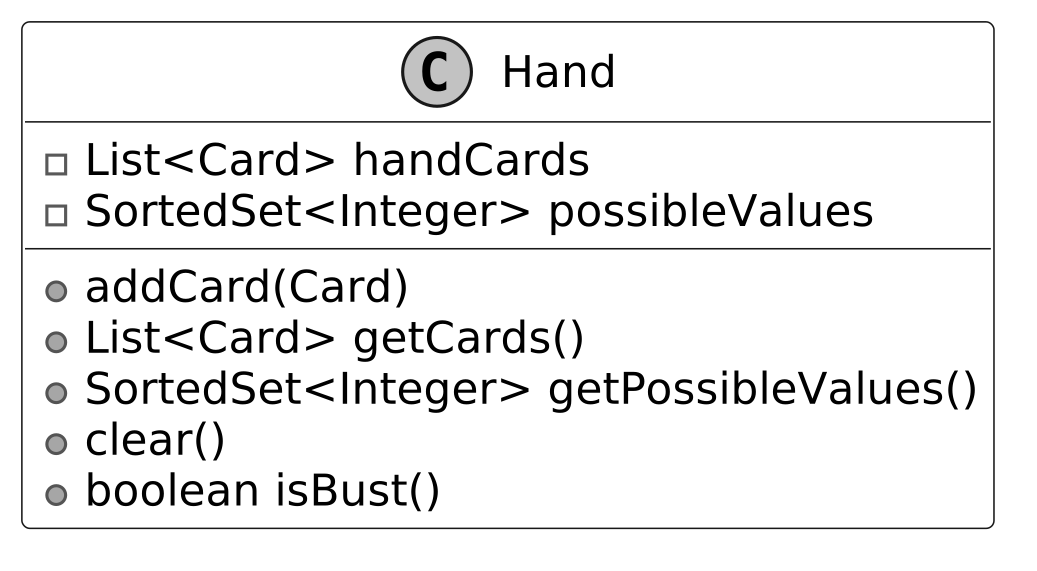
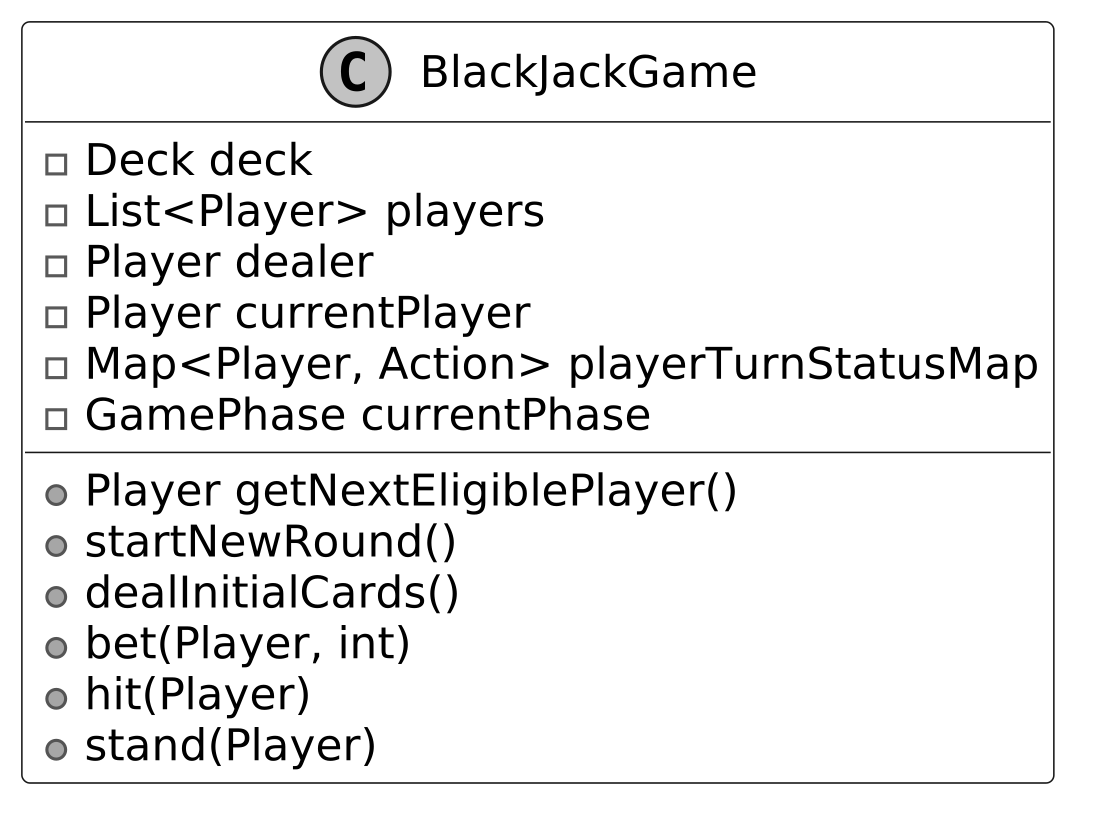
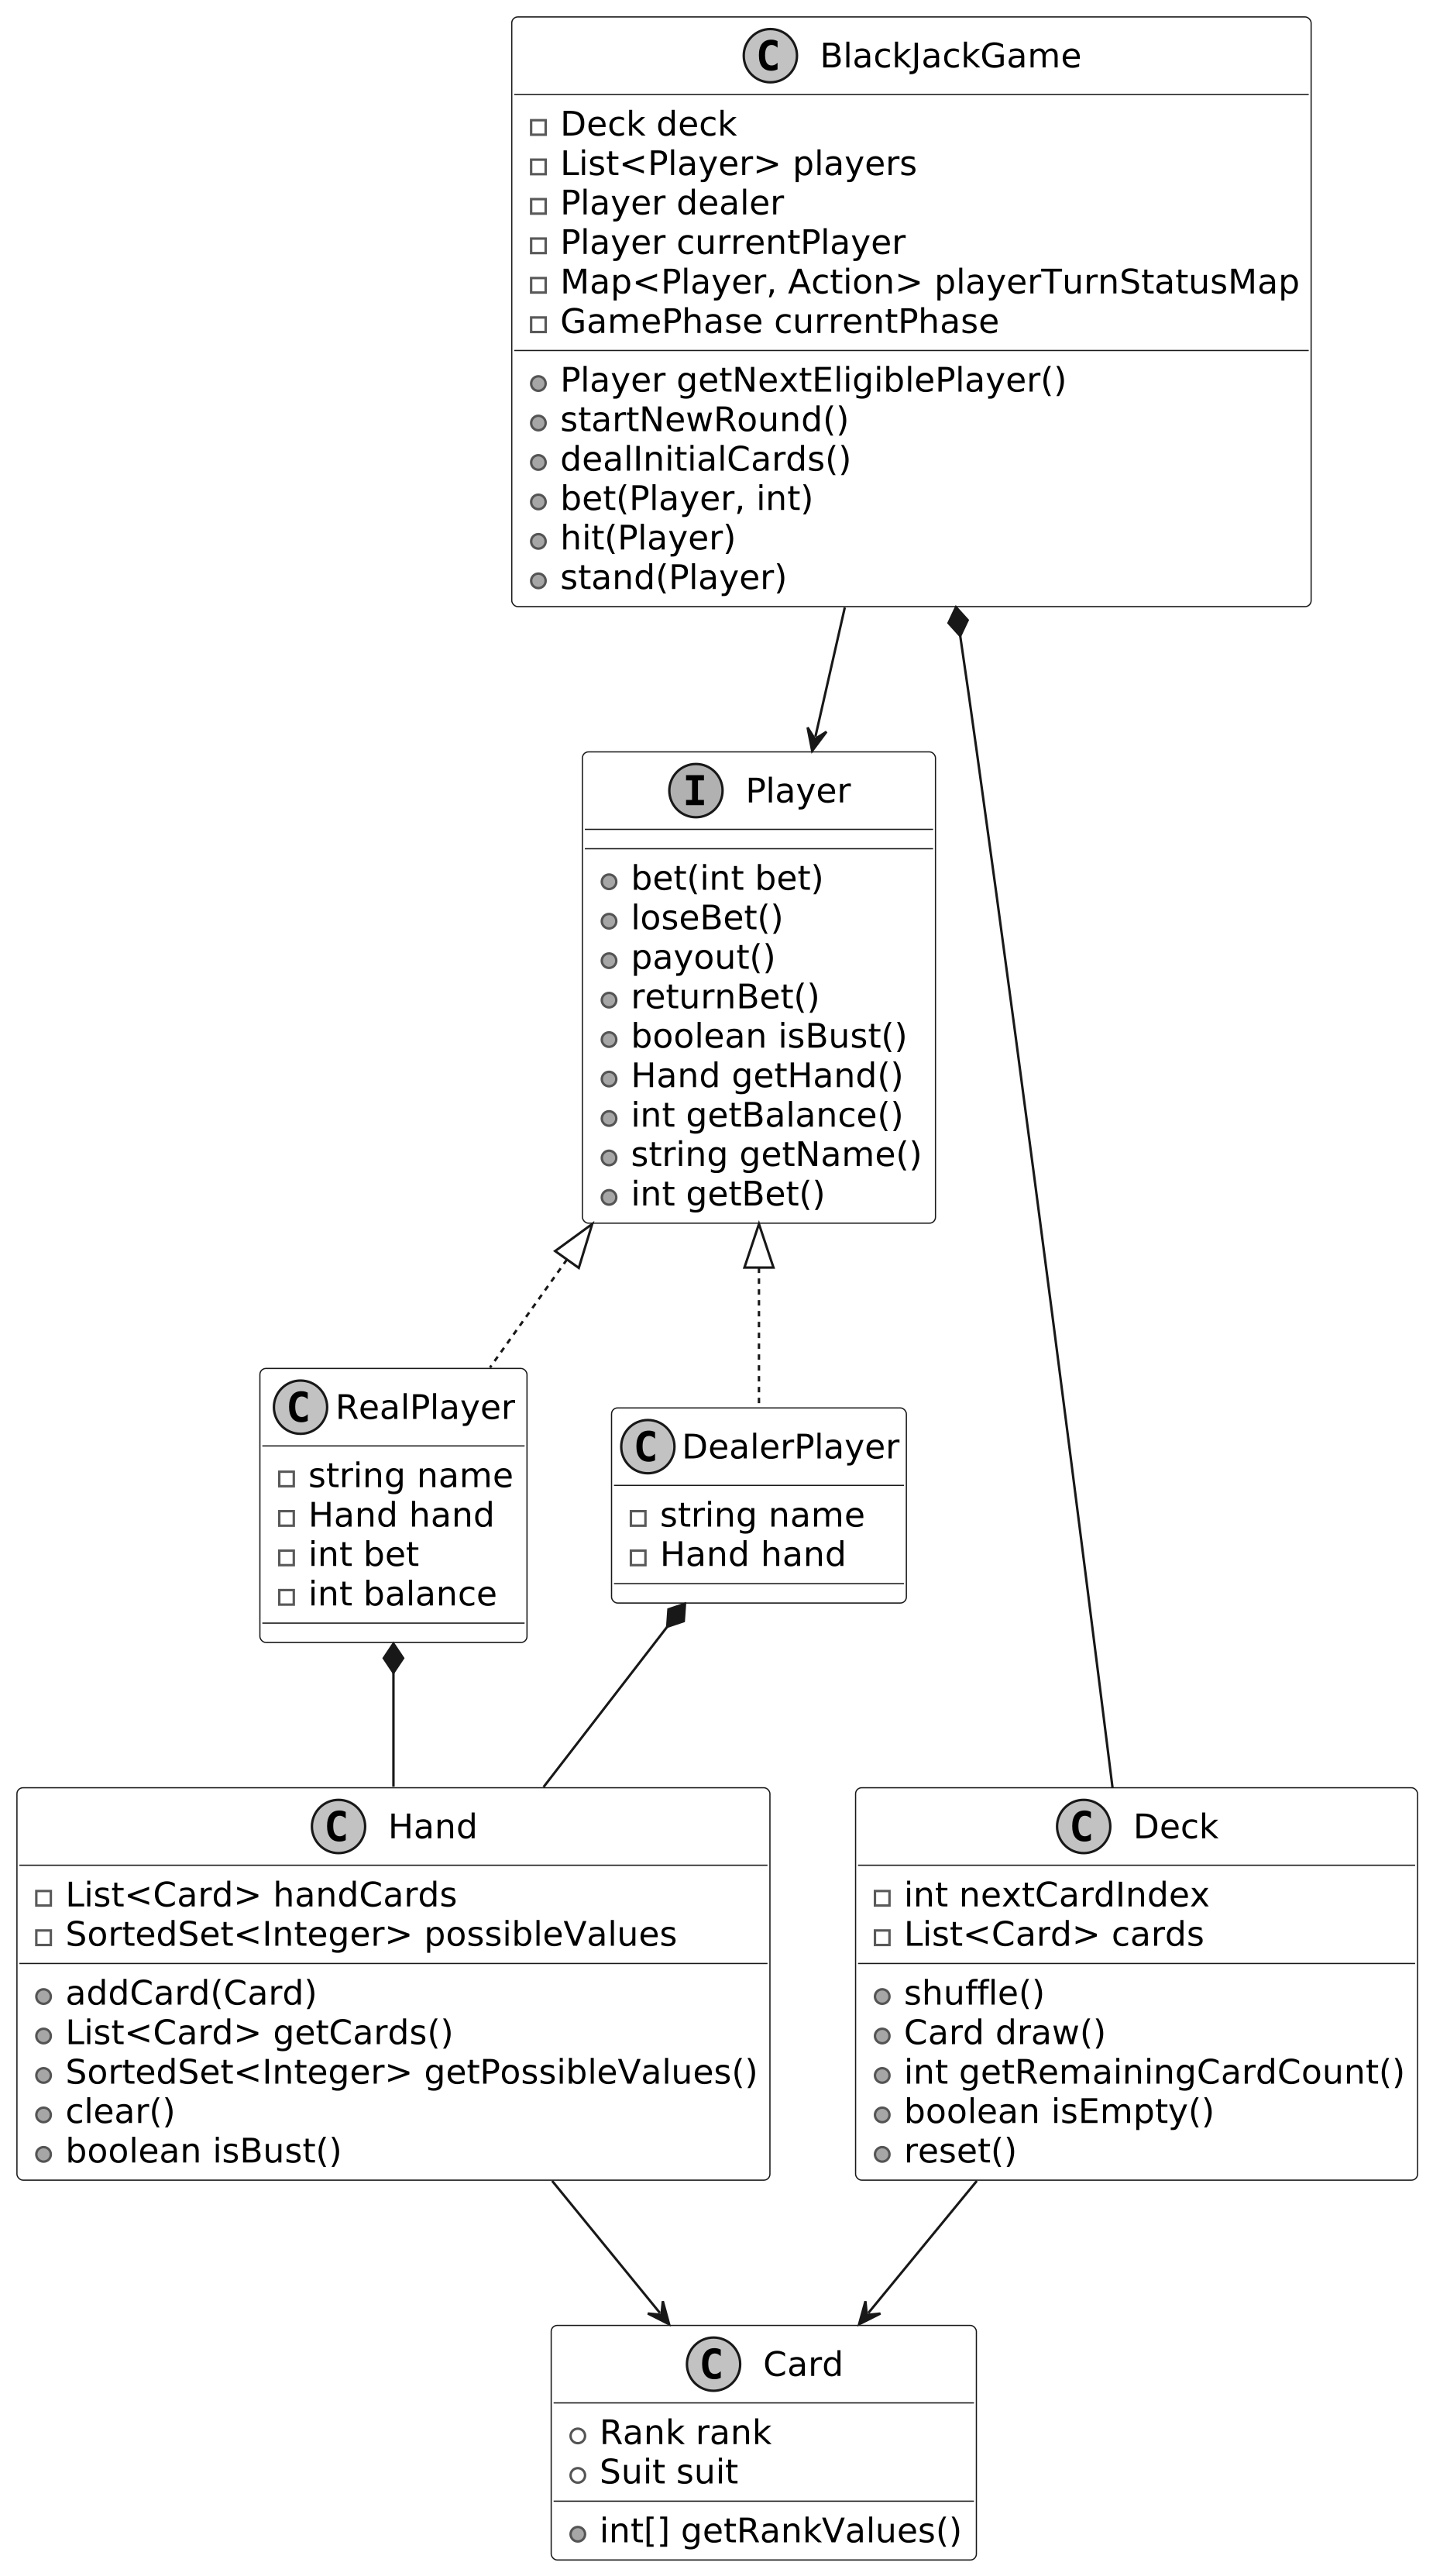
Code — Blackjack
**Card, Rank, and Suit**
```java public class Card { public final Rank rank; public final Suit suit;
public Card(Rank rank, Suit suit) { this.rank = rank; this.suit = suit; }
public int[] getRankValues() { return rank.getRankValues(); } } ```
```java public enum Rank { ACE(new int[] {1, 11}), TWO(new int[] {2}), THREE(new int[] {3}), FOUR(new int[] {4}), FIVE(new int[] {5}), SIX(new int[] {6}), SEVEN(new int[] {7}), EIGHT(new int[] {8}), NINE(new int[] {9}), TEN(new int[] {10}), JACK(new int[] {10}), QUEEN(new int[] {10}), KING(new int[] {10});
private final int[] rankValues;
Rank(int[] rankValues) { this.rankValues = rankValues; }
public int[] getRankValues() { return this.rankValues; } }
public enum Suit { HEARTS, SPADES, CLUBS, DIAMONDS } ```
> **Note:** Ace is defined with `[1, 11]` from the start (not defaulting to 11 and adjusting). This lets `Hand` calculate all possible totals upfront, handling multiple Aces efficiently.
**Deck**
```java public class Deck { int nextCardIndex = 0; List<Card> cards;
public Deck() { initializeDeck(); }
private void initializeDeck() { cards = new ArrayList<>(); for (Suit suit : Suit.values()) { for (Rank rank : Rank.values()) { cards.add(new Card(rank, suit)); } } nextCardIndex = 0; }
public void shuffle() { Collections.shuffle(cards, new Random(System.currentTimeMillis())); }
public Card draw() { if (isEmpty() || nextCardIndex >= cards.size()) { throw new IllegalStateException("No more cards in deck"); } Card drawCard = cards.get(nextCardIndex); nextCardIndex++; return drawCard; }
public int getRemainingCardCount() { return cards.size() - nextCardIndex; }
public boolean isEmpty() { return getRemainingCardCount() == 0; }
public void reset() { nextCardIndex = 0; } } ```
> **Implementation Choice:** Instead of removing drawn cards (O(n) shift), the deck tracks position with `nextCardIndex`. Drawing becomes O(1).
**Hand**
```java public class Hand { final List<Card> handCards = new ArrayList<>(); final SortedSet<Integer> possibleValues = new TreeSet<>();
public void addCard(Card card) { if (card == null) { throw new IllegalArgumentException("Cannot add null card to hand"); } handCards.add(card);
if (possibleValues.isEmpty()) { for (int value : card.getRankValues()) { possibleValues.add(value); } } else { SortedSet<Integer> newPossibleValue = new TreeSet<>(); for (int value : possibleValues) { for (int cardValue : card.getRankValues()) { newPossibleValue.add(value + cardValue); } } possibleValues.clear(); possibleValues.addAll(newPossibleValue); } }
public List<Card> getCards() { return Collections.unmodifiableList(handCards); }
public SortedSet<Integer> getPossibleValues() { return Collections.unmodifiableSortedSet(possibleValues); }
public void clear() { handCards.clear(); possibleValues.clear(); }
// Checks if all possible hand values exceed 21 public boolean isBust() { if (possibleValues.isEmpty()) { return false; } return possibleValues.first() > 21; } } ```
> **Data Structure Choice:** `SortedSet` (TreeSet) maintains sorted values, giving O(log n) insertion and O(1) `first()` access for `isBust()`. A `HashSet` would be O(1) insert but O(n) to find minimum.
**Player, RealPlayer, DealerPlayer**
```java public interface Player { void bet(int bet); void loseBet(); void returnBet(); void payout(); boolean isBust(); Hand getHand(); int getBalance(); String getName(); int getBet(); }
public class RealPlayer implements Player { private final String name; private final Hand hand; private final int bet; private final int balance;
public RealPlayer(String name, int startBalance) { this.name = name; this.hand = new Hand(); this.bet = 0; this.balance = startBalance; }
@Override public void bet(int bet) { if (bet > balance) { throw new IllegalArgumentException("Bet is greater than balance"); } this.bet = bet; this.balance -= bet; }
@Override public void loseBet() { this.bet = 0; }
@Override public void returnBet() { this.balance += bet; this.bet = 0; }
@Override public void payout() { this.balance += bet * 2; // Return bet plus equal amount this.bet = 0; } }
public class DealerPlayer implements Player { private final String name = "Dealer"; private final Hand hand;
public DealerPlayer() { this.hand = new Hand(); }
// Bet-handling methods (bet, loseBet, returnBet) are no-ops for the Dealer @Override public void payout() { // Dealer does not receive a payout } } ```
**BlackJackGame**
```java public class BlackJackGame { private final Deck deck = new Deck(); private final List<Player> players = new ArrayList<>(); protected final Player dealer = new DealerPlayer(); private Player currentPlayer = null; Map<Player, Action> playerTurnStatusMap = new HashMap<>(); GamePhase currentPhase = GamePhase.STARTED;
public BlackJackGame(List<Player> players) { for (Player player : players) { if (player == null) throw new IllegalArgumentException(); this.players.add(player); this.playerTurnStatusMap.put(player, null); } this.playerTurnStatusMap.put(dealer, null); deck.shuffle(); }
public Player getNextEligiblePlayer() { if (currentPlayer != null && !Action.STAND.equals(playerTurnStatusMap.get(currentPlayer)) && !currentPlayer.isBust()) { return currentPlayer; } if (currentPlayer == null) { for (Player player : players) { if (!Action.STAND.equals(playerTurnStatusMap.get(player)) && !player.isBust()) { currentPlayer = player; return currentPlayer; } } } int currentPlayerIndex = players.indexOf(currentPlayer); for (int i = currentPlayerIndex + 1; i < players.size(); i++) { Player player = players.get(i); if (!Action.STAND.equals(playerTurnStatusMap.get(player)) && !player.isBust()) { currentPlayer = player; return currentPlayer; } } return null; }
protected void dealerTurn() { while (dealer.getHand().getPossibleValues().last() < 17) { dealer.getHand().addCard(deck.draw()); } playerTurnStatusMap.put(dealer, Action.STAND); checkGameEndCondition(); }
public void dealInitialCards() { if (!GamePhase.BET_PLACED.equals(currentPhase)) { throw new IllegalStateException("All players must bet before dealing"); } for (Player player : players) { player.getHand().addCard(deck.draw()); } dealer.getHand().addCard(deck.draw()); for (Player player : players) { player.getHand().addCard(deck.draw()); } dealer.getHand().addCard(deck.draw()); currentPhase = GamePhase.INITIAL_CARD_DRAWN; }
public void hit(Player player) { if (Action.STAND.equals(playerTurnStatusMap.get(player))) { throw new IllegalStateException("Player has already stood"); } if (player.isBust()) { throw new IllegalStateException("Player is already bust"); } player.getHand().addCard(deck.draw()); playerTurnStatusMap.put(player, Action.HIT); }
public void stand(Player player) { if (Action.STAND.equals(playerTurnStatusMap.get(player))) { throw new IllegalStateException("Player has already stood"); } playerTurnStatusMap.put(player, Action.STAND); }
private void checkGameEndCondition() { boolean allPlayersDone = players.stream() .allMatch(p -> Action.STAND.equals(playerTurnStatusMap.get(p)) || p.isBust()); if (!allPlayersDone) return;
int dealerValue = dealer.getHand().getPossibleValues().last(); boolean dealerBusts = dealer.isBust();
for (Player player : players) { if (player.isBust()) { player.loseBet(); } else { int playerValue = player.getHand().getPossibleValues().last(); if (dealerBusts || playerValue > dealerValue) { player.payout(); } else if (playerValue == dealerValue) { player.returnBet(); } else { player.loseBet(); } } } currentPhase = GamePhase.END; } } ```
Deep Dive — Decoupling Decision Logic (Strategy Pattern)
In the current design, the dealer's "hit until 17" rule is hardcoded in `dealerTurn()`. Any rule change requires modifying `BlackJackGame`. We decouple this using the **Strategy Pattern**.
**Step 1: Define a decision-making interface**
```java public interface PlayerDecisionLogic { Action decideAction(Hand hand); }
public class RealPlayerDecisionLogic implements PlayerDecisionLogic { @Override public Action decideAction(Hand hand) { return hand.getPossibleValues().last() < 16 ? Action.HIT : Action.STAND; } }
public class DealerDecisionLogic implements PlayerDecisionLogic { @Override public Action decideAction(Hand hand) { return hand.getPossibleValues().last() < 17 ? Action.HIT : Action.STAND; } } ```
**Step 2–3: Integrate into Players**
`RealPlayer` uses `RealPlayerDecisionLogic` (hit below 16). `DealerPlayer` uses `DealerDecisionLogic` (hit below 17). Each player exposes `getDecisionLogic()` from the `Player` interface.
**Step 4: Refactor BlackJackGame**
```java public class BlackJackGame { // Fields unchanged from original...
// Updated: handles dealer as just another player via decision logic public Player getNextEligiblePlayer() { if (currentPlayer == null) { for (Player player : players) { if (!Action.STAND.equals(playerTurnStatusMap.get(player)) && !player.isBust()) { currentPlayer = player; return currentPlayer; } } if (!Action.STAND.equals(playerTurnStatusMap.get(dealer))) { currentPlayer = dealer; return dealer; } } else { int currentIndex = players.indexOf(currentPlayer); for (int i = currentIndex + 1; i < players.size(); i++) { Player player = players.get(i); if (!Action.STAND.equals(playerTurnStatusMap.get(player)) && !player.isBust()) { currentPlayer = player; return currentPlayer; } } if (currentPlayer != dealer && !Action.STAND.equals(playerTurnStatusMap.get(dealer))) { currentPlayer = dealer; return dealer; } } return null; }
public void playNextTurn() { Player nextPlayer = getNextEligiblePlayer(); if (nextPlayer != null) { performPlayerAction(nextPlayer); } }
public void performPlayerAction(Player player) { Action action = player.getDecisionLogic().decideAction(player.getHand()); if (action == Action.HIT) { hit(player); } else if (action == Action.STAND) { stand(player); } } // dealerTurn() removed — dealer now uses DealerDecisionLogic via performPlayerAction() } ```
`playNextTurn()` calls `performPlayerAction()`, which queries each player's decision logic. `dealerTurn()` is removed — the dealer is now handled by the same `performPlayerAction()` flow.
**Strategy Pattern mapping:** - `PlayerDecisionLogic` — the strategy contract - `RealPlayerDecisionLogic` / `DealerDecisionLogic` — concrete behaviors - `BlackJackGame` — uses strategies without knowing decision internals
> **Note:** To learn more about the Strategy Pattern, refer to the Parking Lot chapter.
Wrap Up
In this chapter, we built a solid Blackjack game, structuring responsibilities across `Card`, `Deck`, `Hand`, `Player`, and `BlackJackGame`. Each piece has a clear role: `Card` holds the essentials, `Deck` shuffles and deals, `Hand` tracks totals, and `BlackJackGame` runs the show.
We also decoupled decision-making with `PlayerDecisionLogic`, applying the Strategy Pattern to make it easy to swap strategies for players and dealer without rewrites.
Design a Shipping Locker System
In this chapter, we will design a Shipping Locker system similar to UPS, FedEx, or Amazon Locker. It offers customers a convenient and secure way to pick up their online orders. The system manages locker availability, assigns incoming packages to appropriate lockers, and ensures a smooth package retrieval process.
Requirements Gathering
> **Candidate:** Does the system support multiple locker sizes? > **Interviewer:** Yes. Packages are assigned to the smallest available locker that fits, optimizing space.
> **Candidate:** What happens when a package arrives and how does the customer pick it up? > **Interviewer:** The system finds an open locker of the right size, assigns the package, and sends the customer a notification with the locker location and a unique access code.
> **Candidate:** Is there a time limit or fees for using the locker? > **Interviewer:** Yes. There is a free period (predefined days), then a daily fee based on locker size. After a maximum period, staff clears the locker.
> **Candidate:** Does the system handle payments? > **Interviewer:** No — an external service handles payment processing.
**Requirements** - Track all lockers and support different locker sizes. - Assign lockers by matching package size to the smallest available option. - Customers open their locker with a unique access code. - Monitor storage costs based on locker policy (daily rate per locker size, free period, maximum period).
**Non-functional requirements:** - Handle high volume of locker operations per site without performance degradation. - High availability — lockers must be accessible at all times.
Identify Core Objects
- **Locker:** Represents an individual locker unit. - **Site:** A locker facility containing multiple lockers of various sizes, organizing them by size for efficient assignment. - **ShippingPackage:** An interface defining package standards, with `BasicShippingPackage` as the concrete implementation tracking order ID, dimensions, and status. - **Account:** Represents customers and their accounts, storing policy information (free period, maximum period) and current balance.
Design Class Diagram — Locker and LockerSize
**Locker**
Represents a physical storage unit. Attributes: `LockerSize size`, `ShippingPackage currentPackage`, `Date assignmentDate`, `String accessCode`. Methods: assign package, release locker, calculate storage charges, check availability, verify access code.
> **Design Choice:** Designed as a standalone entity to encapsulate state and behavior of an individual locker, ensuring modularity.
**LockerSize**
Enum with predefined sizes (SMALL, MEDIUM, LARGE), each with a `sizeName`, `dailyCharge`, and physical dimensions (`width`, `height`, `depth`).
> **Design Choice:** Enum over strings or integers — type-safe, readable, ensures fixed valid set of sizes.
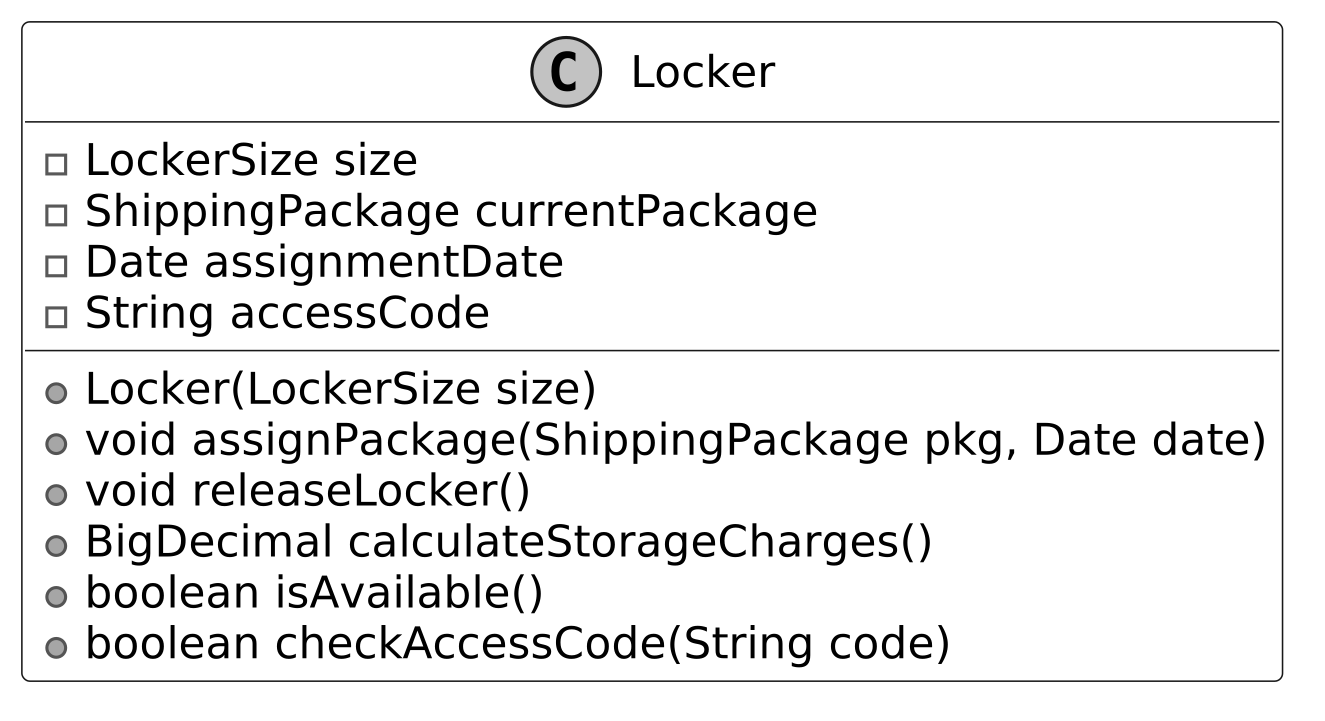
Site, ShippingPackage, Account, and LockerManager
**Site**
Models a physical location with lockers organized by size via `Map<LockerSize, Set<Locker>>`. Key methods: `findAvailableLocker(LockerSize)` and `placePackage(ShippingPackage, Date)`.
**ShippingPackage**
Interface for all package types. `BasicShippingPackage` implements it, tracking dimensions and status. `ShippingStatus` enum defines PENDING, STORED, RETRIEVED.
> **Design Choice:** Interface allows extensibility for diverse package types (fragile, perishable) without modifying core logic.
**Account / AccountLockerPolicy**
`Account` stores customer balance and references an `AccountLockerPolicy` (free period days + maximum period days).
> **Design Choice:** Separating customer data from policy data enhances maintainability and enables personalized billing rules.
**NotificationInterface**
Interface with a `sendNotification(message, account)` method. Keeps notification logic flexible and external.
> **Best Practice:** In OOD interviews, external systems like notifications are represented as interfaces to avoid unnecessary complexity.
**LockerManager**
Facade coordinating package assignment and retrieval. Maintains `Map<String, Account>` and `Map<String, Locker>` (access code → locker).
> **Design Choice:** Facade providing a single point of control for package assignment, retrieval, and notifications.
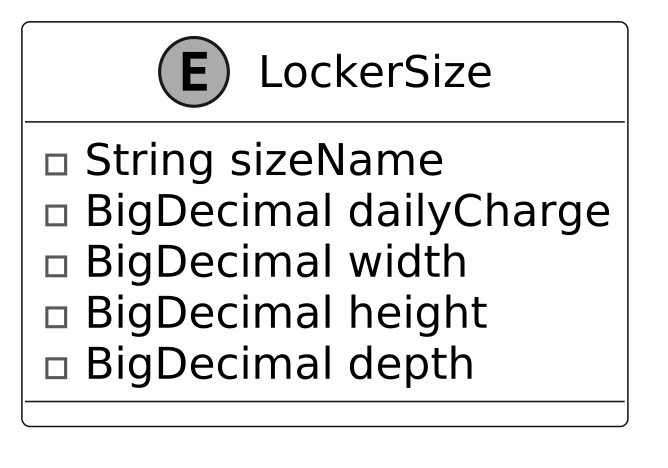
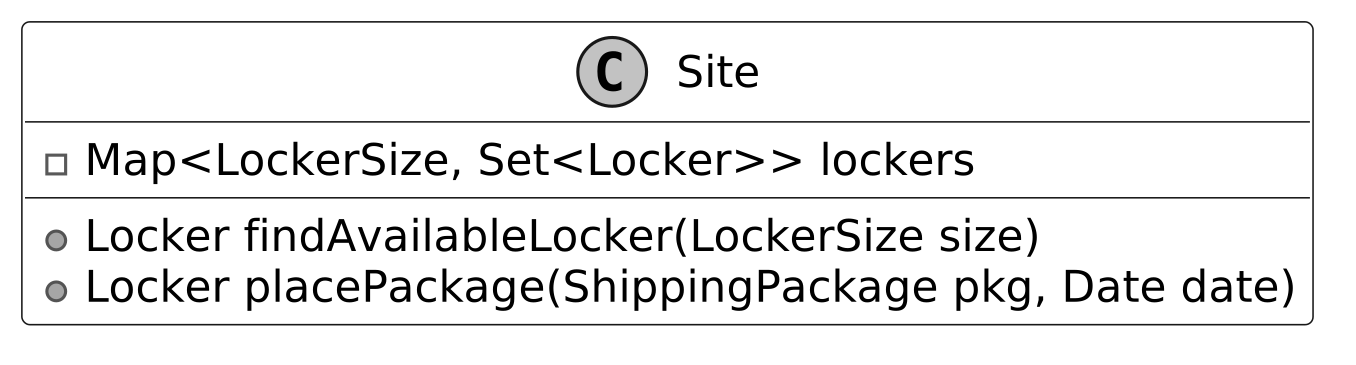
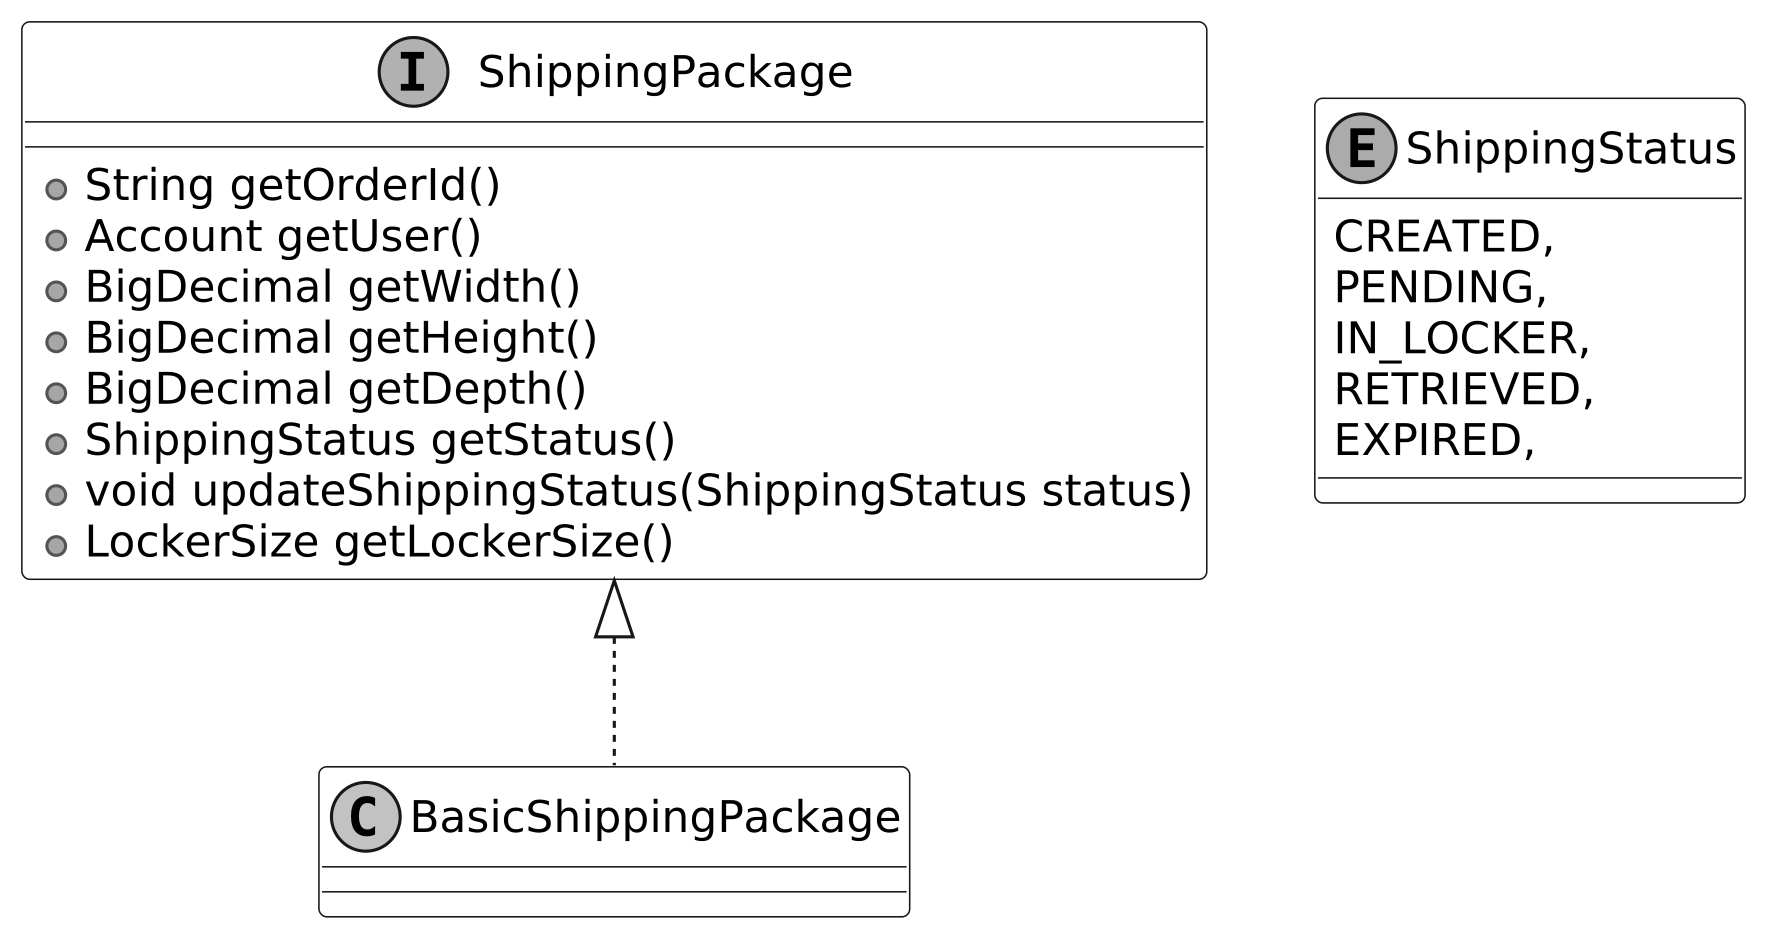
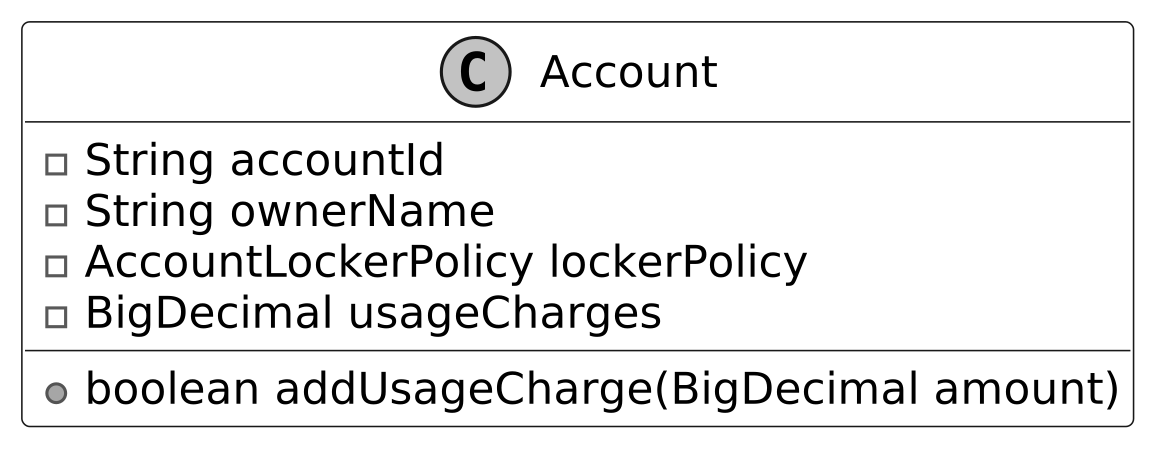
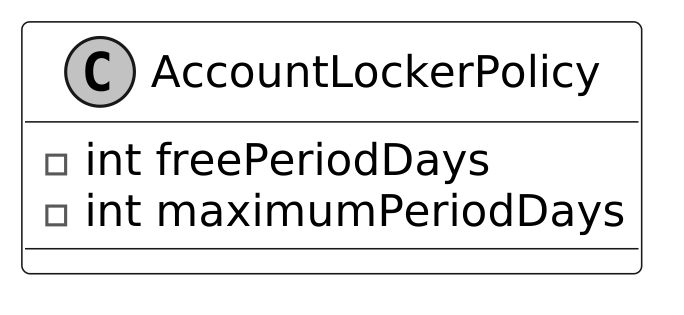
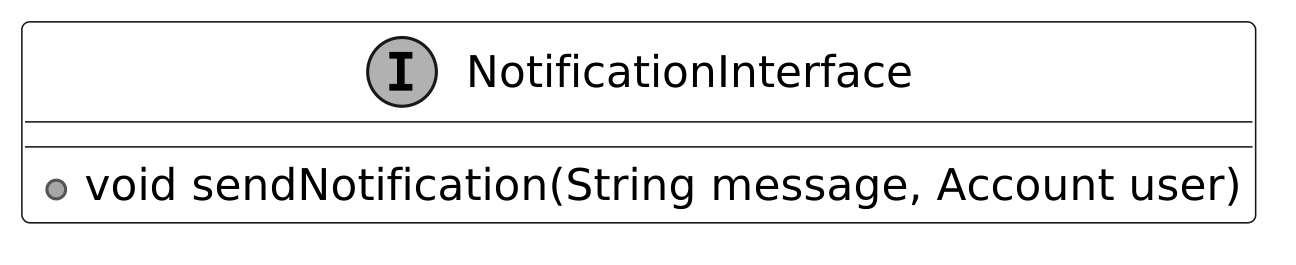
Code — Shipping Locker Service
**Locker and LockerSize**
```java public class Locker { private final LockerSize size; private ShippingPackage currentPackage; private Date assignmentDate; private String accessCode;
public Locker(LockerSize size) { this.size = size; }
public void assignPackage(ShippingPackage pkg, Date date) { this.currentPackage = pkg; this.assignmentDate = date; this.accessCode = generateAccessCode(); }
public void releaseLocker() { this.currentPackage = null; this.assignmentDate = null; this.accessCode = null; }
public BigDecimal calculateStorageCharges() { if (currentPackage == null || assignmentDate == null) { return BigDecimal.ZERO; } AccountLockerPolicy policy = currentPackage.getUser().getLockerPolicy(); long totalDaysUsed = (new Date().getTime() - assignmentDate.getTime()) / (1000 * 60 * 60 * 24);
if (totalDaysUsed > policy.getMaximumPeriodDays()) { currentPackage.updateShippingStatus(ShippingStatus.EXPIRED); throw new MaximumStoragePeriodExceededException( "Package has exceeded maximum allowed storage period of " + policy.getMaximumPeriodDays() + " days"); }
long chargeableDays = Math.max(0, totalDaysUsed - policy.getFreePeriodDays()); return size.dailyCharge.multiply(new BigDecimal(chargeableDays)); }
public boolean isAvailable() { return currentPackage == null; }
public boolean checkAccessCode(String code) { return this.accessCode != null && accessCode.equals(code); } } ```
```java public enum LockerSize { SMALL("Small", new BigDecimal("5.00"), new BigDecimal("10.00"), new BigDecimal("10.00"), new BigDecimal("10.00")), MEDIUM("Medium", new BigDecimal("10.00"), new BigDecimal("20.00"), new BigDecimal("20.00"), new BigDecimal("20.00")), LARGE("Large", new BigDecimal("15.00"), new BigDecimal("30.00"), new BigDecimal("30.00"), new BigDecimal("30.00"));
final String sizeName; final BigDecimal dailyCharge; final BigDecimal width; final BigDecimal height; final BigDecimal depth;
LockerSize(String sizeName, BigDecimal dailyCharge, BigDecimal width, BigDecimal height, BigDecimal depth) { this.sizeName = sizeName; this.dailyCharge = dailyCharge; this.width = width; this.height = height; this.depth = depth; } } ```
> **Implementation Choice:** `BigDecimal` for `dailyCharge` and dimensions ensures precision in financial calculations — `float`/`double` would introduce rounding errors.
**Site**
```java public class Site { final Map<LockerSize, Set<Locker>> lockers = new HashMap<>();
public Site(Map<LockerSize, Integer> lockers) { for (Map.Entry<LockerSize, Integer> entry : lockers.entrySet()) { Set<Locker> lockerSet = new HashSet<>(); for (int i = 0; i < entry.getValue(); i++) { lockerSet.add(new Locker(entry.getKey())); } this.lockers.put(entry.getKey(), lockerSet); } }
public Locker findAvailableLocker(LockerSize size) { for (Locker locker : lockers.get(size)) { if (locker.isAvailable()) { return locker; } } return null; }
public Locker placePackage(ShippingPackage pkg, Date date) { LockerSize size = pkg.getLockerSize(); Locker locker = findAvailableLocker(size); if (locker != null) { locker.assignPackage(pkg, date); pkg.updateShippingStatus(ShippingStatus.IN_LOCKER); return locker; } throw new NoLockerAvailableException("No locker of size " + size + " is currently available"); } } ```
> **Implementation Choice:** `placePackage()` provides atomic find-and-assign behavior, preventing inconsistent states that could occur if these operations were performed separately.
**BasicShippingPackage**
```java public class BasicShippingPackage implements ShippingPackage { private final String orderId; private final Account user; private final BigDecimal width; private final BigDecimal height; private final BigDecimal depth; private ShippingStatus status;
public BasicShippingPackage( String orderId, Account user, BigDecimal width, BigDecimal height, BigDecimal depth) { this.orderId = orderId; this.user = user; this.width = width; this.height = height; this.depth = depth; this.status = ShippingStatus.CREATED; }
@Override public ShippingStatus getStatus() { return status; }
@Override public void updateShippingStatus(ShippingStatus status) { this.status = status; }
// Returns the smallest locker size that fits this package's dimensions @Override public LockerSize getLockerSize() { for (LockerSize size : LockerSize.values()) { if (size.getWidth().compareTo(width) >= 0 && size.getHeight().compareTo(height) >= 0 && size.getDepth().compareTo(depth) >= 0) { return size; } } throw new PackageIncompatibleException("No locker size available for the package"); } } ```
**Account and AccountLockerPolicy**
```java public class Account { private final String accountId; private final String ownerName; private final AccountLockerPolicy lockerPolicy; private BigDecimal usageCharges = new BigDecimal("0.00");
public Account(String accountId, String ownerName, AccountLockerPolicy lockerPolicy) { this.accountId = accountId; this.ownerName = ownerName; this.lockerPolicy = lockerPolicy; }
public void addUsageCharge(BigDecimal amount) { usageCharges = usageCharges.add(amount); } }
public class AccountLockerPolicy { final int freePeriodDays; final int maximumPeriodDays;
public AccountLockerPolicy(int freePeriodDays, int maximumPeriodDays) { this.freePeriodDays = freePeriodDays; this.maximumPeriodDays = maximumPeriodDays; } } ```
**LockerManager**
```java public class LockerManager { private final Site site; private final NotificationInterface notificationService; private final Map<String, Account> accounts; private final Map<String, Locker> accessCodeMap = new HashMap<>();
public LockerManager( Site site, Map<String, Account> accounts, NotificationInterface notificationService) { this.site = site; this.accounts = accounts; this.notificationService = notificationService; }
public Locker assignPackage(ShippingPackage pkg, Date date) { Locker locker = site.placePackage(pkg, date); if (locker != null) { accessCodeMap.put(locker.getAccessCode(), locker); notificationService.sendNotification( "Package assigned to locker" + locker.getAccessCode(), pkg.getUser()); } return locker; }
public Locker pickUpPackage(String accessCode) { Locker locker = accessCodeMap.get(accessCode); if (locker != null && locker.checkAccessCode(accessCode)) { try { BigDecimal charge = locker.calculateStorageCharges(); ShippingPackage pkg = locker.getPackage(); locker.releaseLocker(); pkg.getUser().addUsageCharge(charge); pkg.updateShippingStatus(ShippingStatus.RETRIEVED); return locker; } catch (MaximumStoragePeriodExceededException e) { locker.releaseLocker(); return locker; } } return null; } } ```
> **Best Practice:** Keep `LockerManager` thin — delegate low-level operations (finding lockers, storing packages, enforcing policies) to `Site` and `Locker`.
Deep Dive — Factory Pattern for Locker Creation
Currently, lockers are created directly based on predefined sizes. Adding a new locker type (e.g., XLARGE, temperature-controlled) requires modifying multiple parts of the codebase.
The **Factory Pattern** centralizes locker creation in a single class:
```java class LockerFactory { public static Locker createLocker(LockerSize size) { return switch (size) { case SMALL -> new Locker(LockerSize.SMALL); case MEDIUM -> new Locker(LockerSize.MEDIUM); case LARGE -> new Locker(LockerSize.LARGE); case XLARGE -> new Locker(LockerSize.XLARGE); }; } } ```
**Benefits:** - **Centralized creation:** Changes to locker instantiation are localized to `LockerFactory`. - **Extensibility:** New sizes/types added without touching core business logic. - **SRP:** Separates locker creation from locker usage logic.
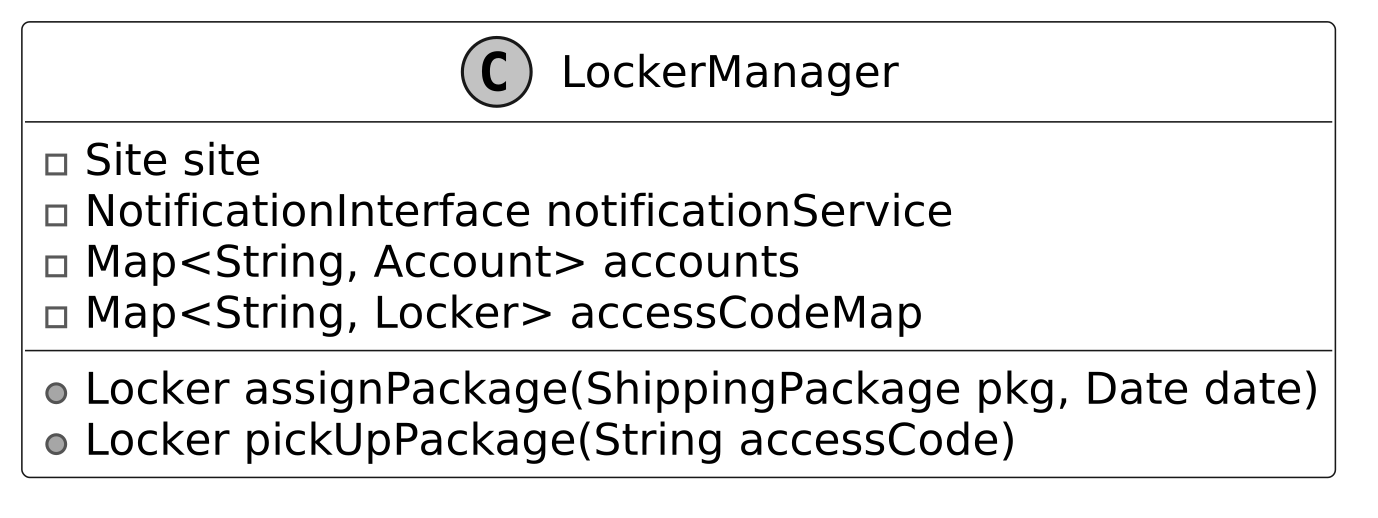
Deep Dive — Observer Pattern for Event Handling
Currently, `LockerManager` directly calls `NotificationInterface.sendNotification()`, tightly coupling it to the notification system. Using the **Observer Pattern** decouples event handling:
```java class LockerManagerChange { private final List<LockerEventObserver> observers = new ArrayList<>();
public void addObserver(LockerEventObserver observer) { observers.add(observer); }
public void removeObserver(LockerEventObserver observer) { observers.remove(observer); }
private void notifyObservers(String message, Account account) { for (LockerEventObserver observer : observers) { observer.update(message, account); } }
public void assignPackage(ShippingPackage pkg) { Locker locker = assignLockerToPackage(pkg); if (locker != null) { notifyObservers("Package assigned to locker", pkg.getUser()); } } }
public interface LockerEventObserver { void update(String message, Account account); }
class EmailNotification implements LockerEventObserver { public void update(String message, Account account) { // Send email to account owner } } ```
**Roles:** - **Subject:** `LockerManagerChange` — maintains observer list, broadcasts events. - **Observer:** `LockerEventObserver` interface — defines `update(message, account)`. - **Concrete Observers:** `EmailNotification`, SMS, analytics — each responds independently.
> **Note:** For more on the Observer Pattern, see the Elevator System chapter.
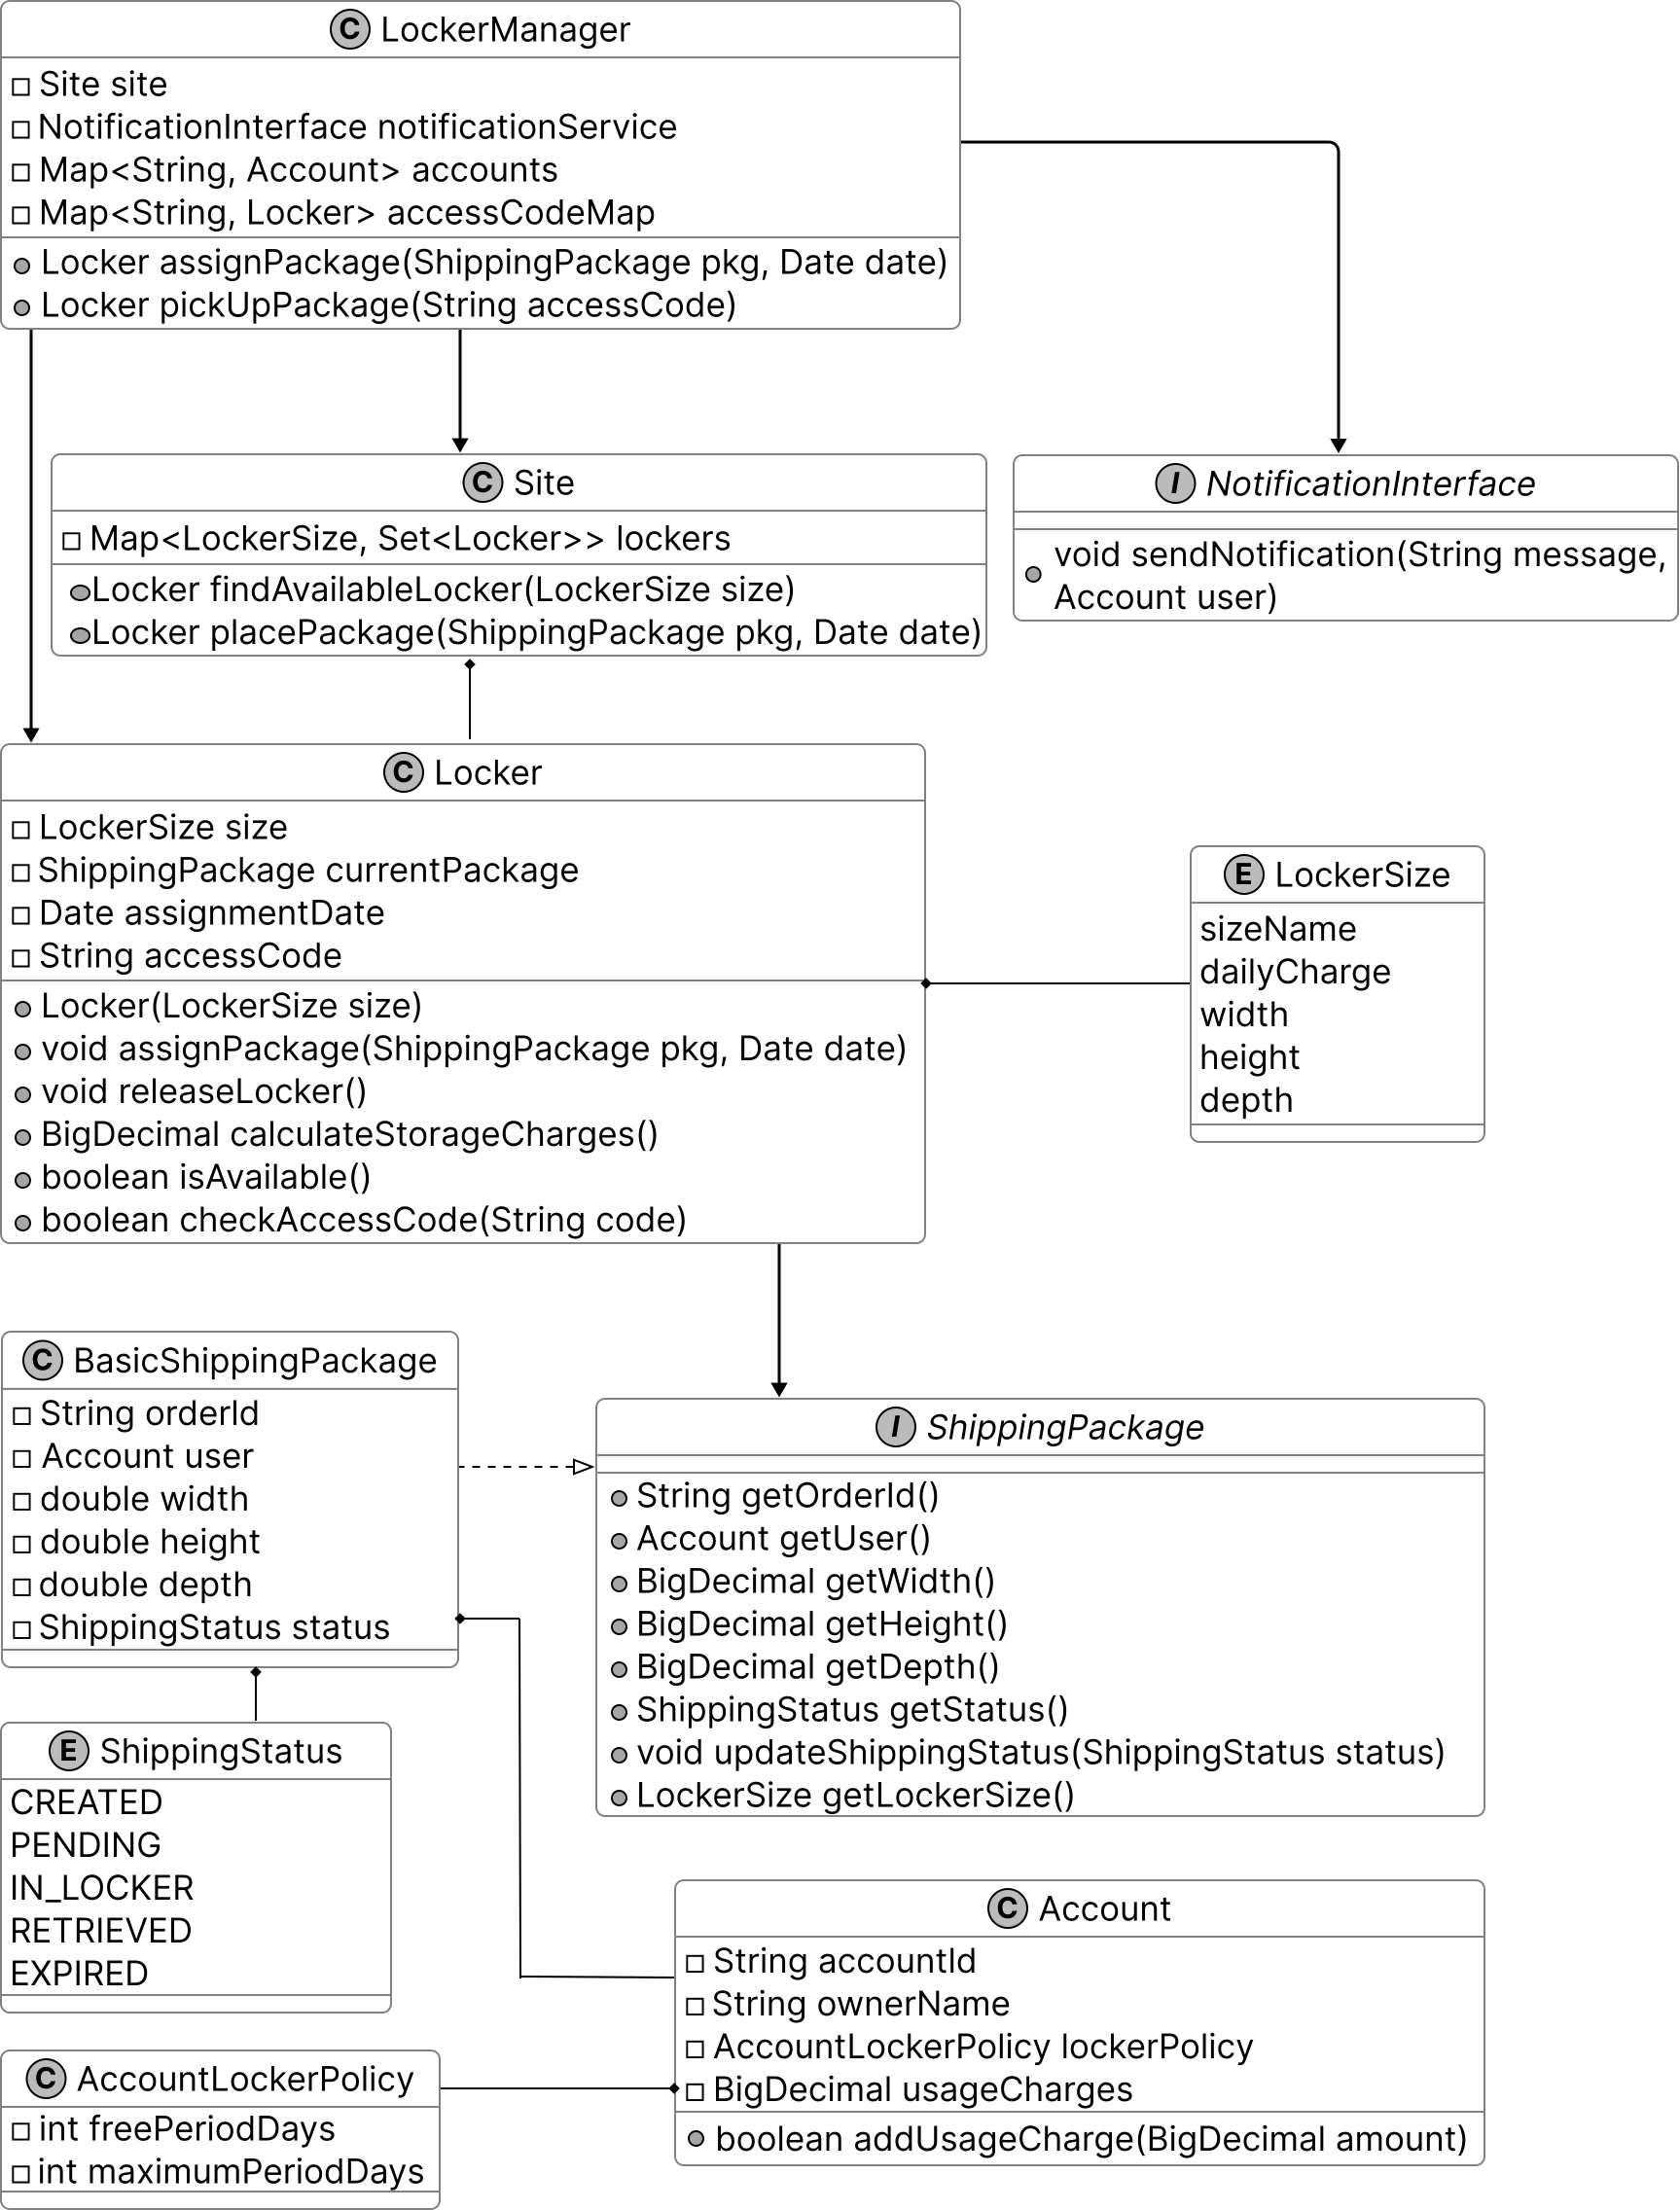
Wrap Up
In this chapter, we designed a Shipping Locker System. We clarified requirements, identified core objects, developed a class diagram, and implemented key components.
In the deep dive, we explored how the **Factory Pattern** simplifies locker instantiation for scalability, and how the **Observer Pattern** decouples event handling for flexible notifications.
Further Reading — Factory Design Pattern
The **Factory Method Pattern** is a creational design pattern that provides an interface for creating instances of a class, but allows subclasses to alter the type of objects created.
**Problem:** An e-commerce payment system initially supports only credit card payments. Adding digital wallets or cryptocurrency requires modifying tightly coupled code everywhere.
**Solution:** A factory method encapsulates instantiation, allowing new payment types to be added via subclasses without changing existing code.
**When to use:** - When the specific types of objects required are unknown in advance. - When you want to allow library users to extend internal components without modifying existing code. - When you want to optimize resource utilization by reusing existing objects.
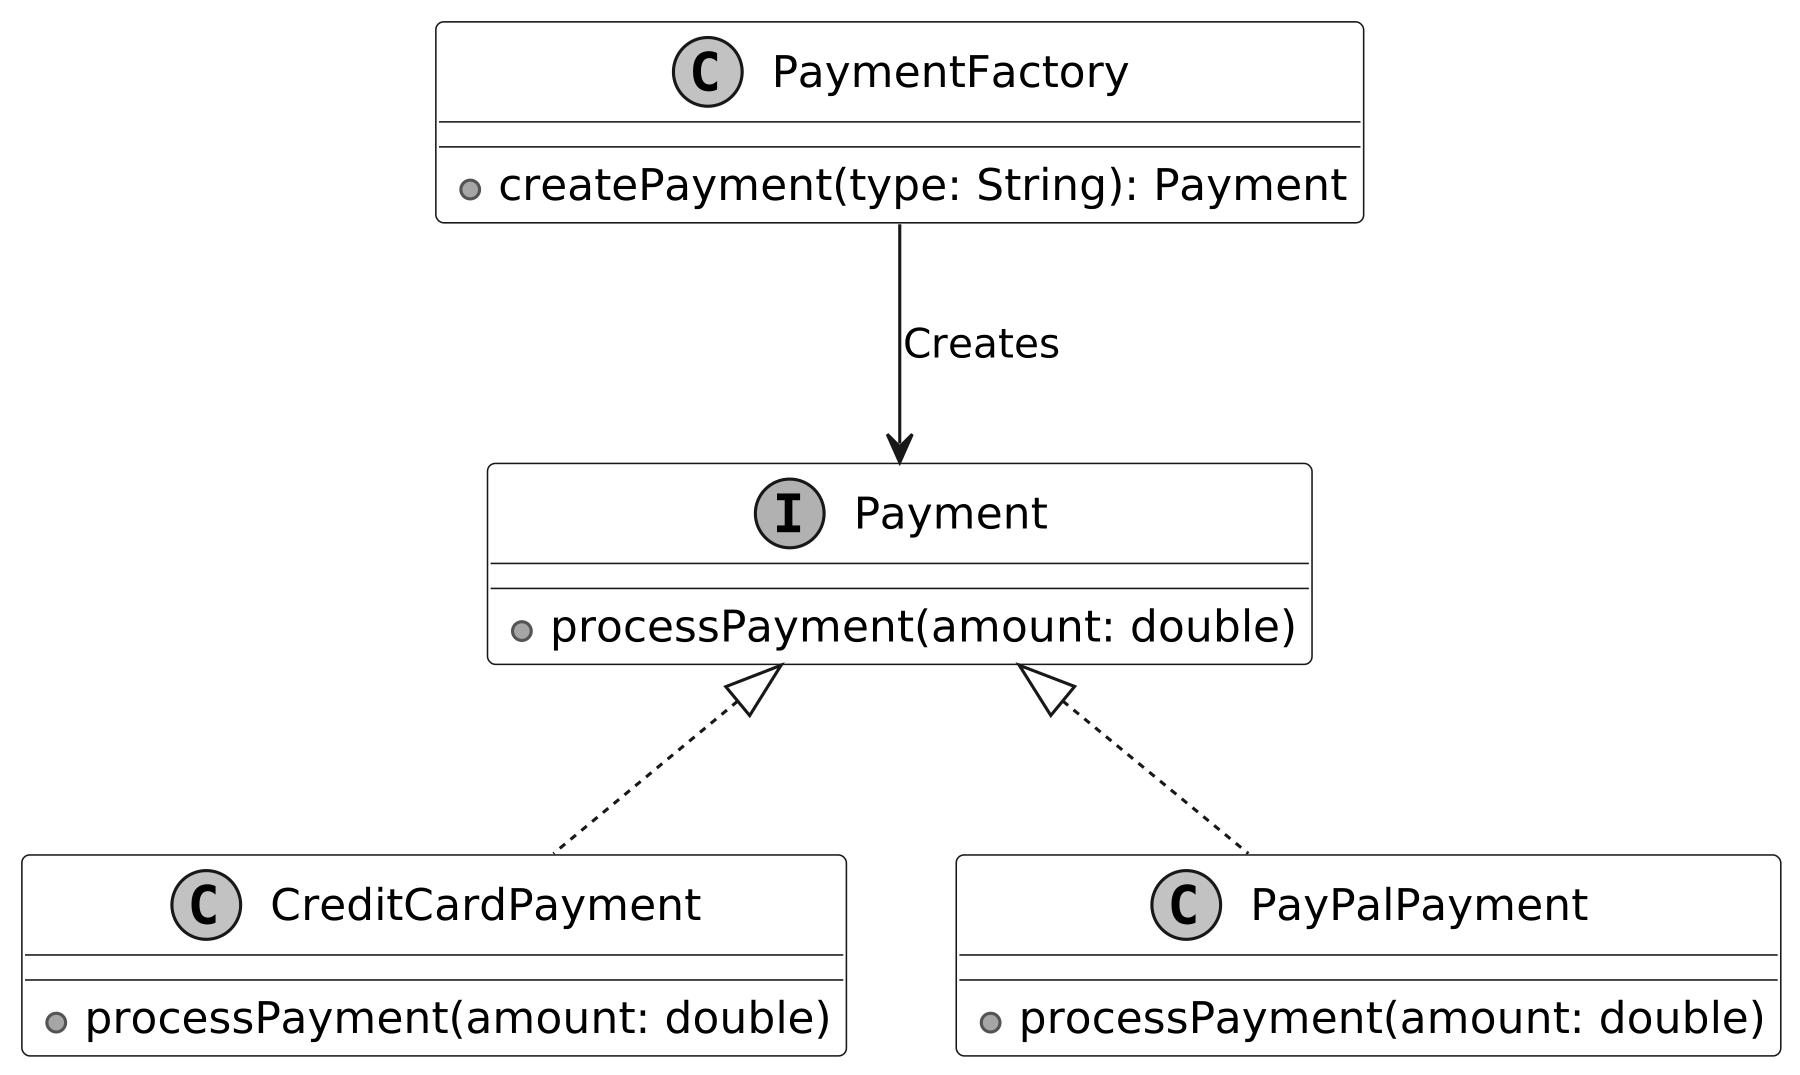
Design an ATM System
In this chapter, we will explore the object-oriented design of an ATM system. The primary purpose of an ATM is to automate banking tasks for users, allowing them to check balances, withdraw cash, and transfer funds. This design aims to make these operations seamless by designing classes that model key components, such as the ATM machine, bank accounts, hardware interfaces, and transaction states.
Requirements Gathering
> **Candidate:** The ATM should have a card reader, keypad, screen, cash dispenser, and deposit slot. Does this cover the main components? > **Interviewer:** That's a solid list.
> **Candidate:** The ATM flow: insert card → enter PIN → menu (check balance, withdraw, deposit) → continue or exit → eject card. Does this align? > **Interviewer:** Your flow is accurate.
> **Candidate:** For authentication, the ATM validates card + PIN, showing an error if invalid. Should we limit PIN attempts? > **Interviewer:** Yes — three PIN attempts before locking the card. Keep that in scope.
> **Candidate:** The ATM should support Checking and Savings accounts linked to a card. Users select an account for transactions. > **Interviewer:** Correct.
> **Candidate:** For transactions: Withdraw (validates sufficient funds) and Deposit (updates balance). Should we include transfers? > **Interviewer:** Focus on Withdraw and Deposit. Transfers are out of scope.
**Requirements** - Authenticate users via debit card and PIN. - Support Checking and Savings accounts per user, with account selection. - Hardware: Card Reader, Keypad, Screen, Cash Dispenser, Deposit Slot, optional Printer. - Support Withdraw and Deposit transactions with validation. - Clear error messages for insufficient funds, invalid PIN, hardware failures. Card retained after repeated invalid attempts.
Use Case Diagram
**Customer actor use cases:** Insert Card, Enter PIN, Select Transaction, Select Account, Withdraw Cash, Deposit Funds, Eject Card.
**System actor use cases:** Validate Card and PIN, Withdraw Cash, Deposit Funds, Eject Card.
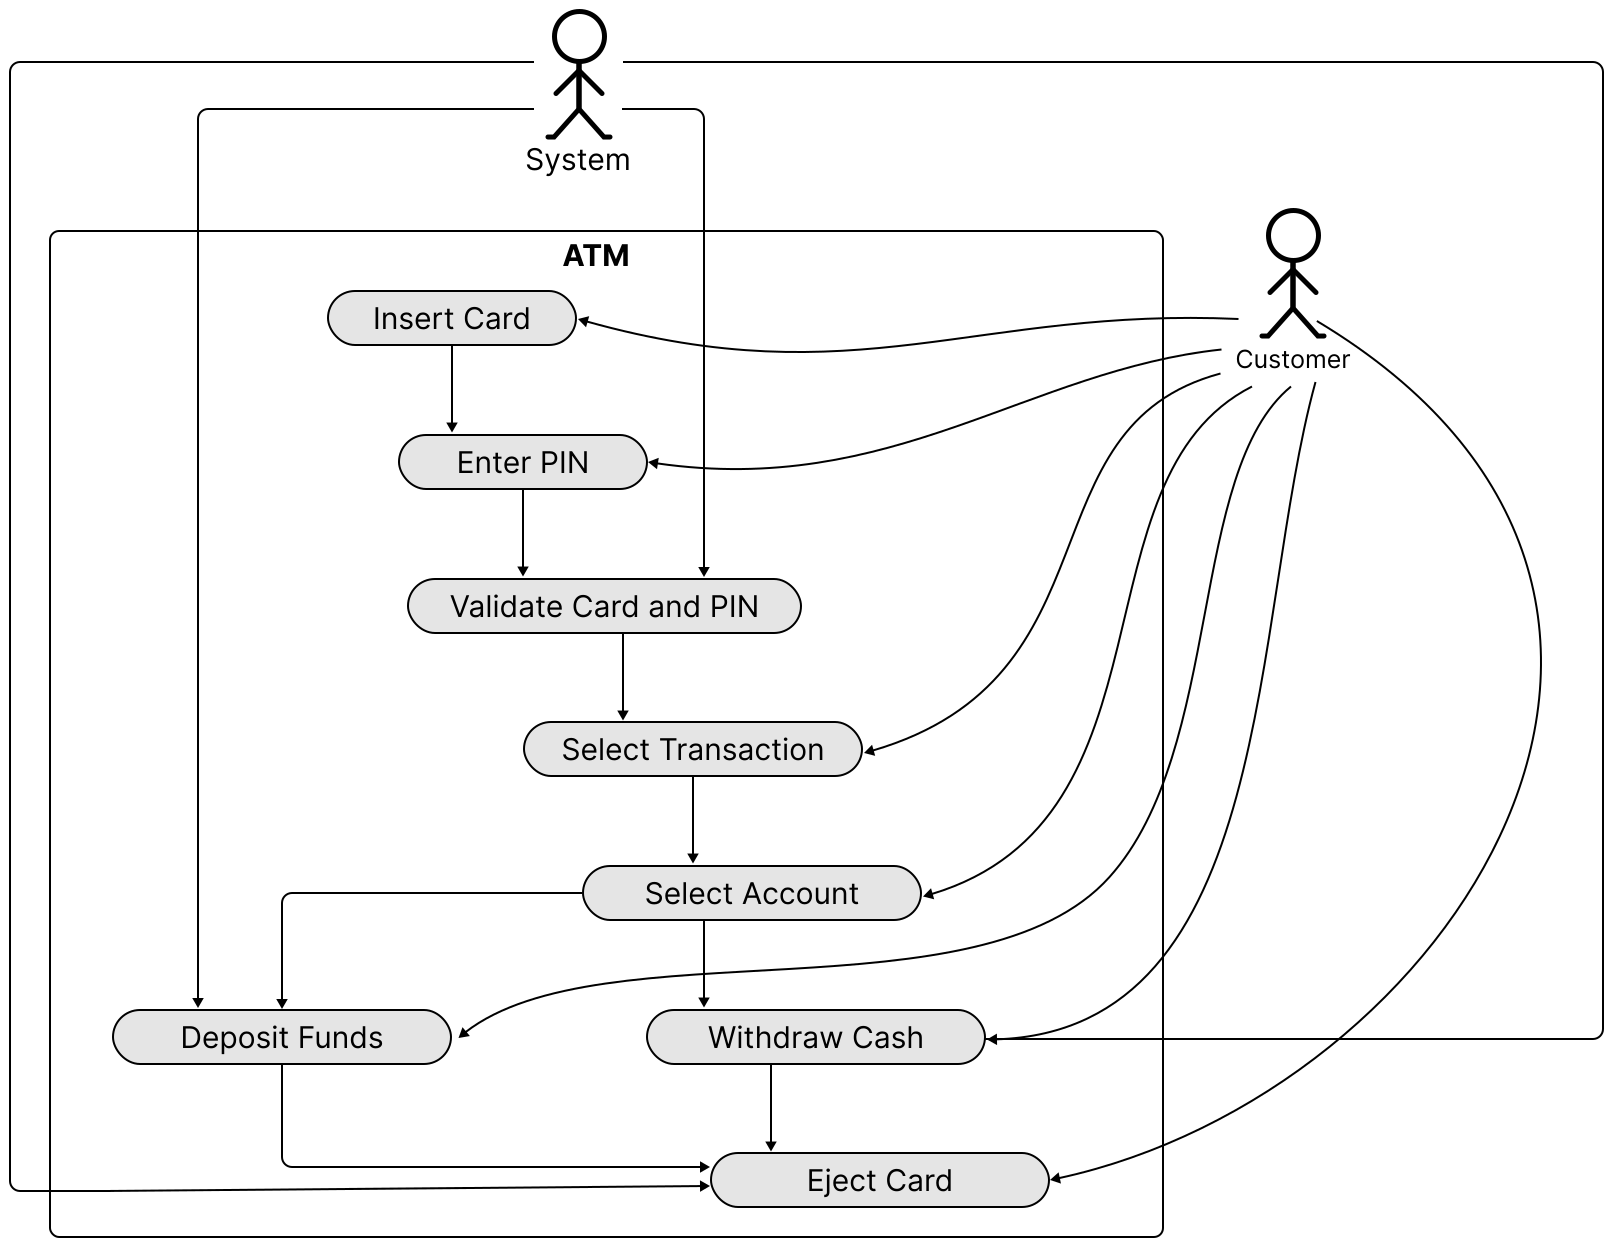
Identify Core Objects
- **Bank:** Stores and manages accounts. - **Account:** Manages balance, account number, card number, hashed PIN, and account type (Checking/Savings). - **ATMMachine:** Main coordinator managing user interactions and connecting with hardware (card reader, keypad, screen, cash dispenser, deposit slot). - **Transaction:** Manages financial transactions (withdrawals, deposits) including validation and execution.
> **Design Choice:** Consolidate hardware access within `ATMMachine` to ensure consistent behavior across components, enabling seamless user flow from card insertion to session end.
Design Class Diagram
**Account**
Encapsulates balance, account number, card number, hashed PIN, and `AccountType` enum (CHECKING/SAVING). Enables PIN validation and balance updates.
> **Note:** Rather than maintaining a transaction ledger (as in real banking), we directly update the balance for simplicity and effective scope management.
**Bank / BankInterface**
The `Bank` class stores `Account` objects and links them to cards for fast retrieval. `BankInterface` decouples the Bank from the ATM, allowing a local implementation to be replaced with a networked API client without modifying ATM core logic.
> **Alternative:** Integrating Bank into ATMMachine would tightly couple account management with ATM operations, reducing modularity.
**Transaction**
`Transaction` interface defines a contract for all transaction types, supported by a `TransactionType` enum (WITHDRAW, DEPOSIT). Concrete classes `WithdrawTransaction` and `DepositTransaction` handle their respective operations.
> **Design Choice:** Abstracting Transaction as a separate object makes it easy to introduce new types (e.g., Transfer) without modifying core logic.
**ATMState**
Interface defining operations for each ATM stage: card insertion, PIN entry, transaction selection, amount entry, deposit collection. Concrete states: `IdleState`, `PinEntryState`, `TransactionSelectionState`, `WithdrawAmountEntryState`, `DepositCollectionState`.
**Hardware interfaces**
`CardProcessor`, `Keypad`, `Display`, `CashDispenser`, `DepositBox` — all interfaces enabling testing with mock implementations.
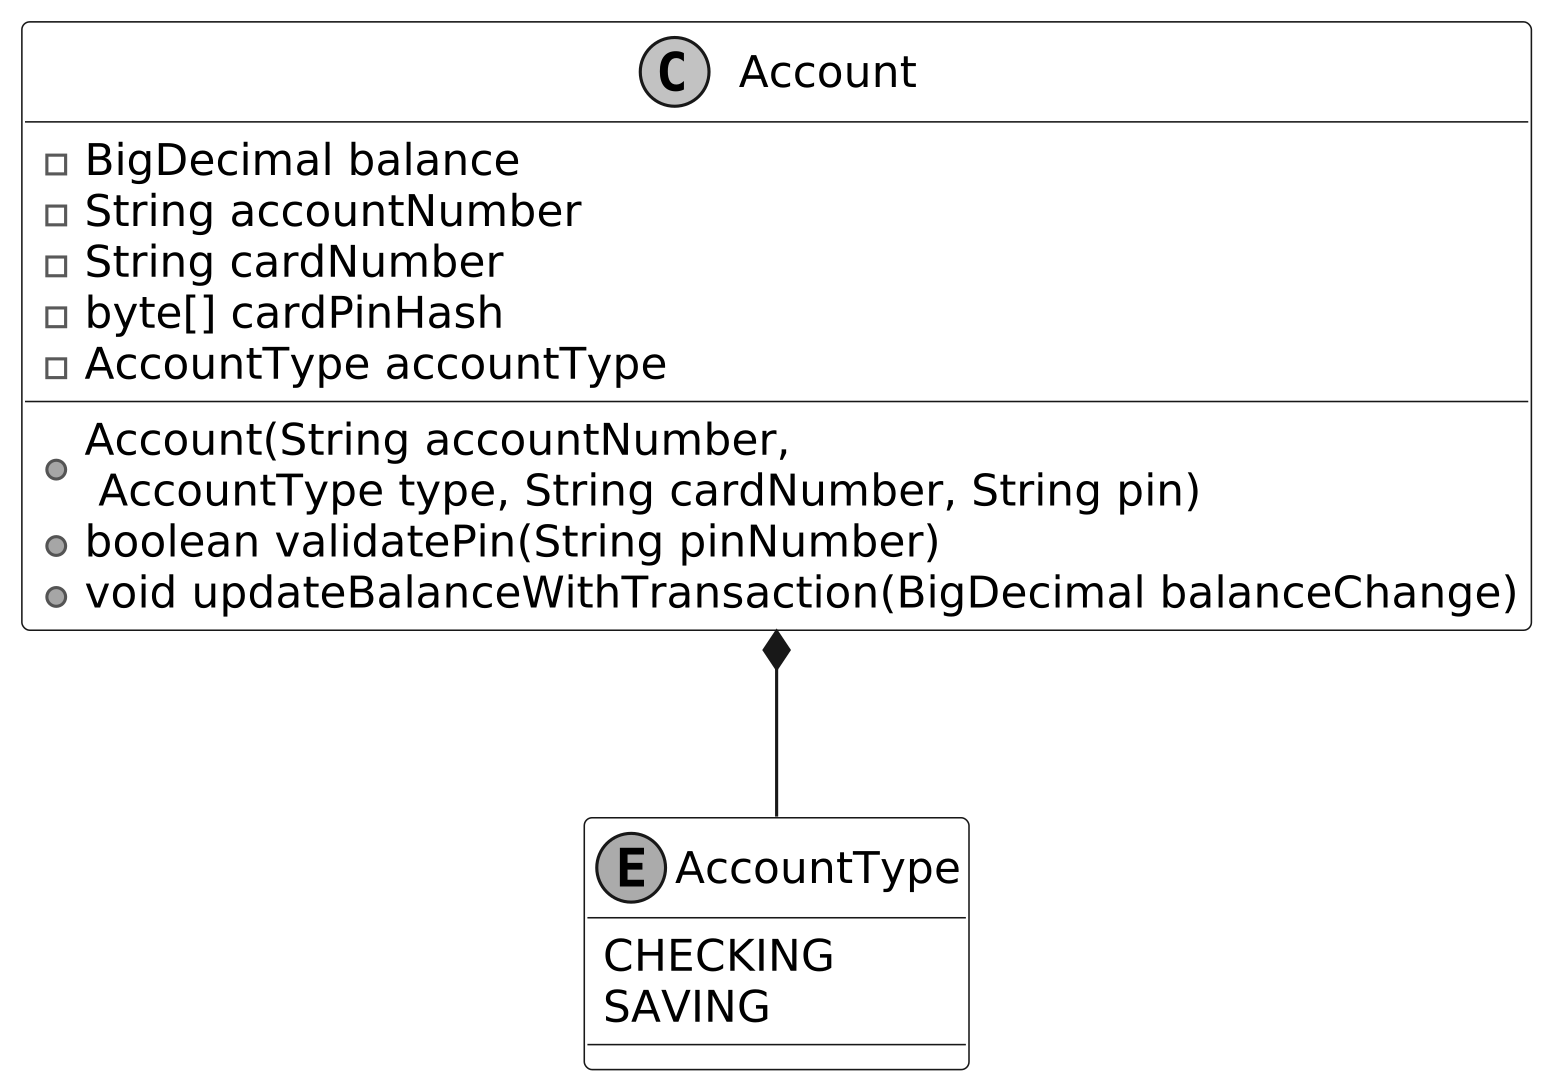
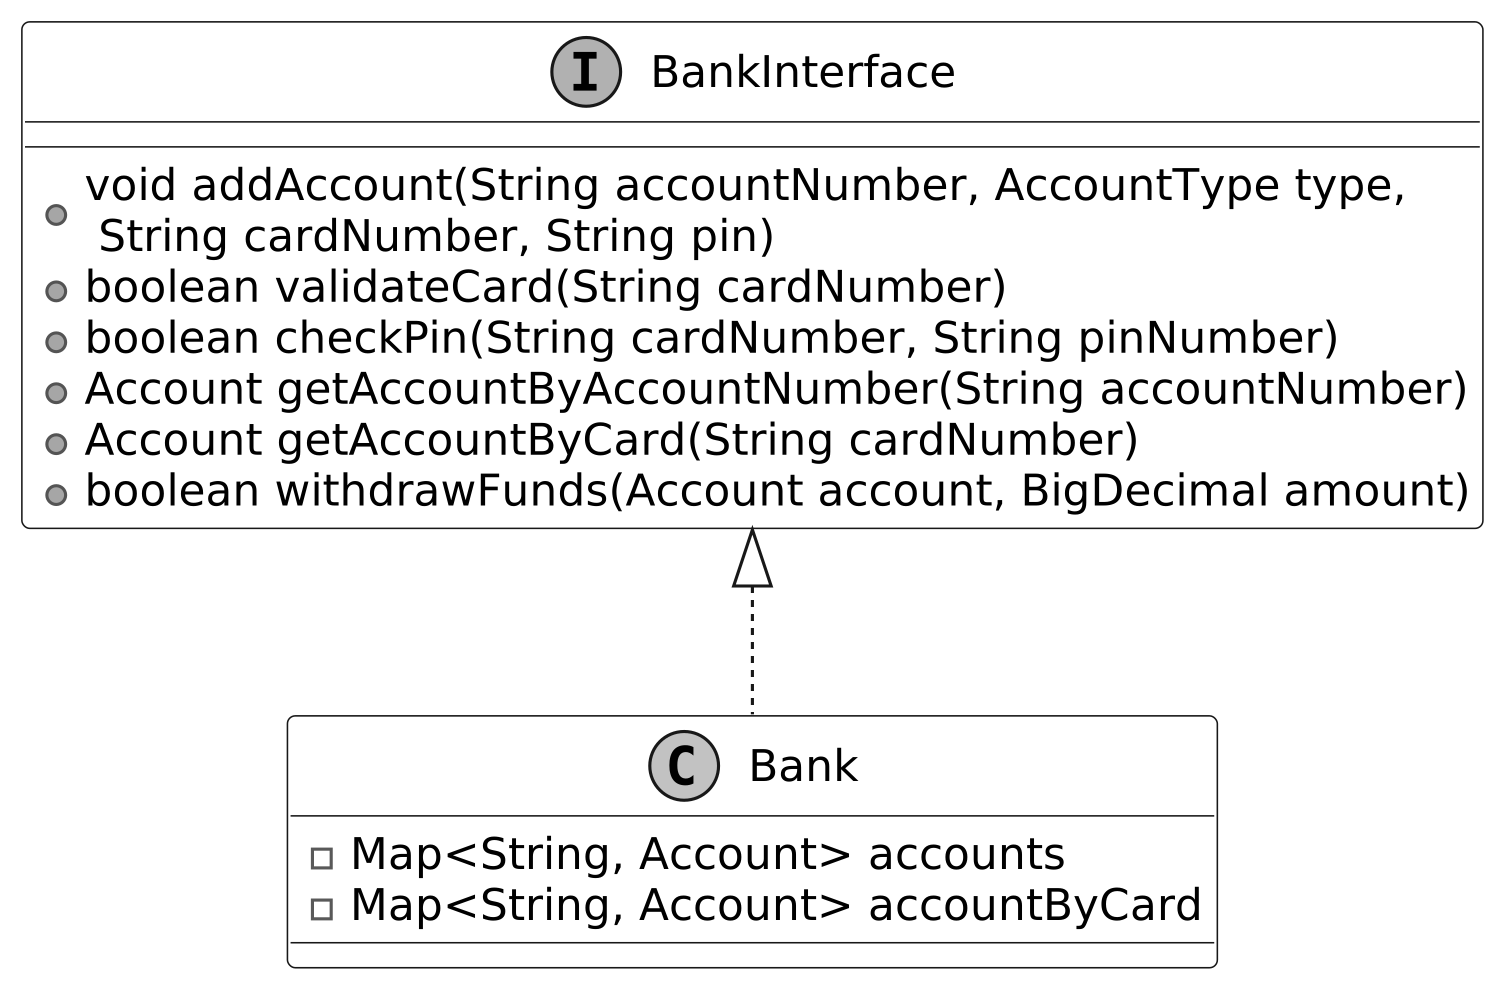
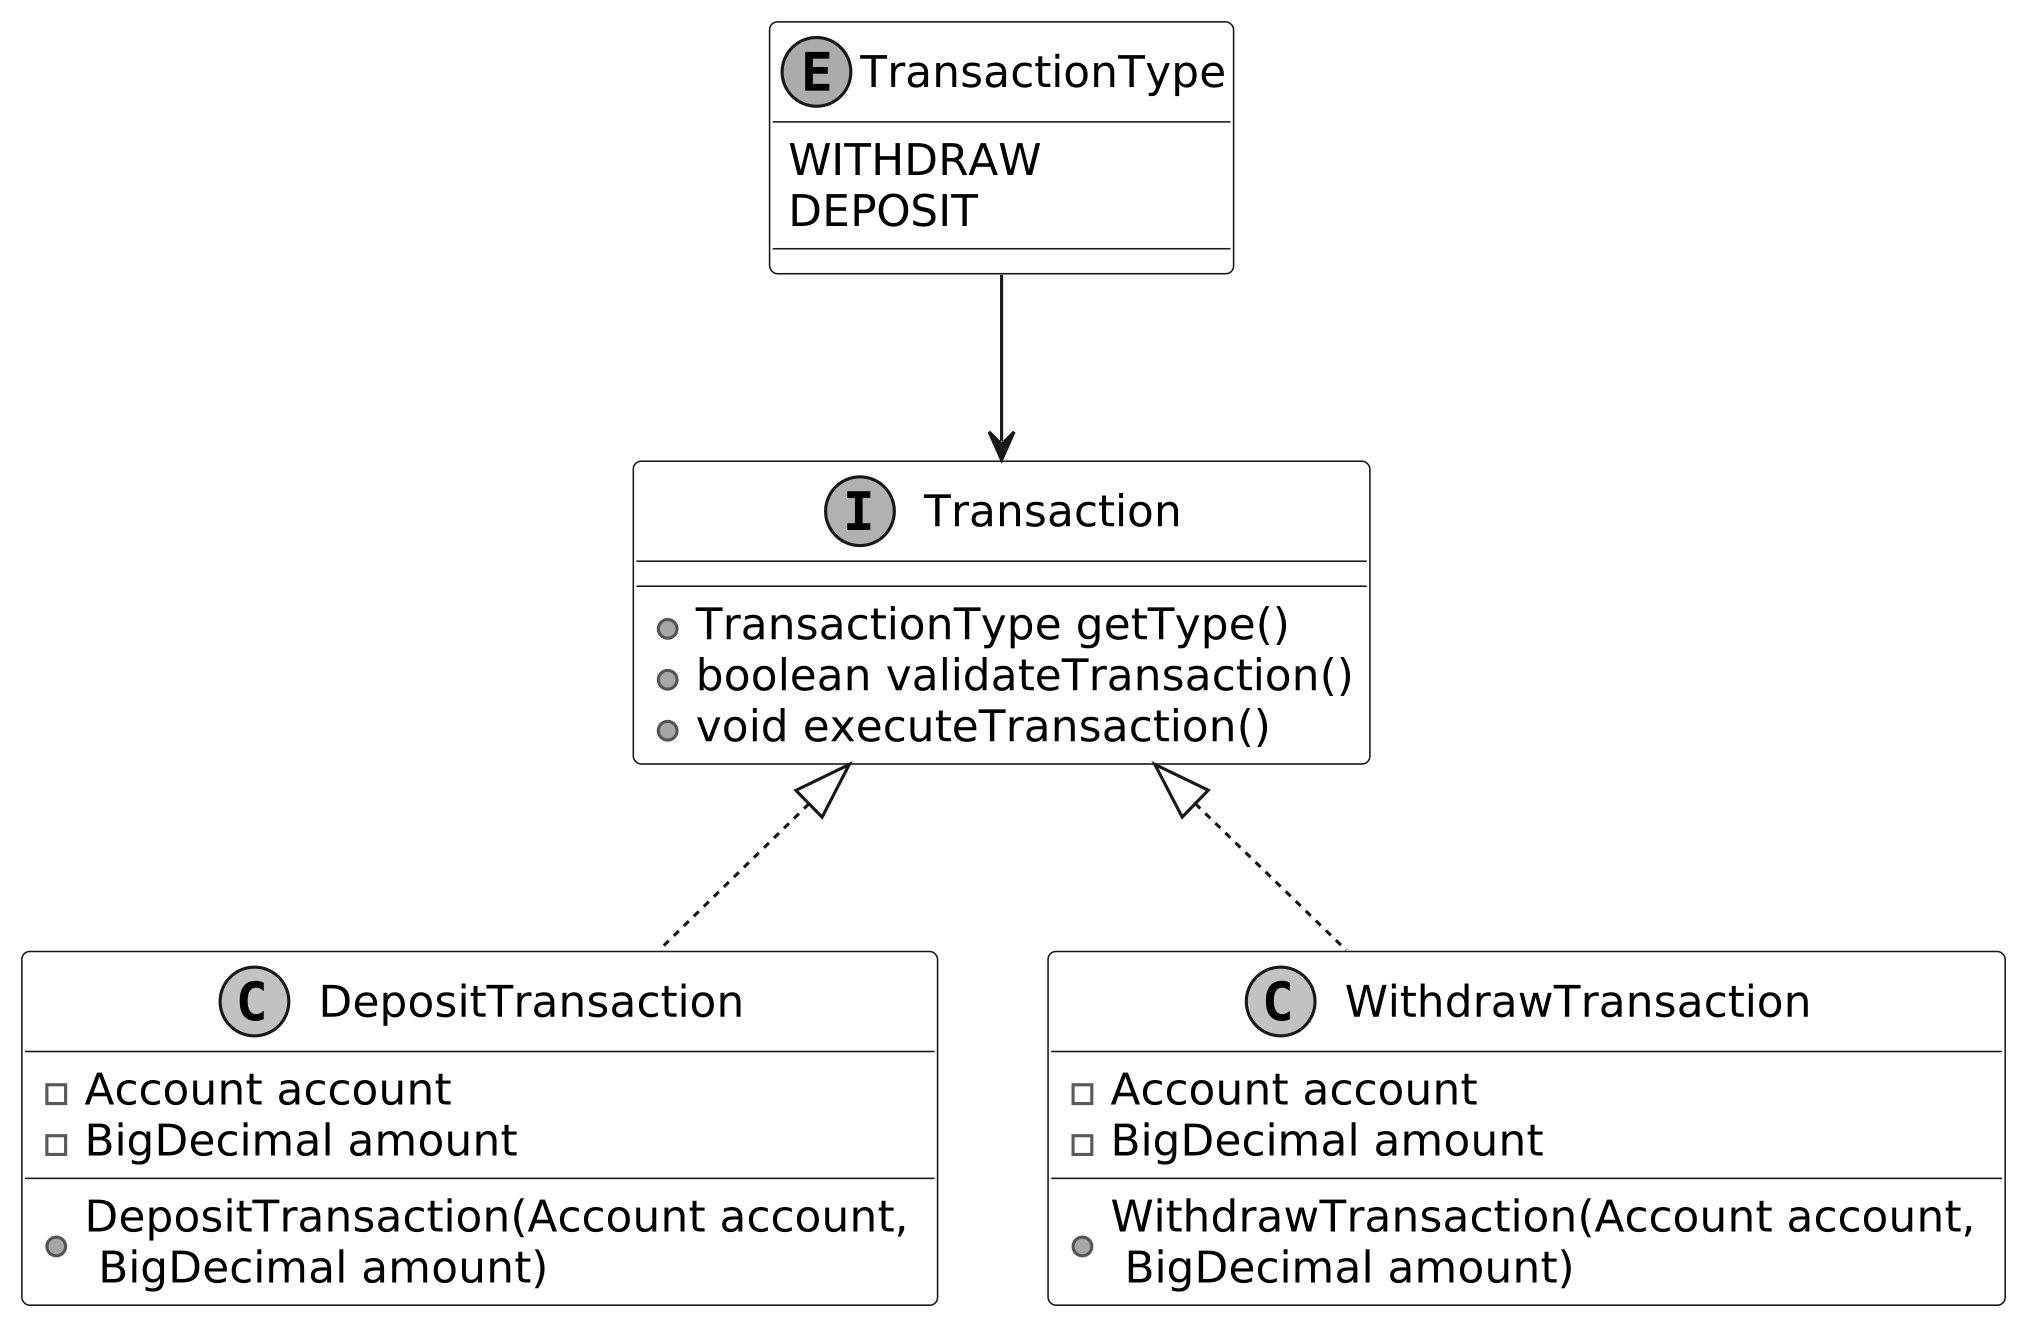
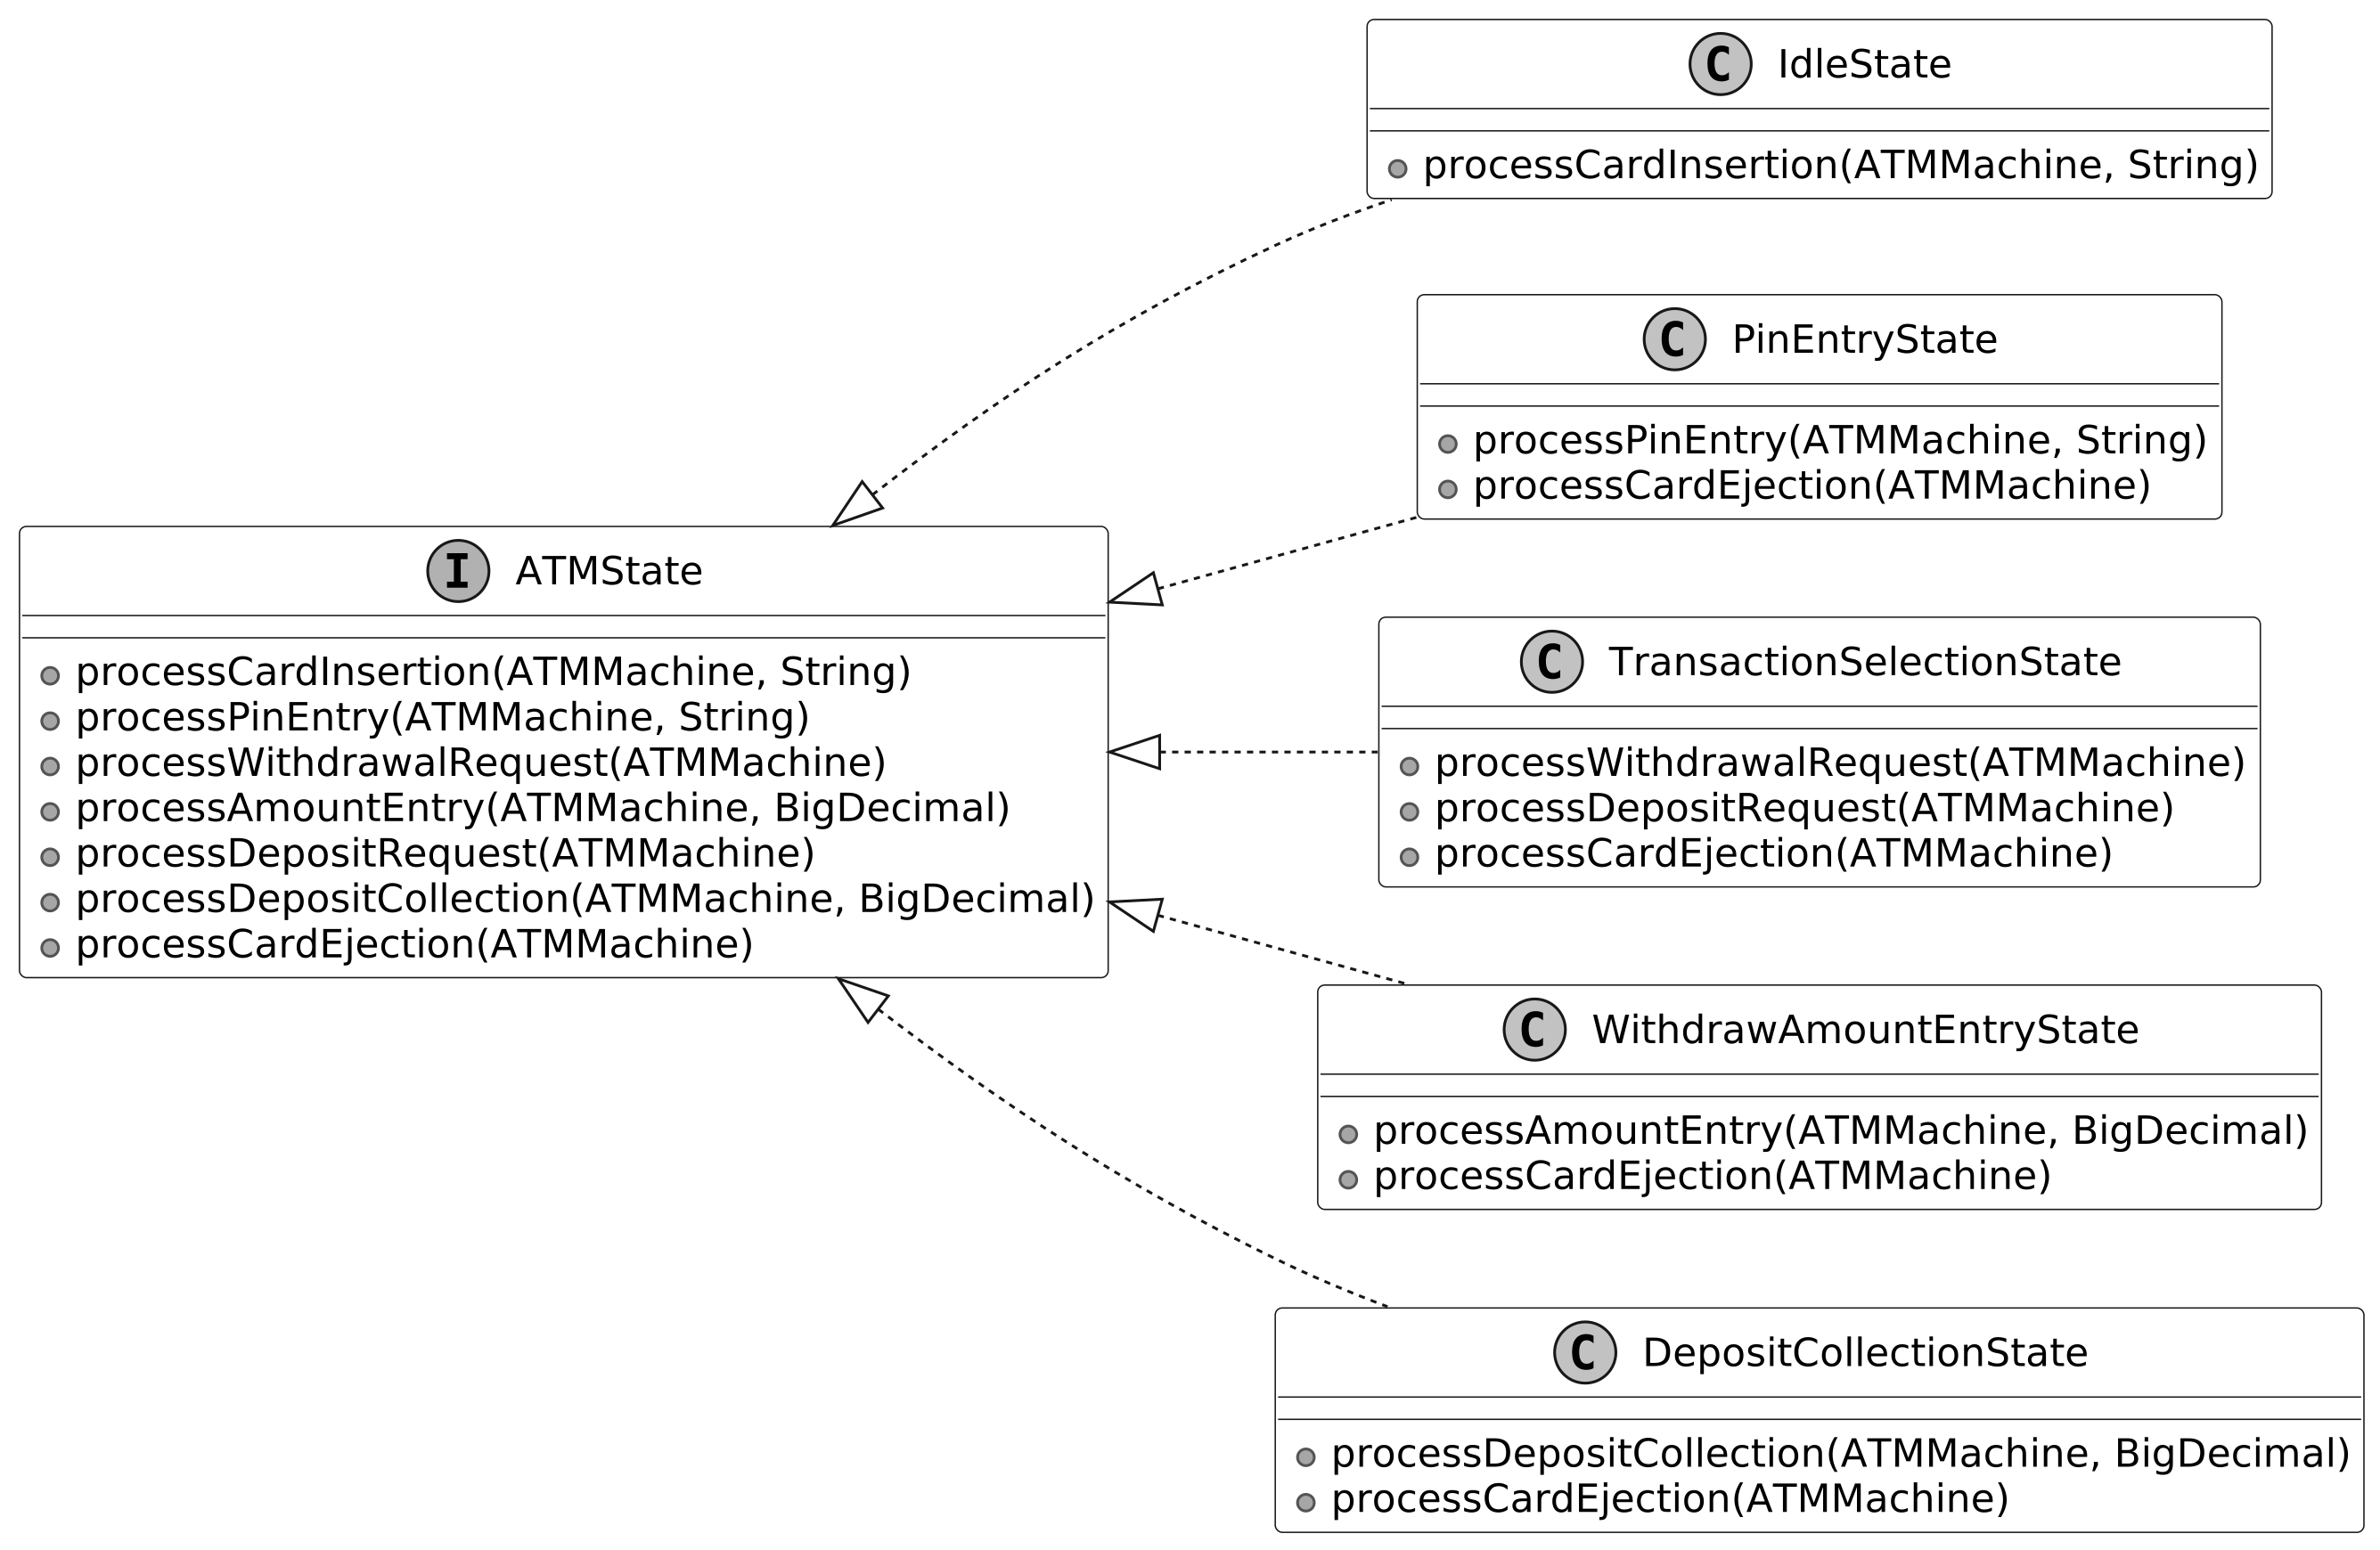
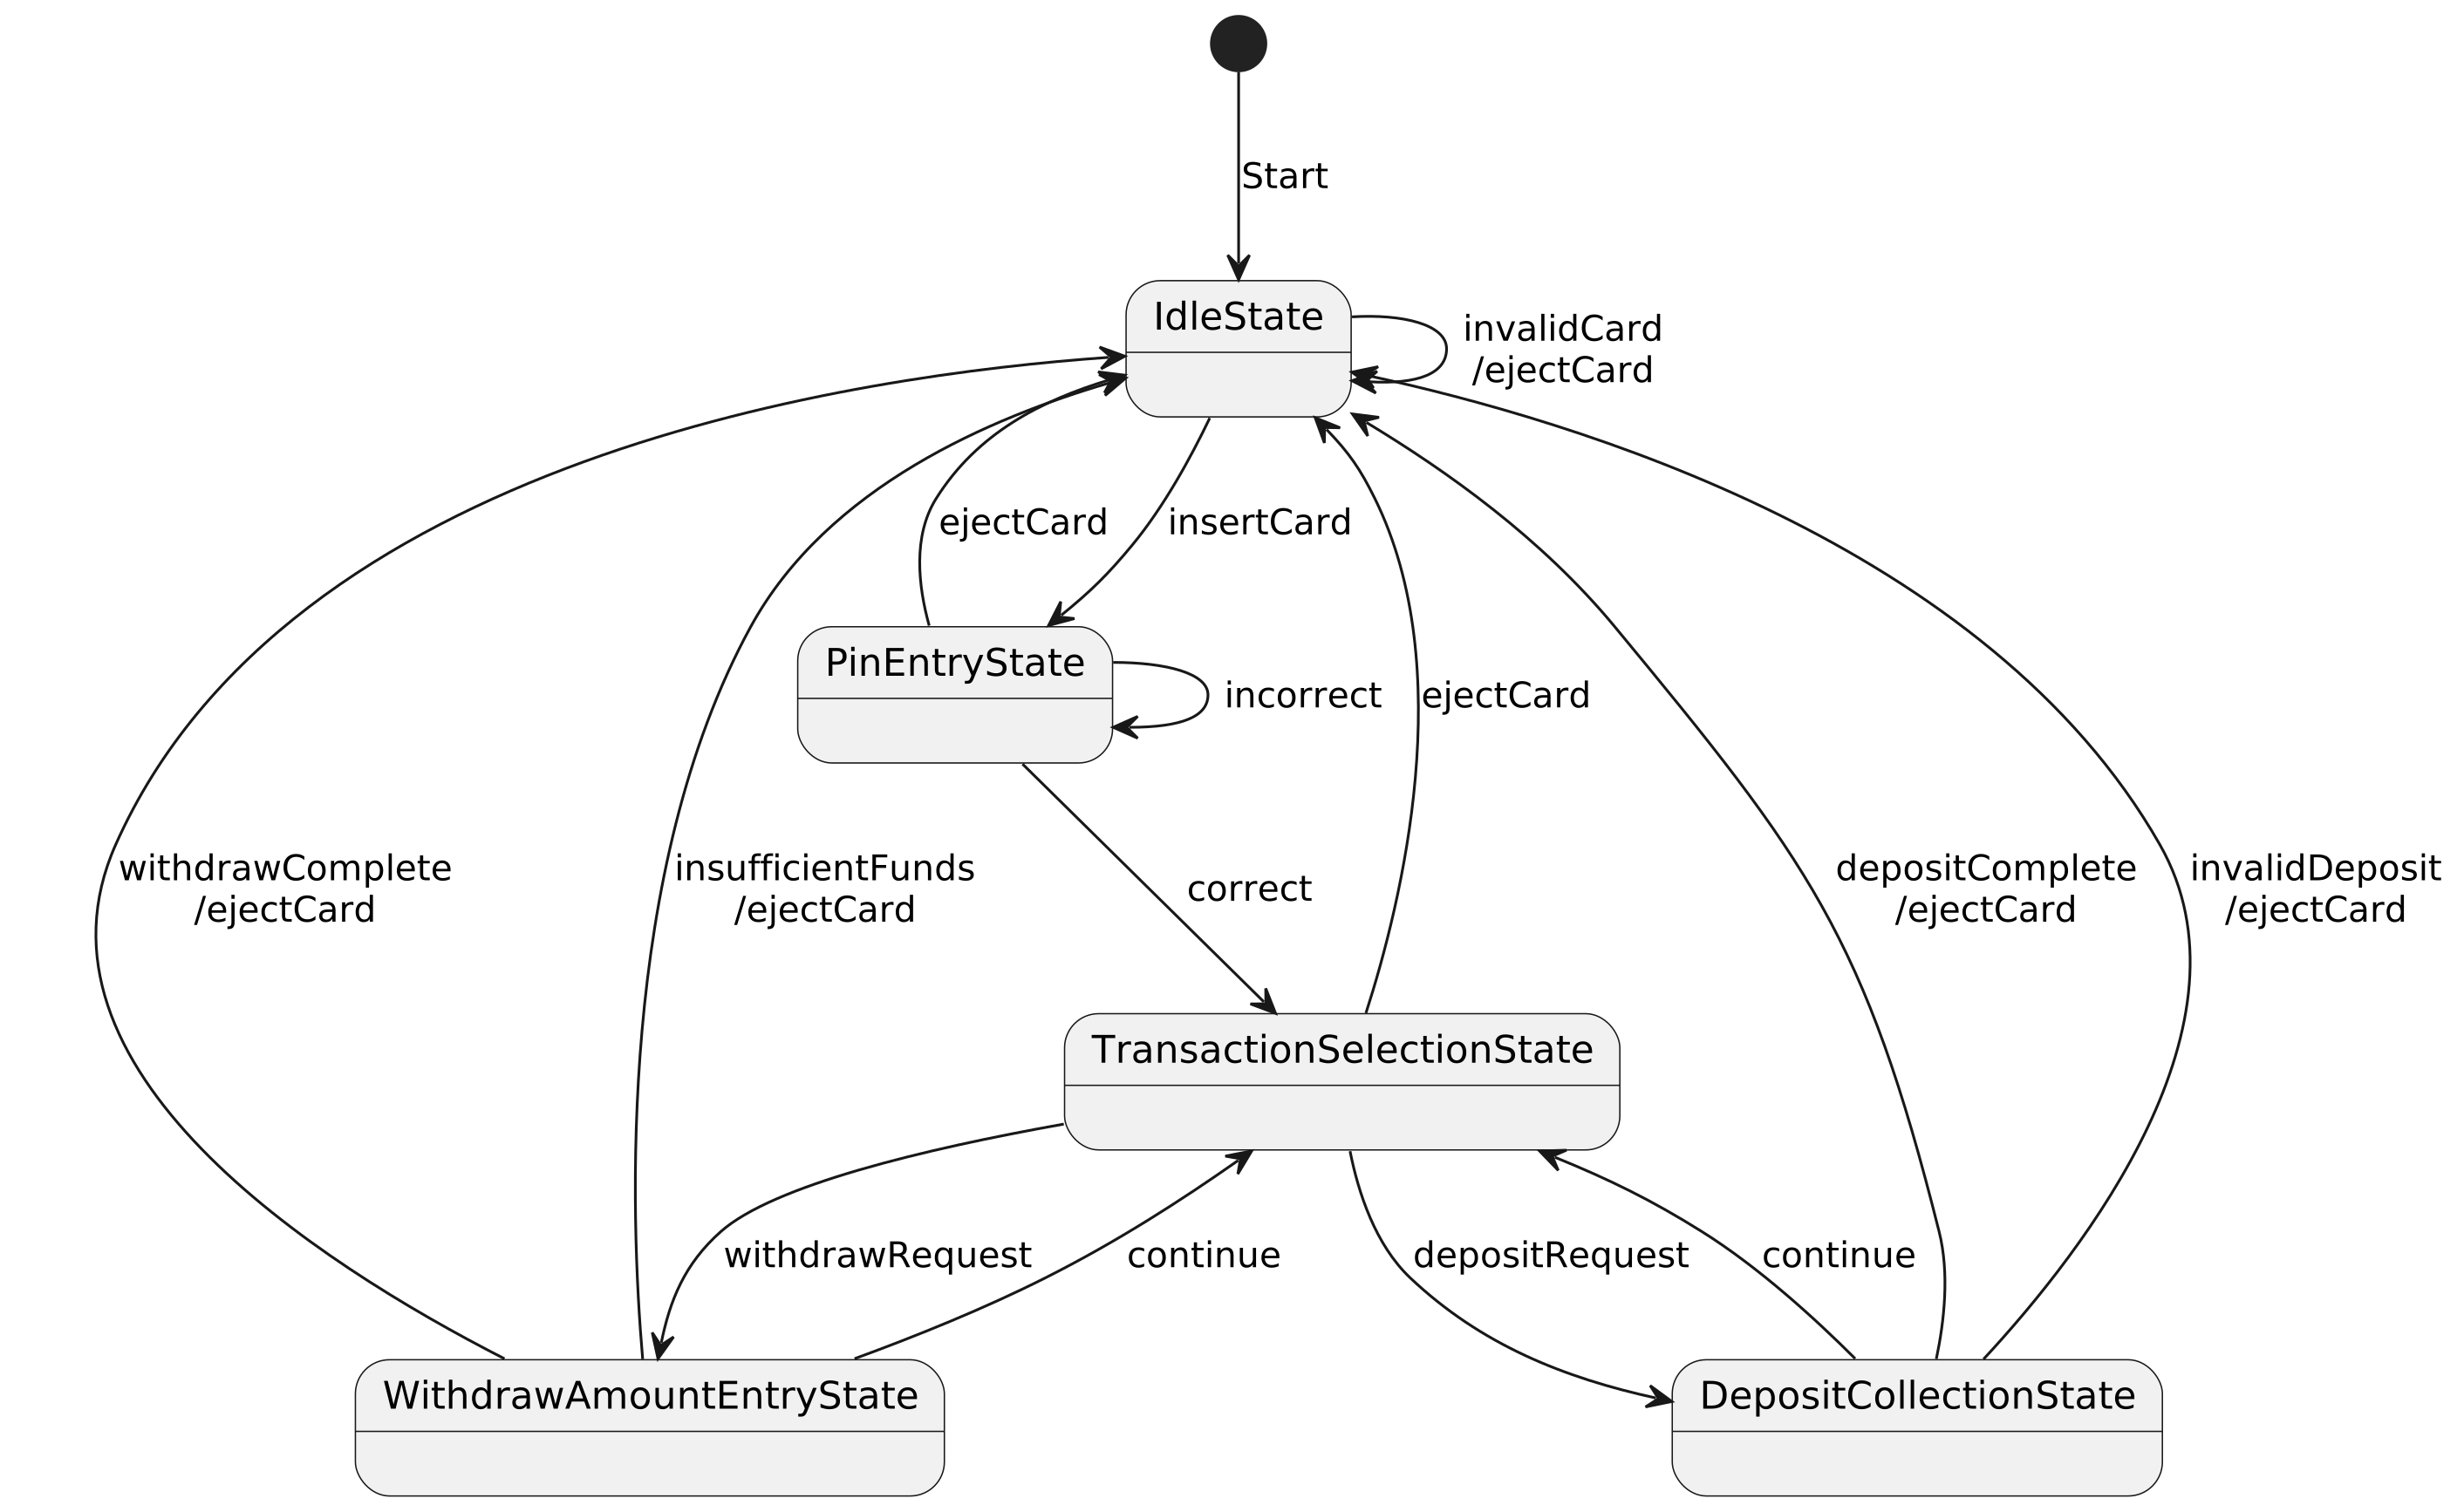
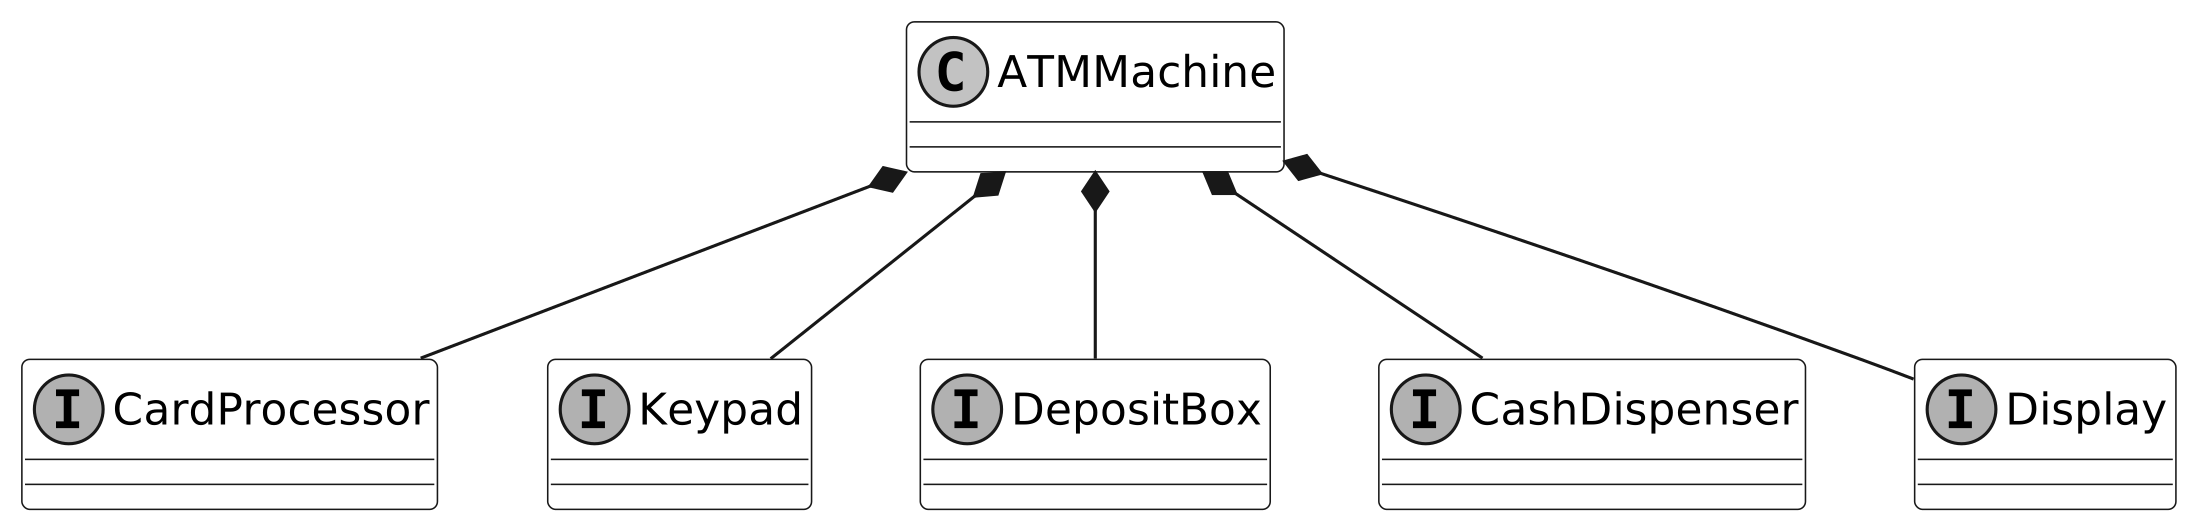
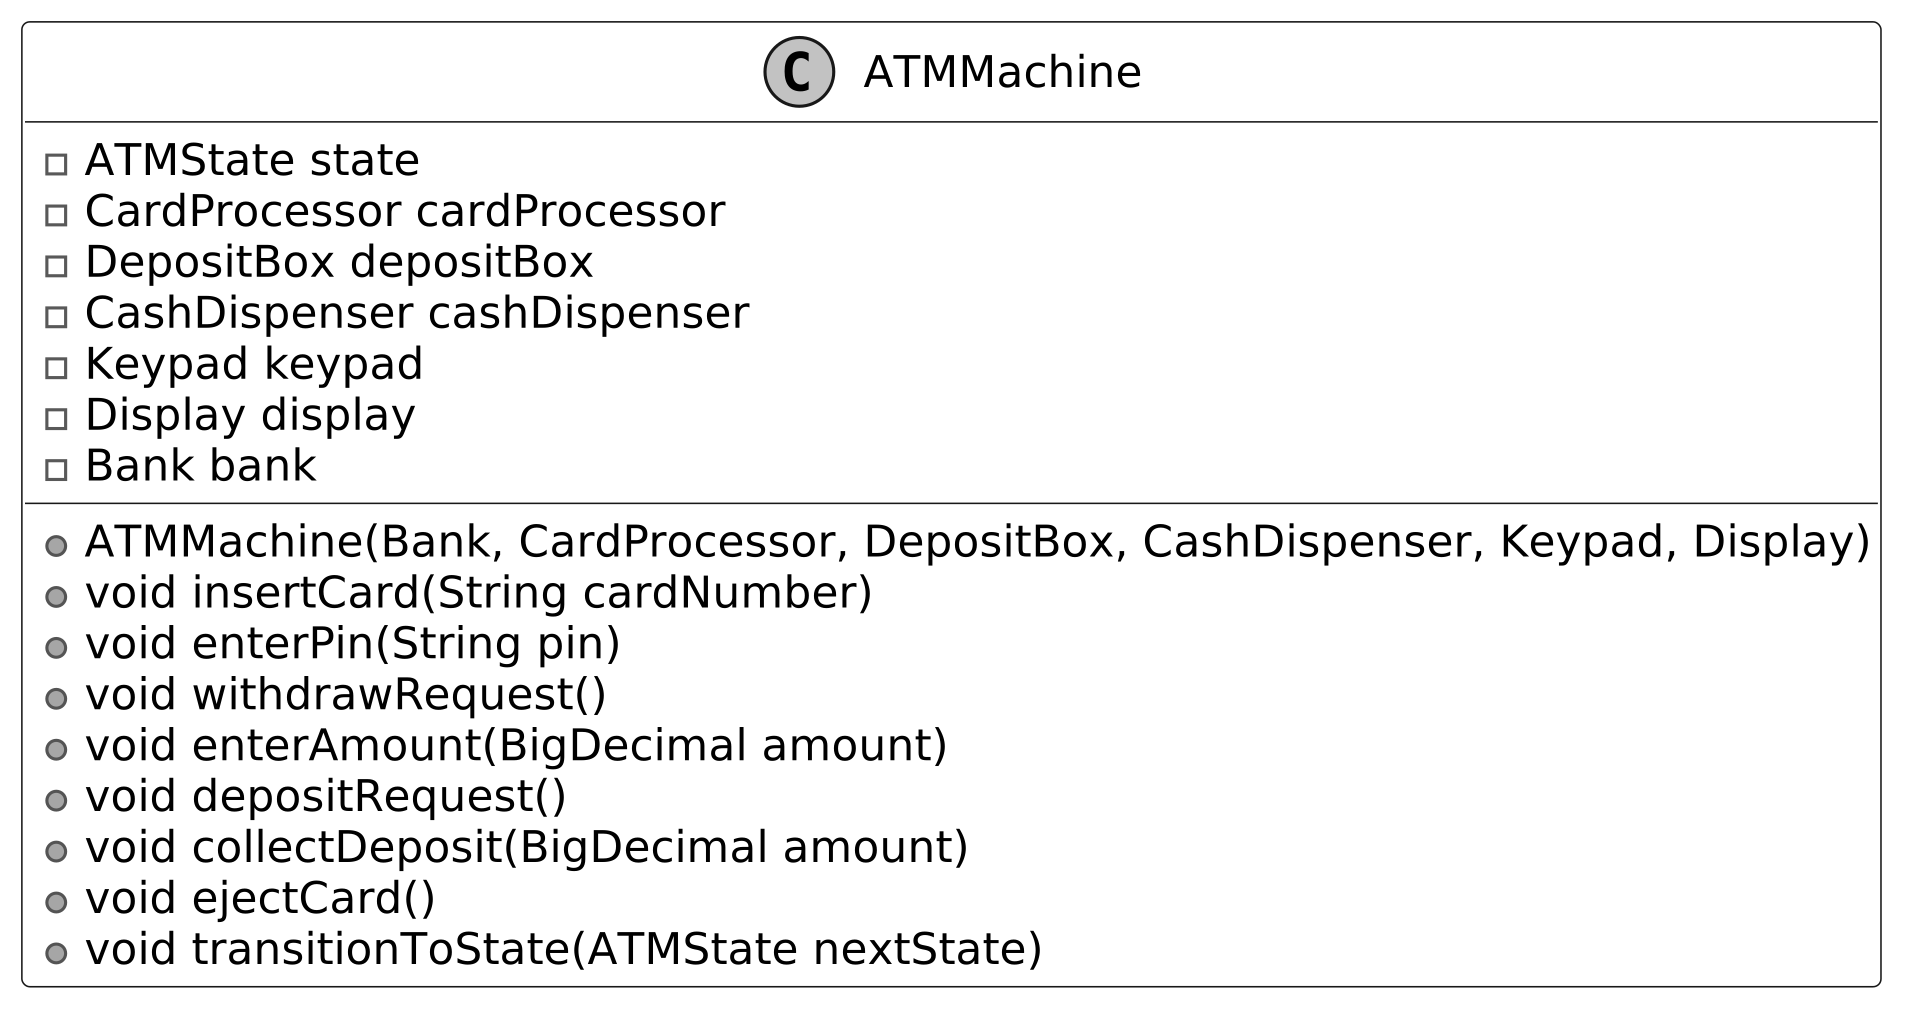
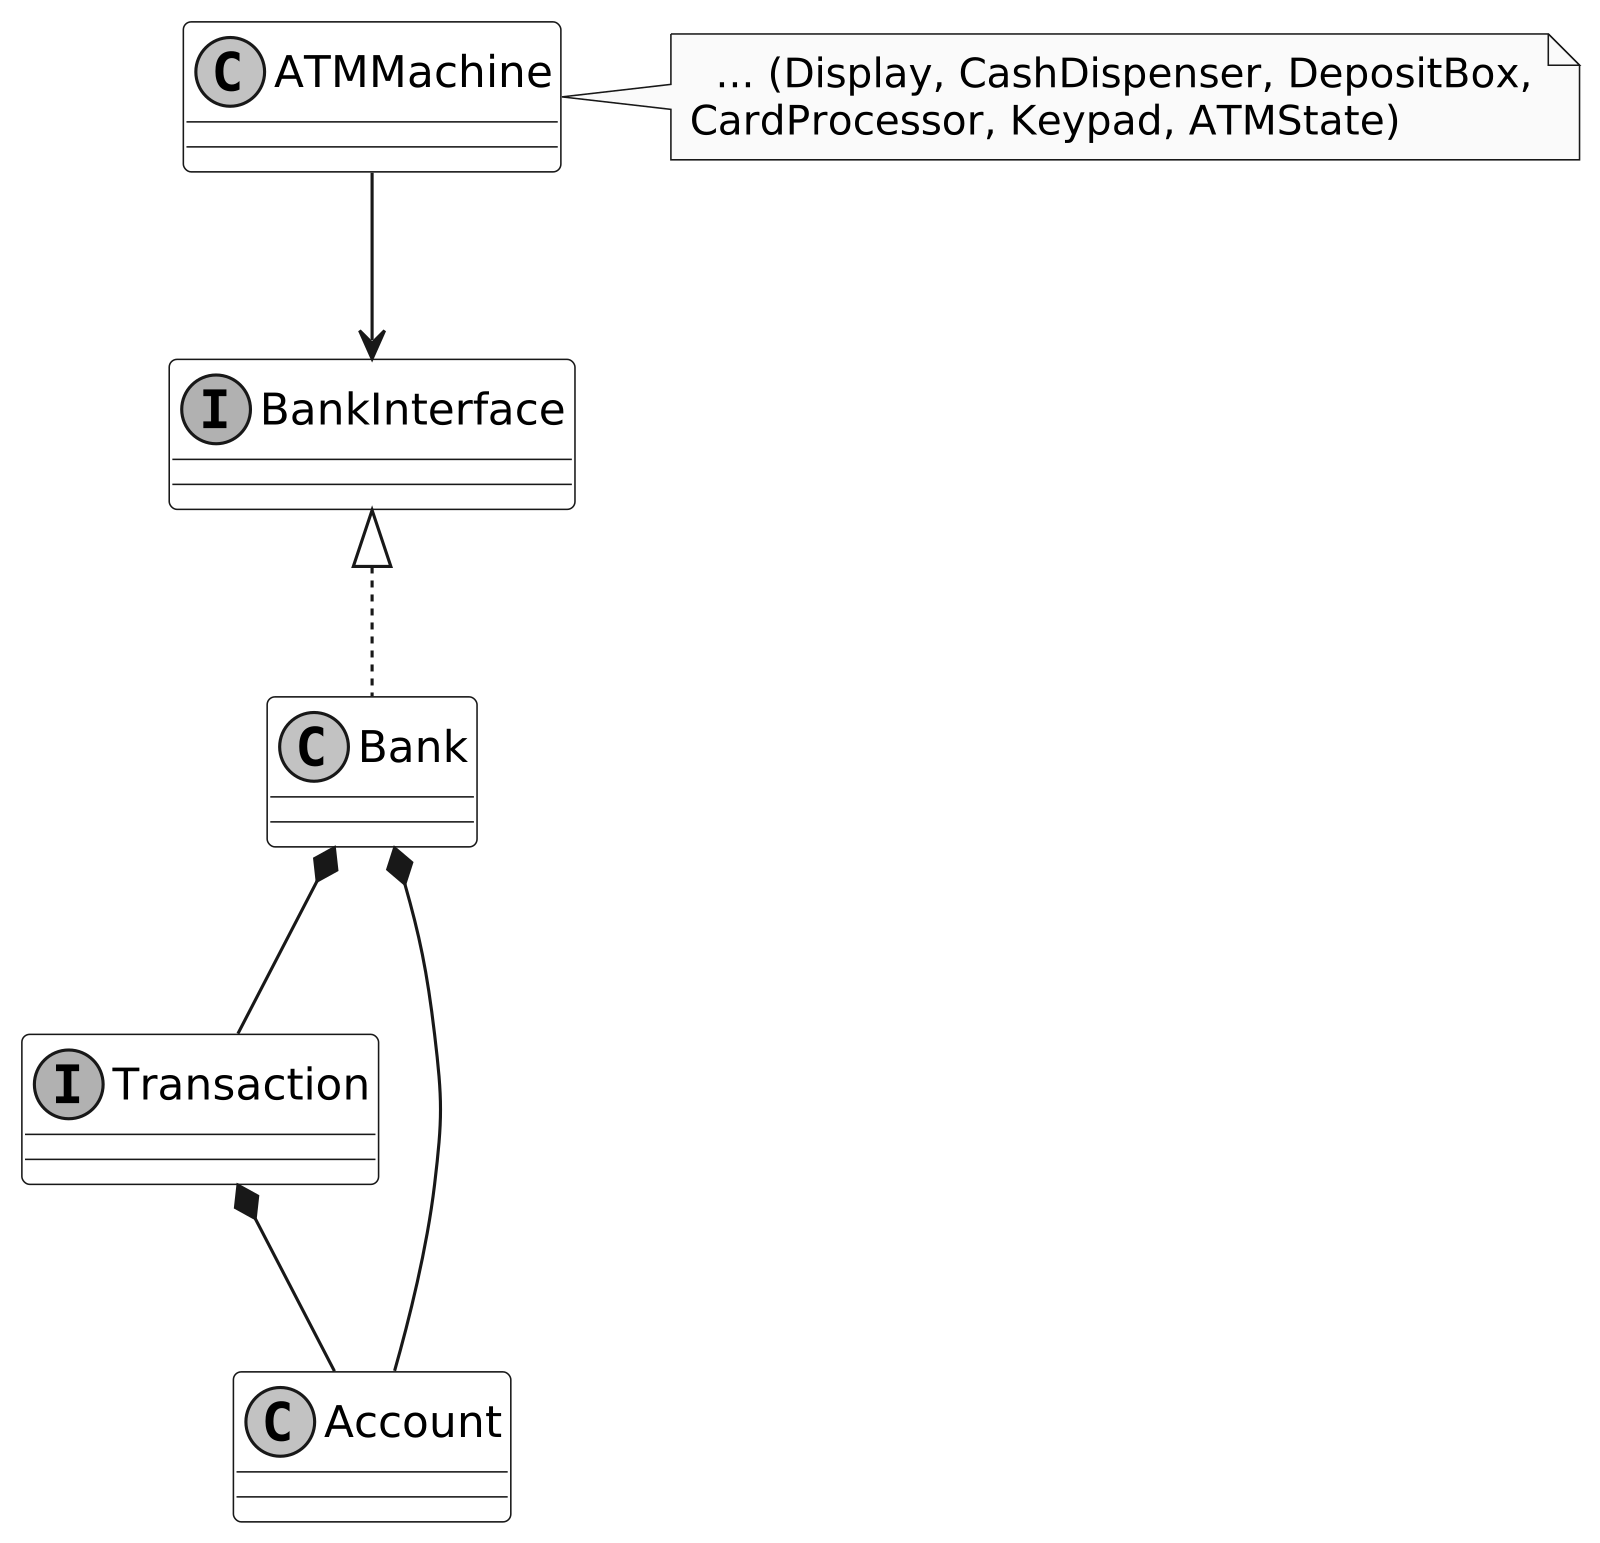
Code — ATM System
**Account and AccountType**
```java public class Account { private BigDecimal balance; private final String accountNumber; private final String cardNumber; private final byte[] cardPinHash; private final AccountType accountType;
public Account(final String accountNumber, final AccountType type, final String cardNumber, final String pin) { this.accountNumber = accountNumber; this.accountType = type; this.cardNumber = cardNumber; this.cardPinHash = calculateMd5(pin); // PIN is hashed for security this.balance = BigDecimal.ZERO; }
public boolean validatePin(String pinNumber) { byte[] entryPinHash = calculateMd5(pinNumber); return Arrays.equals(cardPinHash, entryPinHash); }
public void updateBalanceWithTransaction(final BigDecimal balanceChange) { this.balance = this.balance.add(balanceChange); } }
public enum AccountType { CHECKING, SAVING } ```
> **Implementation Choice:** `BigDecimal` for balance ensures precise financial calculations. `updateBalanceWithTransaction` handles both deposits (positive) and withdrawals (negative) through a single method.
**BankInterface and Bank**
```java public interface BankInterface { void addAccount(String accountNumber, AccountType type, String cardNumber, String pin); boolean validateCard(String cardNumber); boolean checkPin(String cardNumber, String pinNumber); Account getAccountByAccountNumber(String accountNumber); Account getAccountByCard(String cardNumber); boolean withdrawFunds(Account account, BigDecimal amount); }
public class Bank implements BankInterface { private final Map<String, Account> accounts = new HashMap<>(); private final Map<String, Account> accountByCard = new HashMap<>();
@Override public void addAccount(final String accountNumber, final AccountType type, final String cardNumber, final String pin) { final Account newAccount = new Account(accountNumber, type, cardNumber, pin); accounts.put(newAccount.getAccountNumber(), newAccount); accountByCard.put(newAccount.getCardNumber(), newAccount); }
@Override public boolean validateCard(final String cardNumber) { return getAccountByCard(cardNumber) != null; }
@Override public boolean checkPin(String cardNumber, String pinNumber) { Account account = getAccountByCard(cardNumber); if (account != null) { return account.validatePin(pinNumber); } return false; }
@Override public Account getAccountByAccountNumber(String accountNumber) { return accounts.get(accountNumber); }
@Override public Account getAccountByCard(String cardNumber) { return accountByCard.get(cardNumber); }
@Override public boolean withdrawFunds(Account account, BigDecimal amount) { if (account.getBalance().compareTo(amount) >= 0) { account.updateBalanceWithTransaction(amount.negate()); return true; } return false; } } ```
> **Implementation Choice:** Two `HashMap`s — `accounts` (account number → Account) and `accountByCard` (card number → Account) — provide O(1) lookup for real-time operations like card validation and account retrieval.
**Transaction, WithdrawTransaction, DepositTransaction**
```java public interface Transaction { TransactionType getType(); boolean validateTransaction(); void executeTransaction(); }
public class WithdrawTransaction implements Transaction { Account account; BigDecimal amount;
public WithdrawTransaction(Account account, BigDecimal amount) { if (!validateTransaction()) { throw new IllegalStateException( "Cannot complete withdrawal: Insufficient funds in account"); } this.account = account; this.amount = amount; }
@Override public TransactionType getType() { return TransactionType.WITHDRAW; }
@Override public boolean validateTransaction() { assert account != null; return account.getBalance().compareTo(amount) > 0; }
@Override public void executeTransaction() { account.updateBalanceWithTransaction(amount.negate()); } }
public class DepositTransaction implements Transaction { final Account account; final BigDecimal amount;
public DepositTransaction(Account account, BigDecimal amount) { this.account = account; this.amount = amount; }
@Override public TransactionType getType() { return TransactionType.DEPOSIT; }
@Override public boolean validateTransaction() { return true; // Deposits are always valid }
@Override public void executeTransaction() { account.updateBalanceWithTransaction(amount); } } ```
**ATMState (base + IdleState + WithdrawAmountEntryState)**
```java public class ATMState { private static void renderDefaultAction(ATMMachine atmMachine) { atmMachine.getDisplay().showMessage("Invalid action, please try again."); }
public void processCardInsertion(ATMMachine atmMachine, String cardNumber) { renderDefaultAction(atmMachine); }
public void processCardEjection(ATMMachine atmMachine) { renderDefaultAction(atmMachine); }
public void processPinEntry(ATMMachine atmMachine, String pin) { renderDefaultAction(atmMachine); }
public void processWithdrawalRequest(ATMMachine atmMachine) { renderDefaultAction(atmMachine); }
public void processDepositRequest(ATMMachine atmMachine) { renderDefaultAction(atmMachine); }
public void processAmountEntry(ATMMachine atmMachine, BigDecimal amount) { renderDefaultAction(atmMachine); }
public void processDepositCollection(ATMMachine atmMachine, BigDecimal amount) { renderDefaultAction(atmMachine); } }
public class IdleState extends ATMState { @Override public void processCardInsertion(ATMMachine atmMachine, String cardNumber) { if (atmMachine.getBankInterface().validateCard(cardNumber)) { atmMachine.getDisplay().showMessage("Please enter your PIN"); atmMachine.transitionToState(new PinEntryState()); } else { atmMachine.getDisplay().showMessage("Invalid card. Please try again."); } } }
public class WithdrawAmountEntryState extends ATMState { @Override public void processCardEjection(ATMMachine atmMachine) { atmMachine.getDisplay().showMessage("Transaction cancelled, card ejected"); atmMachine.transitionToState(new IdleState()); }
@Override public void processAmountEntry(ATMMachine atmMachine, BigDecimal amount) { String cardNumber = atmMachine.getCardProcessor().getCardNumber(); Account account = atmMachine.getBankInterface().getAccountByCard(cardNumber); boolean isSuccess = atmMachine.getBankInterface().withdrawFunds(account, amount);
if (isSuccess) { atmMachine.getCashDispenser().dispenseCash(amount); atmMachine.getDisplay().showMessage("Please take your cash."); } else { atmMachine.getDisplay().showMessage("Insufficient funds, please try again."); } atmMachine.transitionToState(new TransactionSelectionState()); } } ```
> **Note:** `PinEntryState`, `TransactionSelectionState`, and `DepositCollectionState` are omitted for brevity — their complete code is available in the book's accompanying materials.
**ATMMachine**
```java public class ATMMachine { private ATMState state; private final CardProcessor cardProcessor; private final DepositBox depositBox; private final CashDispenser cashDispenser; private final Keypad keypad; private final Display display; private final Bank bank;
public ATMMachine(Bank bank, CardProcessor cardProcessor, DepositBox depositBox, CashDispenser cashDispenser, Keypad keypad, Display display) { this.bank = bank; this.cardProcessor = cardProcessor; this.depositBox = depositBox; this.cashDispenser = cashDispenser; this.keypad = keypad; this.display = display; this.state = new IdleState(); }
public void insertCard(String cardNumber) { state.processCardInsertion(this, cardNumber); }
public void ejectCard() { state.processCardEjection(this); }
public void enterPin(String pin) { state.processPinEntry(this, pin); }
public void withdrawRequest() { state.processWithdrawalRequest(this); }
public void depositRequest() { state.processDepositRequest(this); }
public void enterAmount(BigDecimal amount) { state.processAmountEntry(this, amount); }
public void collectDeposit(BigDecimal amount) { state.processDepositCollection(this, amount); }
public void transitionToState(ATMState nextState) { this.state = nextState; }
public ATMState getCurrentState() { return state; }
// Getters for hardware components public Display getDisplay() { return display; } public CashDispenser getCashDispenser() { return cashDispenser; } public BankInterface getBankInterface() { return bank; } public CardProcessor getCardProcessor() { return cardProcessor; } public Keypad getKeypad() { return keypad; } public DepositBox getDepositBox() { return depositBox; } } ```
Wrap Up
In this chapter, we designed an ATM system by gathering requirements through structured dialogue, defining core objects, designing their class structure, and implementing essential components including the state machine and hardware interactions.
The system's maintainability is ensured by clear division of responsibilities: - `Account` and `Bank` manage account data and banking operations - `Transaction` handles financial operations - `ATMState` and state classes manage user flow stages - Hardware interfaces (`Keypad`, `CardProcessor`, etc.) handle user interactions - `ATMMachine` orchestrates everything as a facade
Using the **State Pattern** with `ATMState` and separating hardware interactions into interfaces improves modularity and enables future extensions like new transaction types or hardware components.
Design a Restaurant Management System
In this chapter, we will explore the design of a Restaurant Management System. The goal is to create classes that represent the system's essential components, such as menus, reservations, and tables. We will develop a system that supports critical functions like booking reservations, managing orders, and assigning tables, ensuring the design is both straightforward and flexible for future enhancements.

Requirements Gathering
> **Candidate:** The system manages reservations, menu, order tracking, and payments. For now I focus on reservations and order management. > **Interviewer:** That's a reasonable starting point.
> **Candidate:** Can customers make and manage reservations? > **Interviewer:** Yes, customers can book tables based on availability.
> **Candidate:** How does the system determine table availability? > **Interviewer:** It checks for a table fitting the party size and free at the requested time. Each reservation lasts exactly one hour.
> **Candidate:** Can customers cancel reservations? > **Interviewer:** Yes.
> **Candidate:** When a reserved party arrives, do they automatically get their table? > **Interviewer:** Yes — they provide their name, the system finds the reservation and the assigned table.
> **Candidate:** What about walk-in parties? > **Interviewer:** Assign walk-ins to tables based on current availability and party size.
> **Candidate:** Can orders be altered after placed? > **Interviewer:** Yes — remove items or adjust quantities.
> **Candidate:** Rules for splitting the bill? > **Interviewer:** Just a single total bill amount for now.
**Requirements**
*Reservations:* Book tables for a future time; one-hour slots; check for overlaps; assign table; customers arrive by name; cancellations supported.
*Walk-in seating:* Assign based on availability and party size.
*Order management:* Alter/remove items after placing; track order progress.
*Billing:* Single total bill at checkout.
Identify Core Objects
- **Menu:** Stores available items for ordering. - **MenuItem:** Individual menu item with name and price. - **Layout:** Restaurant's physical arrangement, organizing all tables for efficient assignment. - **Table:** Individual table with capacity, current reservations, and active orders. - **Reservation:** Stores party name, size, reserved time, and assigned table. - **ReservationManager:** Oversees reservation creation, lookup, and cancellation. Checks availability and works with Layout to assign tables. - **Restaurant:** Facade providing a central interface for reservations, table assignments, orders, and billing. Delegates to other classes.
Design Class Diagram
**Menu**
Stores `MenuItem` objects in a map (name as key) for fast order retrieval. Separates menu data from `Restaurant` and `Table`.
**MenuItem**
Holds name, description, price, and category (`MAIN`, `APPETIZER`, `DESSERT`). Immutable — designed as a standalone building block.
**Table**
Fixed attributes: `tableId`, `capacity`. Mutable state: `reservations` (by time) and `orderedItems` (by MenuItem). Methods: add/remove orders, calculate bill, check availability.
**Layout**
Organizes tables by ID and capacity. Uses `SortedMap<Integer, Set<Table>>` (sorted by capacity) for efficient assignment of the smallest fitting available table.
> **Design Choice:** Isolating table organization in `Layout` optimizes assignment efficiency and separates it from menu/order logic. Integrating it into `Restaurant` would overburden the facade role.
**OrderItem**
Links to a `MenuItem` and tracks status via `Status` enum: `PENDING` → `SENT_TO_KITCHEN` → `DELIVERED` (or `CANCELED`).
**ReservationManager**
Central coordinator connecting to `Layout` to find tables and storing `Reservation` objects.
**Restaurant**
Facade delegating to `ReservationManager` (reservations/walk-ins), `Menu` (items), and `Table` (orders/billing).
> **Design Choice:** `Restaurant` as a facade keeps it focused. A central controller managing all logic internally would increase complexity.
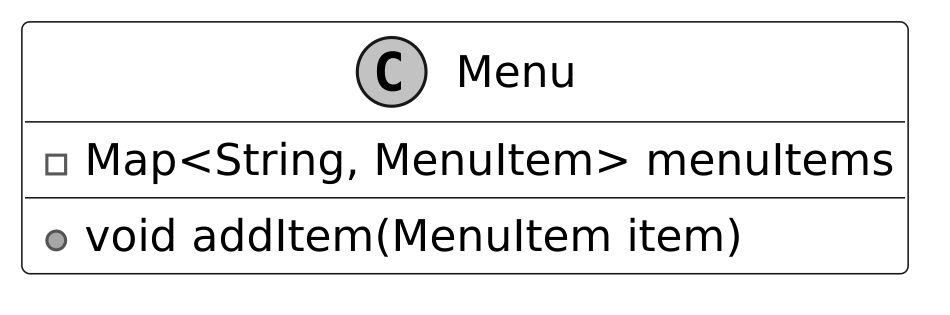
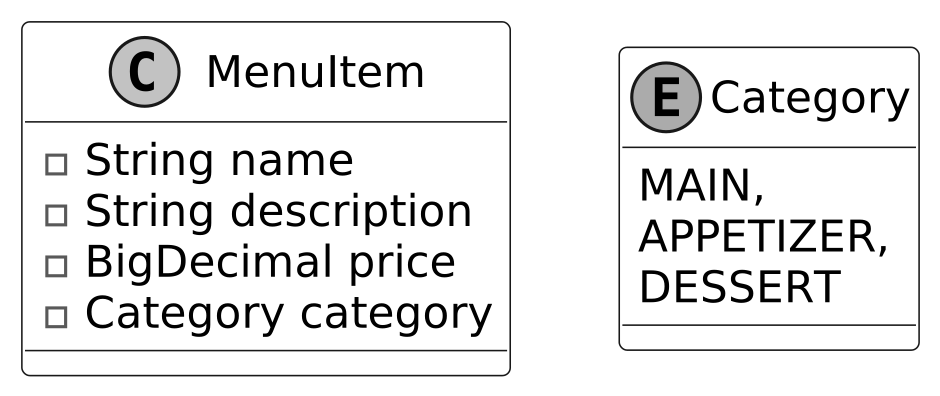
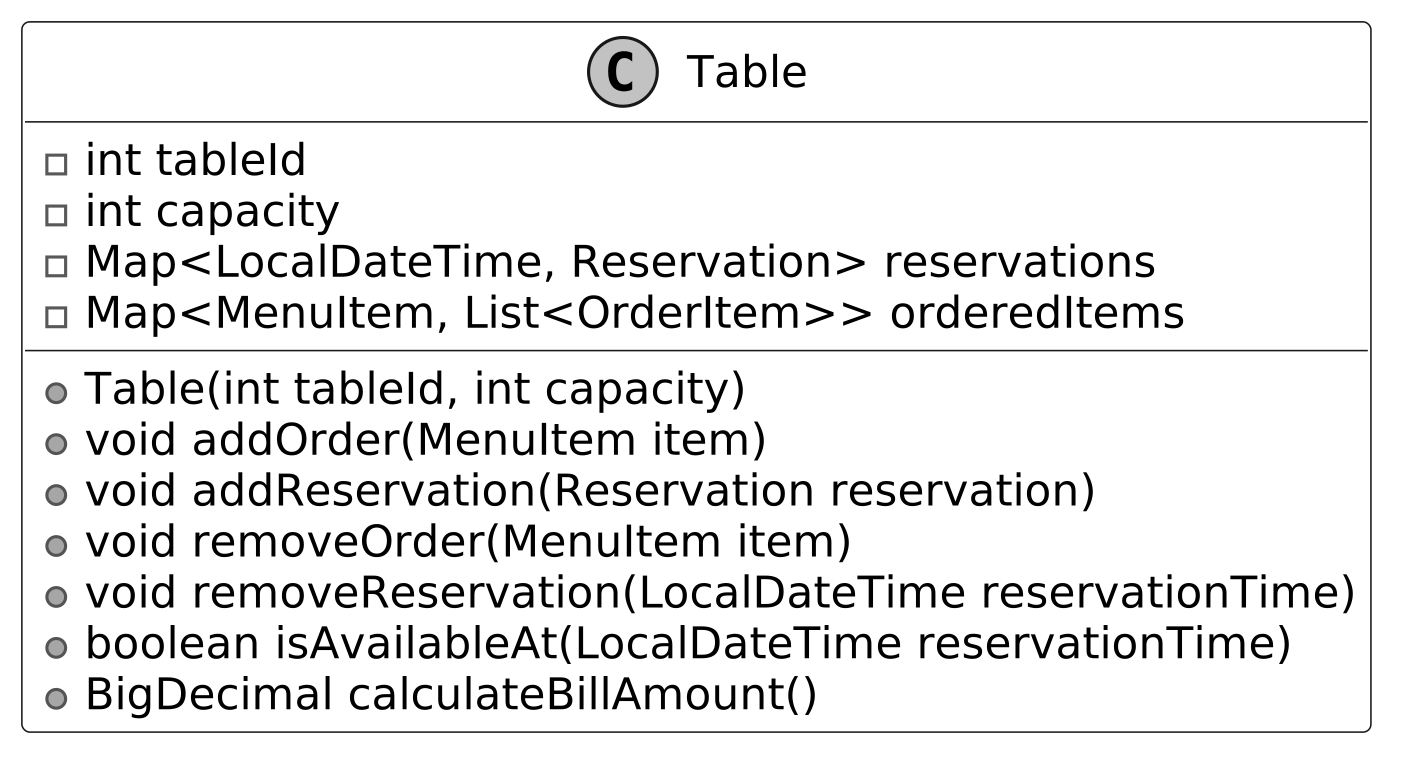
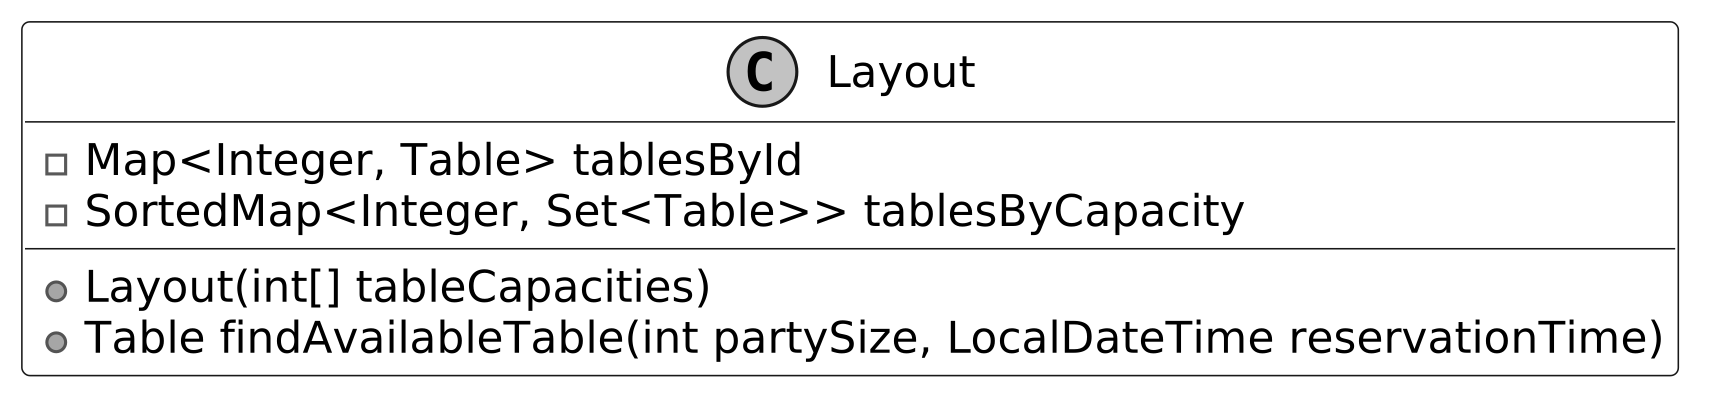
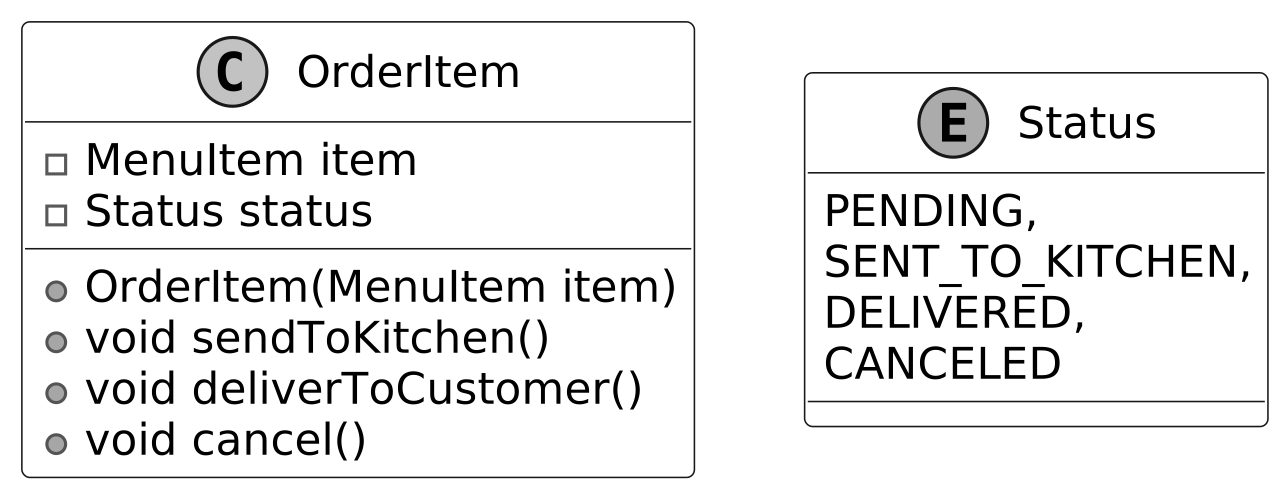
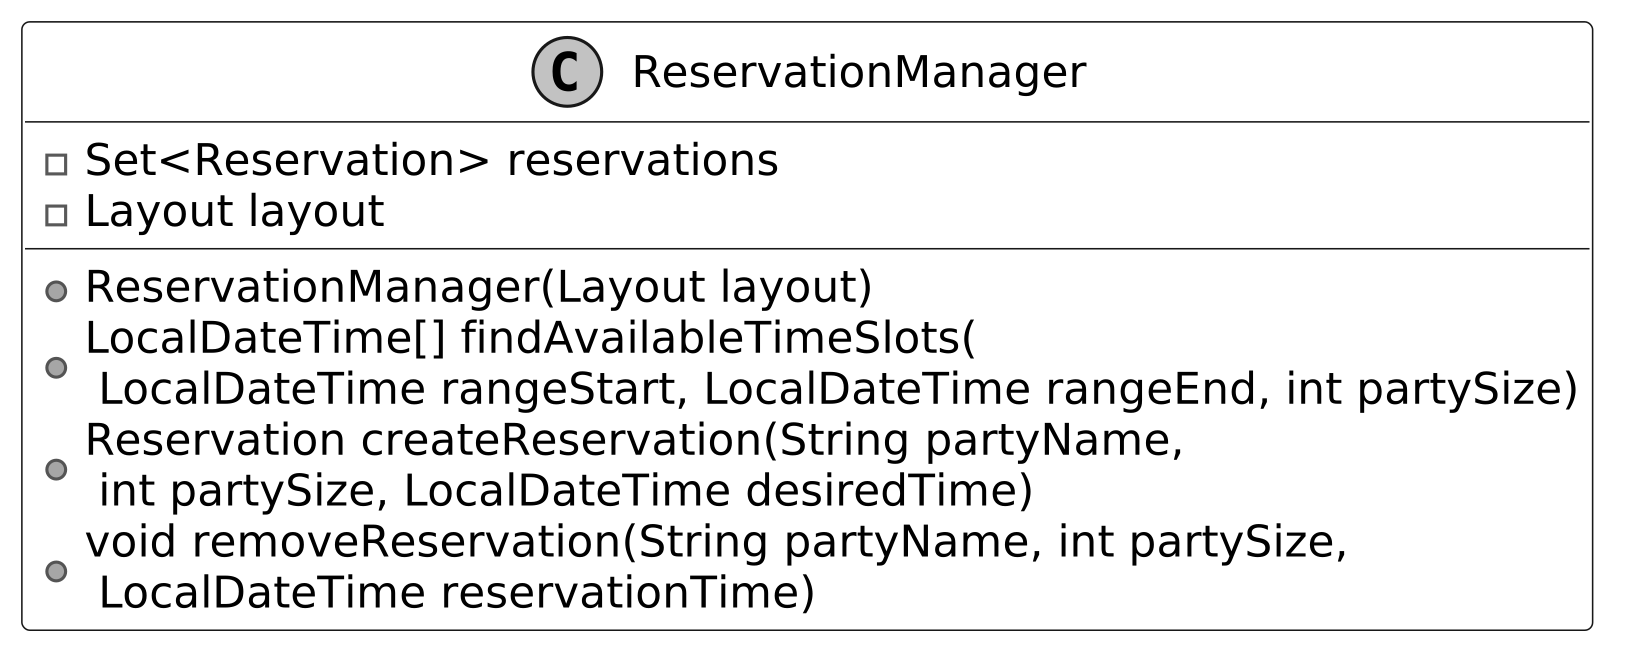
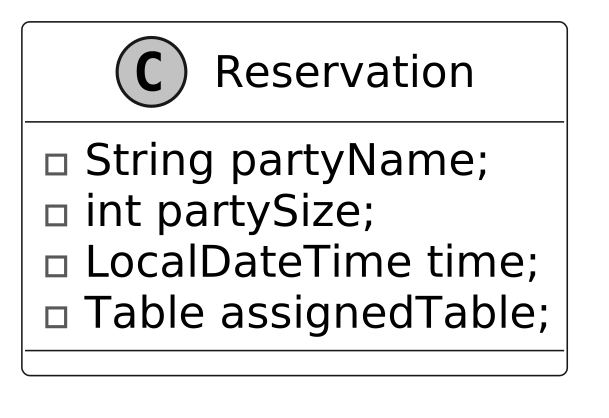
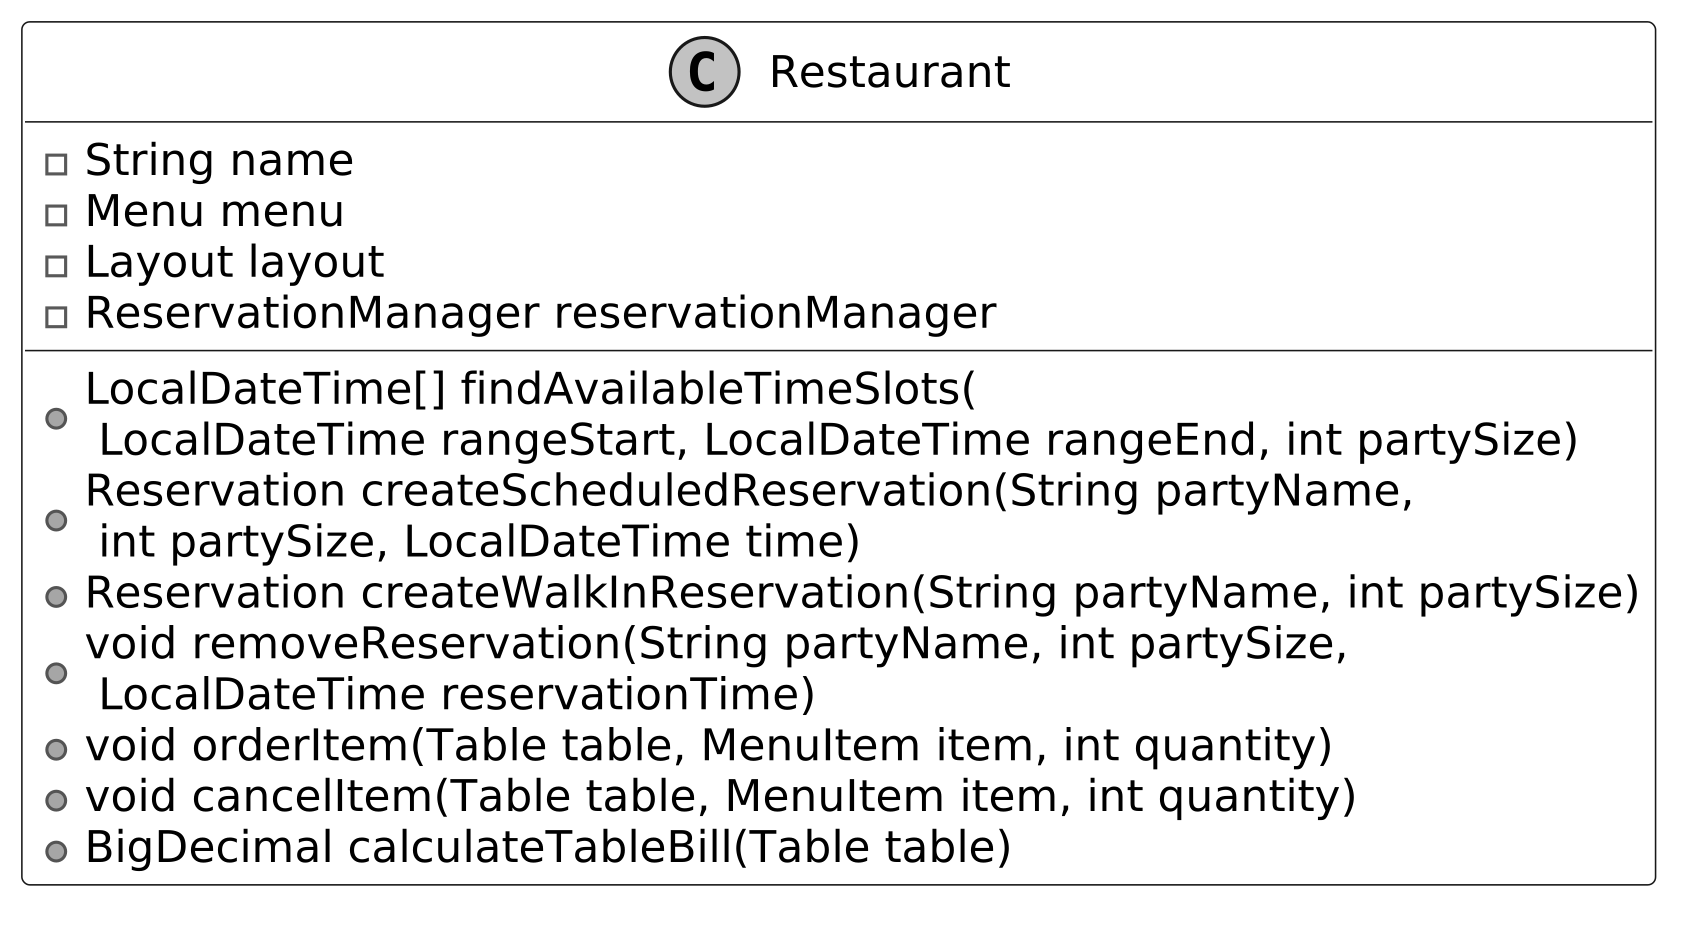
Code — Restaurant Management System
**Menu**
```java public class Menu { private final Map<String, MenuItem> menuItems = new HashMap<>();
public void addItem(MenuItem item) { menuItems.put(item.getName(), item); }
public MenuItem getItem(String name) { return menuItems.get(name); }
public Map<String, MenuItem> getMenuItems() { return Collections.unmodifiableMap(menuItems); } } ```
> **Implementation Choice:** `HashMap` for O(1) name-based lookup, versus `List` which requires linear search.
**MenuItem**
```java public class MenuItem { private final String name; private final String description; private final BigDecimal price; // BigDecimal for precise financial calculations private final Category category;
public MenuItem(String name, String description, BigDecimal price, Category category) { this.name = name; this.description = description; this.price = price; this.category = category; }
public enum Category { MAIN, APPETIZER, DESSERT } // getter methods are omitted for brevity } ```
**Table**
```java public class Table { private final int tableId; private final int capacity; private final Map<LocalDateTime, Reservation> reservations = new HashMap<>(); private final Map<MenuItem, List<OrderItem>> orderedItems = new HashMap<>();
public Table(int tableId, int capacity) { this.tableId = tableId; this.capacity = capacity; }
public BigDecimal calculateBillAmount() { return orderedItems.values().stream() .flatMap(List::stream) .map(OrderItem::getItem) .map(MenuItem::getPrice) .reduce(BigDecimal.ZERO, BigDecimal::add); }
public void addOrder(MenuItem item, int quantity) { for (int i = 0; i < quantity; i++) { addOrder(item); } }
public void addOrder(MenuItem item) { List<OrderItem> orderItems = orderedItems.get(item); if (orderItems == null) { orderItems = new ArrayList<>(); orderedItems.put(item, orderItems); } orderItems.add(new OrderItem(item)); }
public void removeOrder(MenuItem item) { List<OrderItem> orderItems = orderedItems.get(item); if (orderItems != null) { orderItems.remove(0); if (orderItems.isEmpty()) { orderedItems.remove(item); } } }
public boolean isAvailableAt(LocalDateTime reservationTime) { return !reservations.containsKey(reservationTime); }
public void addReservation(Reservation reservation) { reservations.put(reservation.getTime(), reservation); }
public void removeReservation(LocalDateTime reservationTime) { reservations.remove(reservationTime); } } ```
**Layout**
```java public class Layout { private final Map<Integer, Table> tablesById = new HashMap<>(); // SortedMap groups tables by capacity, smallest to largest private final SortedMap<Integer, Set<Table>> tablesByCapacity = new TreeMap<>();
public Layout(List<Integer> tableCapacities) { for (int i = 0; i < tableCapacities.size(); i++) { int capacity = tableCapacities.get(i); Table table = new Table(i, capacity); tablesById.put(i, table); tablesByCapacity.computeIfAbsent(capacity, k -> new HashSet<>()).add(table); } }
// Finds the smallest available table that fits the party at the given time public Table findAvailableTable(int partySize, LocalDateTime reservationTime) { for (Set<Table> tables : tablesByCapacity.tailMap(partySize).values()) { for (Table table : tables) { if (table.isAvailableAt(reservationTime)) { return table; } } } return null; } } ```
> **Implementation Choice:** `SortedMap` (TreeMap) for `tablesByCapacity` enables sorted key access and efficient range searches via `tailMap(partySize)`. A plain `Map` would need extra logic to find the smallest suitable table.
**OrderItem**
```java public class OrderItem { private final MenuItem item; private Status status = Status.PENDING;
public OrderItem(MenuItem item) { this.item = item; }
public void sendToKitchen() { if (status == Status.PENDING) status = Status.SENT_TO_KITCHEN; }
public void deliverToCustomer() { if (status == Status.SENT_TO_KITCHEN) status = Status.DELIVERED; }
public void cancel() { if (status == Status.PENDING || status == Status.SENT_TO_KITCHEN) { status = Status.CANCELED; } }
public enum Status { PENDING, SENT_TO_KITCHEN, DELIVERED, CANCELED } } ```
**ReservationManager and Reservation**
```java public class ReservationManager { private final Layout layout; private final Set<Reservation> reservations = new HashSet<>();
public ReservationManager(Layout layout) { this.layout = layout; }
public LocalDateTime[] findAvailableTimeSlots( LocalDateTime rangeStart, LocalDateTime rangeEnd, int partySize) { LocalDateTime current = rangeStart; List<LocalDateTime> possibleReservations = new ArrayList<>(); while (!current.isAfter(rangeEnd)) { Table availableTable = layout.findAvailableTable(partySize, current); if (availableTable != null) { possibleReservations.add(current); } current = current.plusHours(1); } return possibleReservations.toArray(new LocalDateTime[0]); }
public Reservation createReservation( String partyName, int partySize, LocalDateTime desiredTime) { desiredTime = desiredTime.truncatedTo(ChronoUnit.HOURS); Table table = layout.findAvailableTable(partySize, desiredTime); Reservation reservation = new Reservation(partyName, partySize, desiredTime, table); table.addReservation(reservation); reservations.add(reservation); return reservation; }
public void removeReservation( String partyName, int partySize, LocalDateTime reservationTime) { for (Reservation reservation : new HashSet<>(reservations)) { if (reservation.getTime().equals(reservationTime) && reservation.getPartySize() == partySize && reservation.getPartyName().equals(partyName)) { reservation.getAssignedTable().removeReservation(reservationTime); reservations.remove(reservation); return; } } } }
public class Reservation { private final String partyName; private final int partySize; private final LocalDateTime time; private final Table assignedTable;
public Reservation(String partyName, int partySize, LocalDateTime time, Table assignedTable) { this.partyName = partyName; this.partySize = partySize; this.time = time; this.assignedTable = assignedTable; } // getter methods are omitted for brevity } ```
> **Implementation Choice:** `Set<Reservation>` prevents duplicate bookings. A `List` allows simpler iteration but risks duplicates. A `Map` with time-based keys could speed lookups but complicates removal.
**Restaurant**
```java public class Restaurant { private final String name; private final Menu menu; private final Layout layout; private final ReservationManager reservationManager;
public Restaurant(String name, Menu menu, Layout layout) { this.name = name; this.menu = menu; this.layout = layout; this.reservationManager = new ReservationManager(layout); }
public LocalDateTime[] findAvailableTimeSlots( LocalDateTime rangeStart, LocalDateTime rangeEnd, int partySize) { return reservationManager.findAvailableTimeSlots(rangeStart, rangeEnd, partySize); }
public Reservation createScheduledReservation( String partyName, int partySize, LocalDateTime time) { return reservationManager.createReservation(partyName, partySize, time); }
public void removeReservation(String partyName, int partySize, LocalDateTime reservationTime) { reservationManager.removeReservation(partyName, partySize, reservationTime); }
public Reservation createWalkInReservation(String partyName, int partySize) { return reservationManager.createReservation(partyName, partySize, LocalDateTime.now()); }
public void orderItem(Table table, MenuItem item) { table.addOrder(item); }
public void cancelItem(Table table, MenuItem item) { table.removeOrder(item); }
public BigDecimal calculateTableBill(Table table) { return table.calculateBillAmount(); } } ```
Deep Dive — Order Queue Tracking (Command Pattern)
In the current design, `Table` directly governs `OrderItem` status. This decentralized structure lacks a cohesive view of order progression across all tables during peak hours.
**Solution: Centralized OrderManager with Command Pattern**
```java public interface OrderCommand { void execute(); }
public class SendToKitchenCommand implements OrderCommand { private final OrderItem orderItem;
public SendToKitchenCommand(OrderItem orderItem) { this.orderItem = orderItem; }
@Override public void execute() { orderItem.sendToKitchen(); } }
public class DeliverCommand implements OrderCommand { private final OrderItem orderItem;
public DeliverCommand(OrderItem orderItem) { this.orderItem = orderItem; }
@Override public void execute() { orderItem.deliverToCustomer(); } }
public class CancelCommand implements OrderCommand { private final OrderItem orderItem;
public CancelCommand(OrderItem orderItem) { this.orderItem = orderItem; }
@Override public void execute() { orderItem.cancel(); } }
public class OrderManager { private final List<OrderCommand> commandQueue = new ArrayList<>();
public void addCommand(OrderCommand command) { commandQueue.add(command); }
public void executeCommands() { for (OrderCommand command : commandQueue) { command.execute(); } commandQueue.clear(); } } ```
**Integrating OrderManager into Restaurant:**
```java public class Restaurant { // ... fields unchanged ... private final OrderManager orderManager;
public Restaurant(String name, Menu menu, Layout layout) { // ... fields unchanged ... this.orderManager = new OrderManager(); }
public void orderItem(Table table, MenuItem item) { table.addOrder(item); List<OrderItem> orderItems = table.getOrderedItems().get(item); if (orderItems != null && !orderItems.isEmpty()) { OrderItem lastOrder = orderItems.get(orderItems.size() - 1); orderManager.addCommand(new SendToKitchenCommand(lastOrder)); orderManager.executeCommands(); } }
public void cancelItem(Table table, MenuItem item) { List<OrderItem> orderItems = table.getOrderedItems().get(item); if (orderItems != null && !orderItems.isEmpty()) { OrderItem lastOrder = orderItems.get(orderItems.size() - 1); orderManager.addCommand(new CancelCommand(lastOrder)); orderManager.executeCommands(); table.removeOrder(item); } }
public void deliverItem(Table table, MenuItem item) { List<OrderItem> orderItems = table.getOrderedItems().get(item); if (orderItems != null && !orderItems.isEmpty()) { OrderItem lastOrder = orderItems.get(orderItems.size() - 1); orderManager.addCommand(new DeliverCommand(lastOrder)); orderManager.executeCommands(); } } } ```
**Command Pattern roles:** - **Command:** `OrderCommand` interface + `SendToKitchenCommand` / `DeliverCommand` / `CancelCommand` - **Invoker:** `OrderManager` — queues commands and triggers execution - **Receiver:** `OrderItem` — processes the actual state changes
Benefits: commands can be batched, delayed, logged, or undone. The invoker is completely decoupled from what the command does.
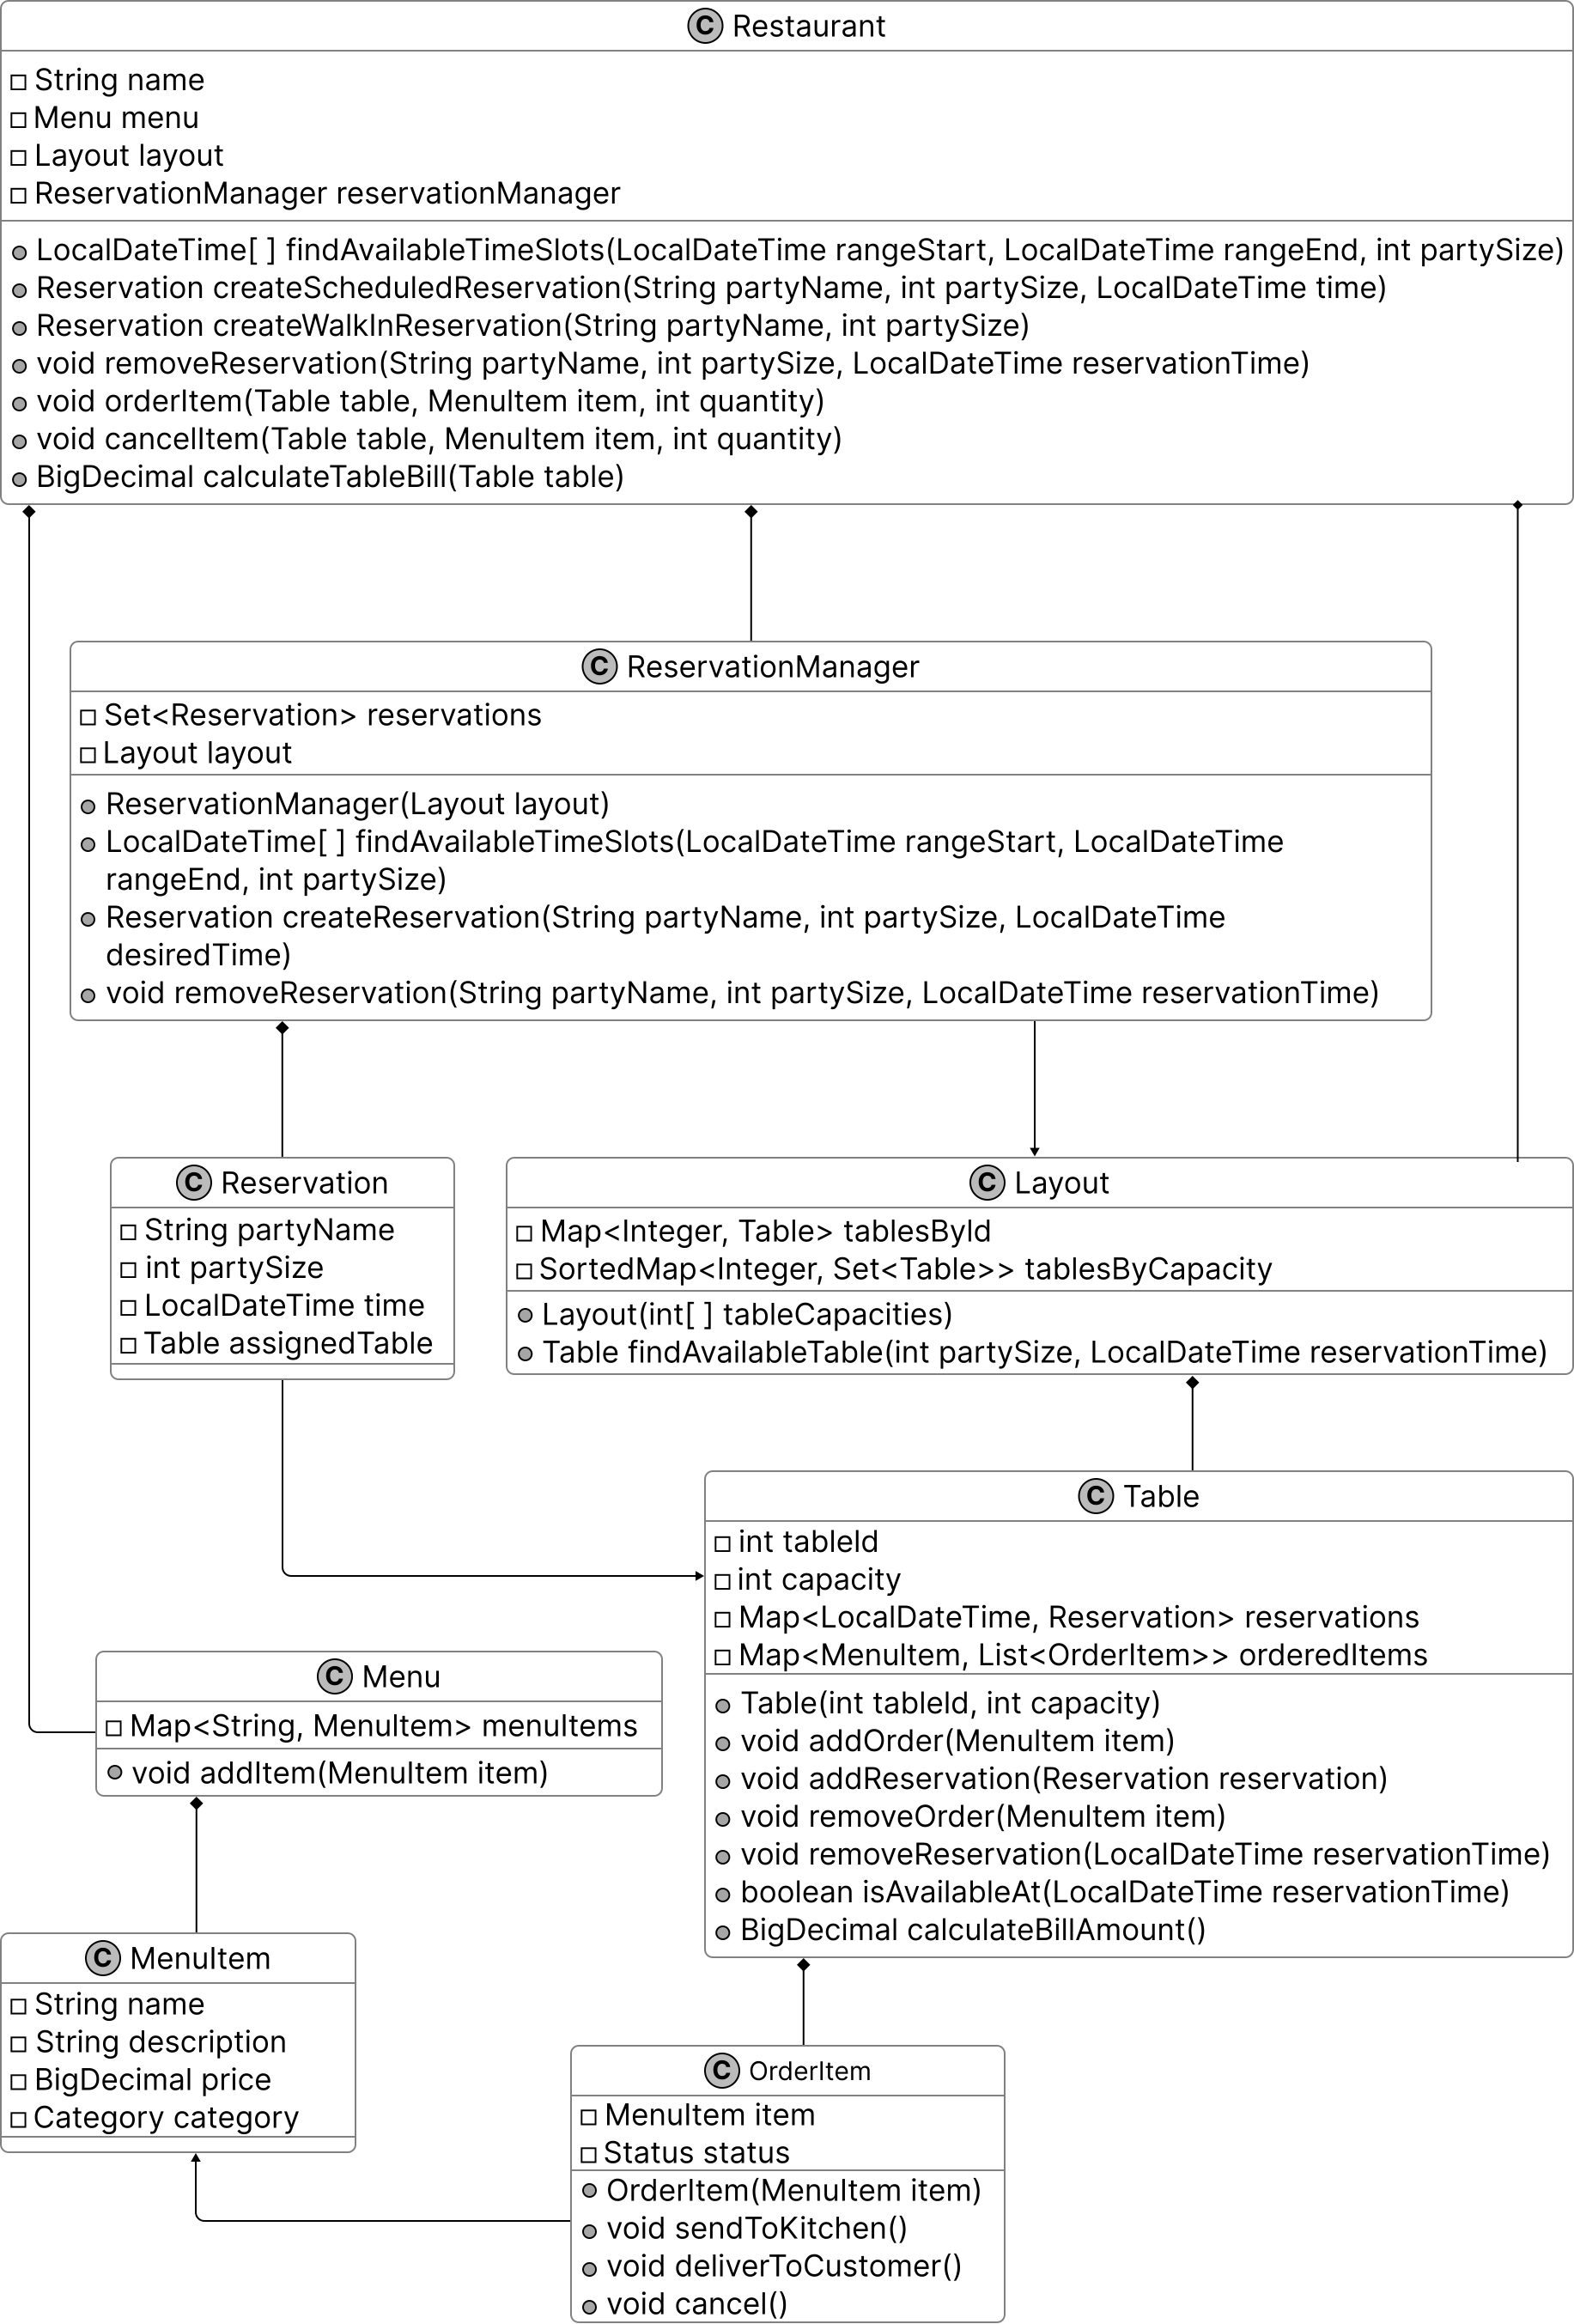
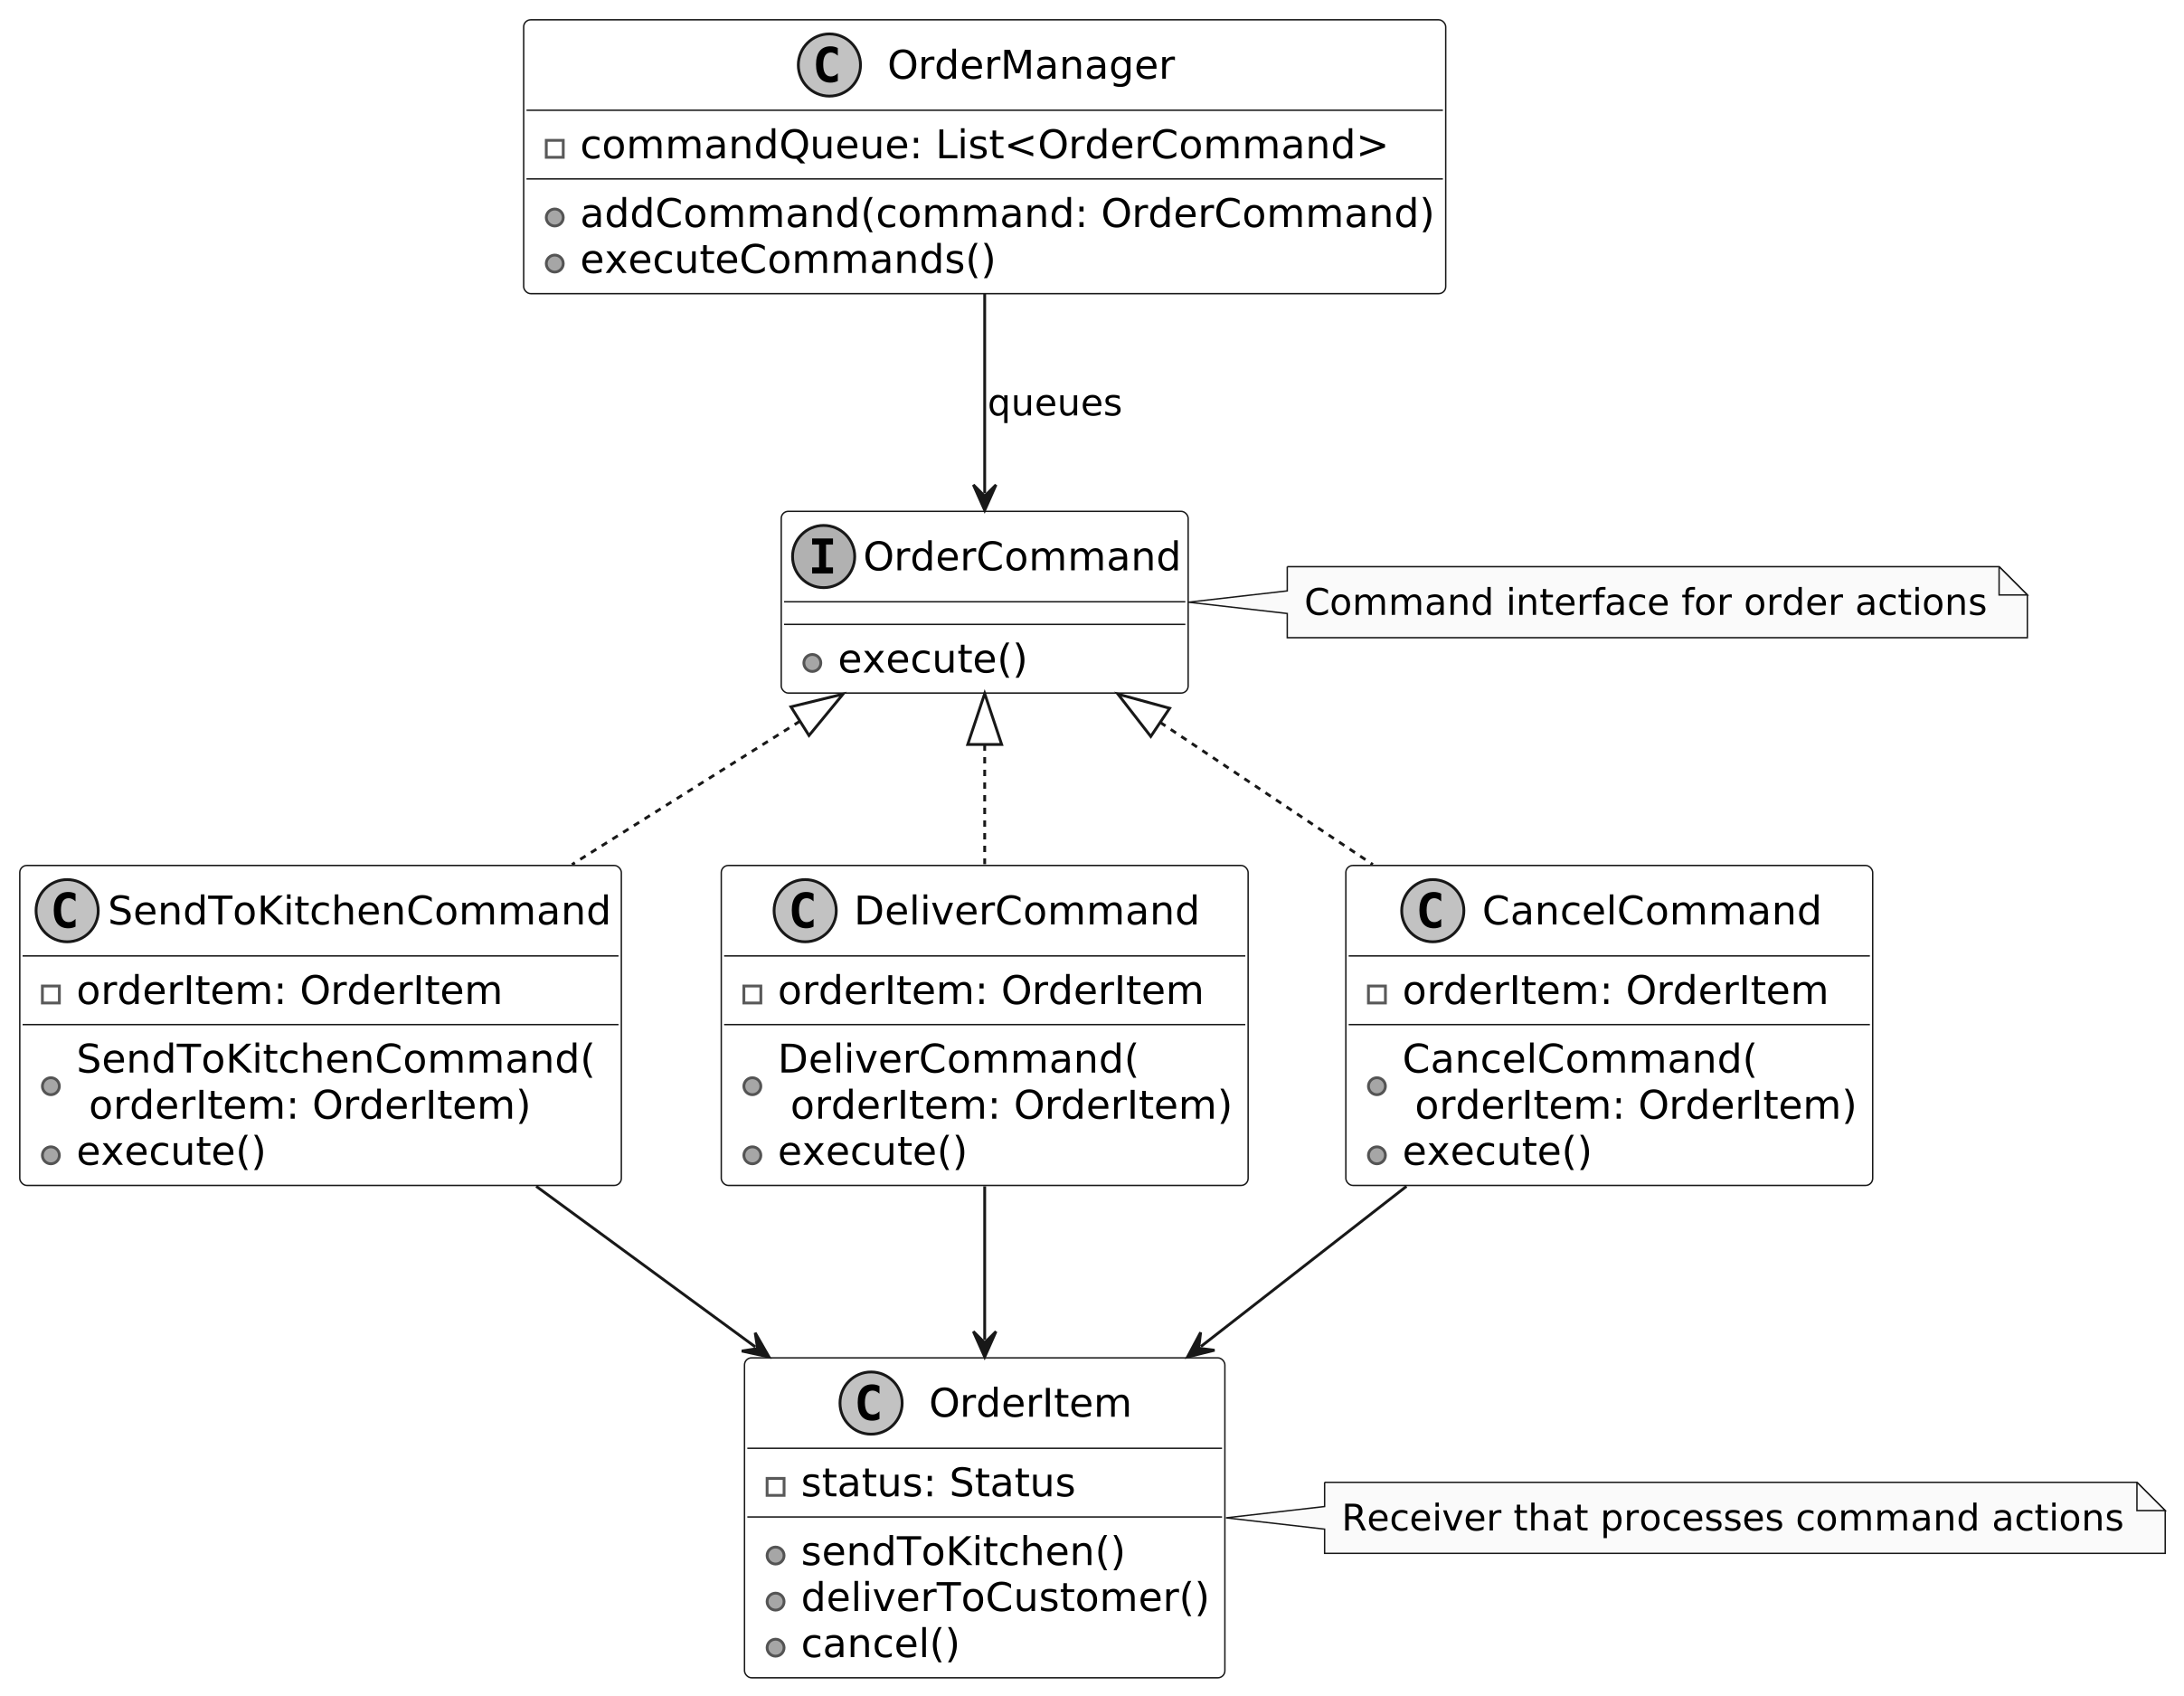
Wrap Up
In this chapter, we designed a Restaurant Management System by gathering requirements through structured dialogue, identifying core objects, designing class structure, and implementing key components.
Key takeaways: - **Modularity + SRP:** `Menu`, `ReservationManager`, `Layout`, and `Table` each manage a distinct responsibility. - **Facade pattern:** `Restaurant` unifies system operations, delegating to specialized classes. - **Immutability:** `MenuItem` objects are immutable for consistency. - **Command Pattern (deep dive):** `OrderManager` centralizes order actions, enabling batching, logging, and undo without direct coupling to `Table`.